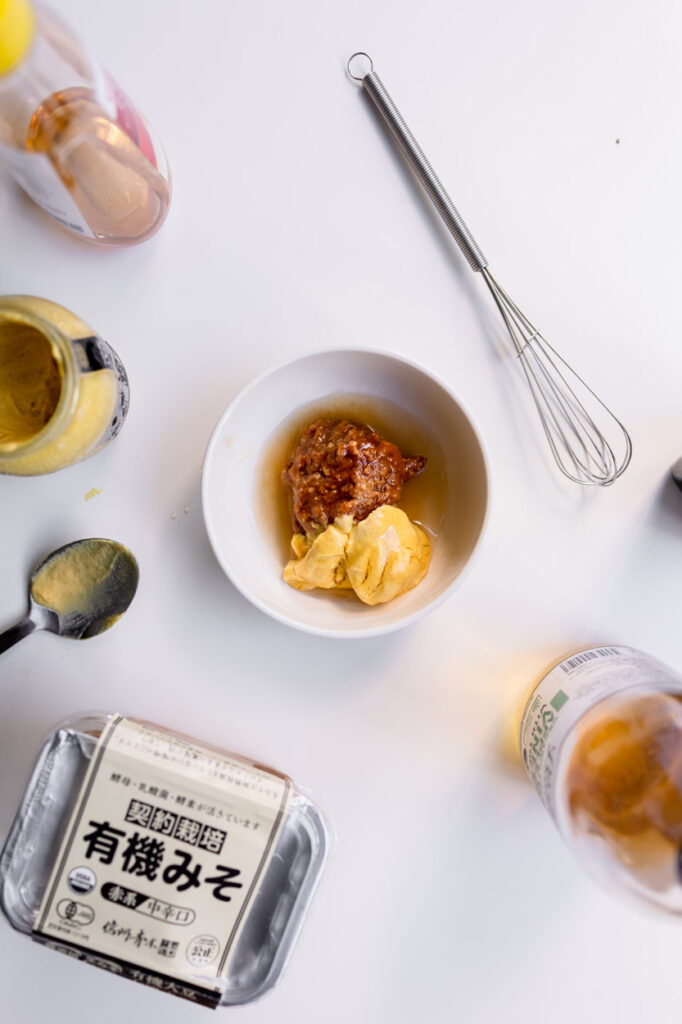
We have a wall piece of glass wall in our house now which were here ever since we were born. However, in many minds of almost everyone who grew up in the ’80s, glass block is synonymous with Bad Architecture. It was part of a sort of late-wave shopping-mall-and-office-park Brutalism and has suffered from the association ever since. Many say it is a symbol of bad design and I guess this is the reason why Angela seel the wall up during our last renovation as she doesn’t like it.
However, I have been seeing this glass block wall trend being brought back and uses in their house. However, the glass block uses now is much more simple unlike the flower engraved one we have in our house. I never would’ve thought I’d describe glass block as “breathtaking,” and yet, here we are. The glass wall doesn’t only act as a partition, it also can be seen as an art piece of the house. What do you think?
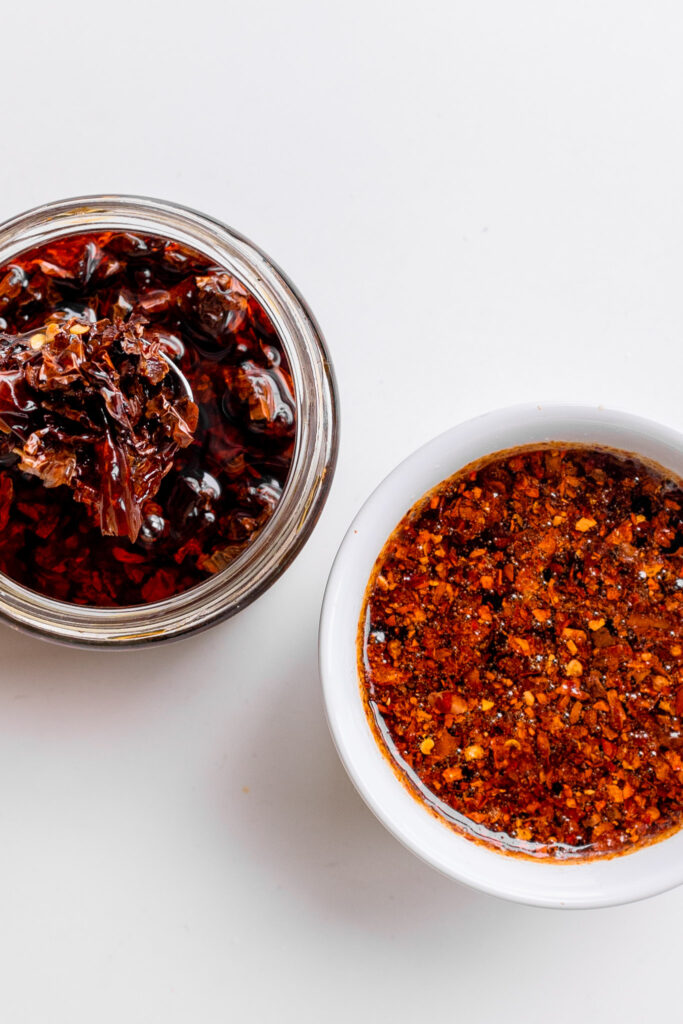
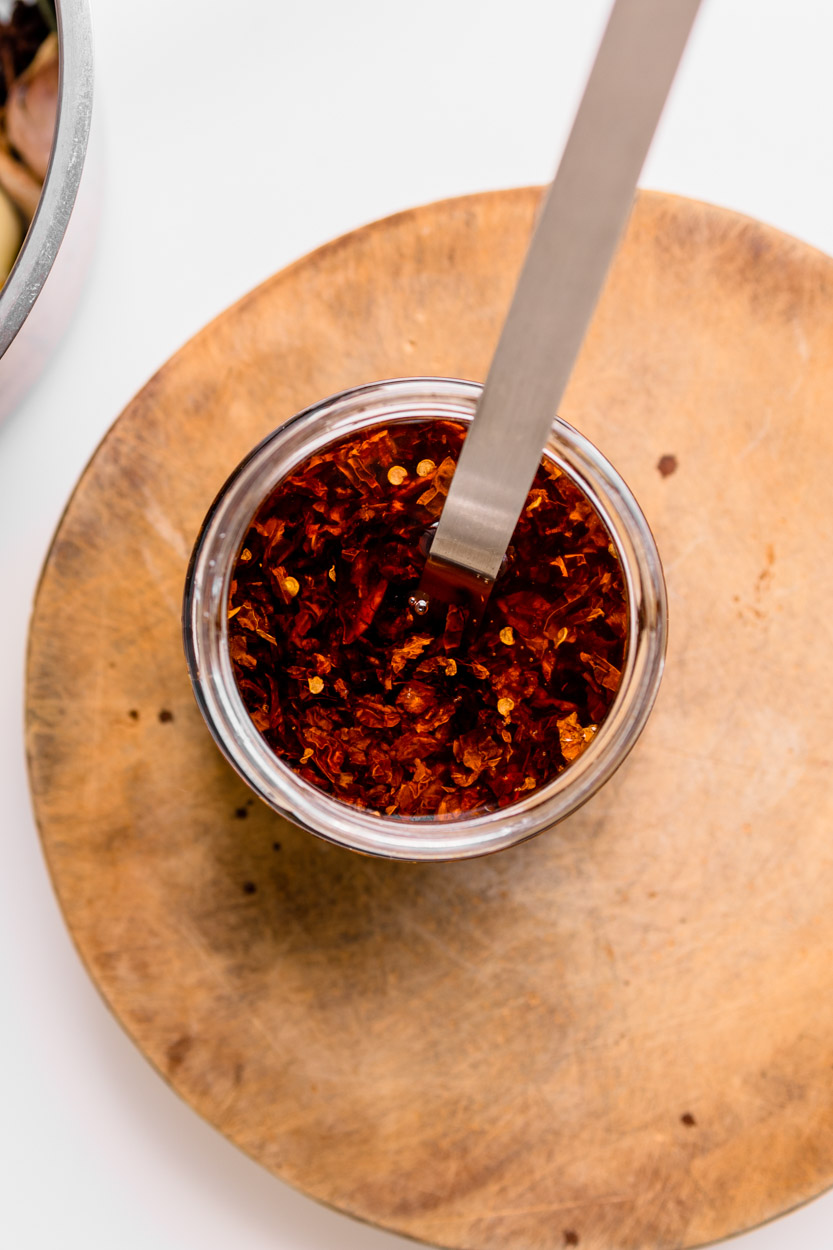
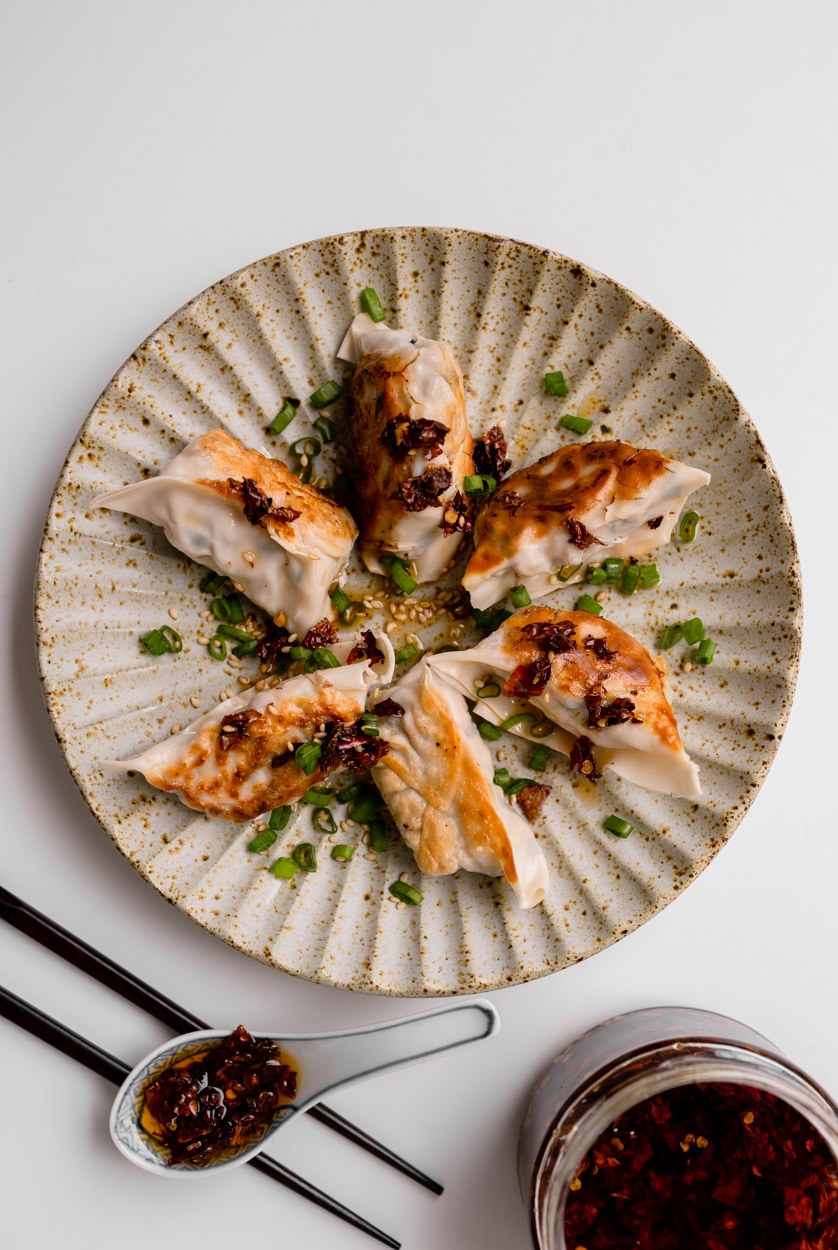
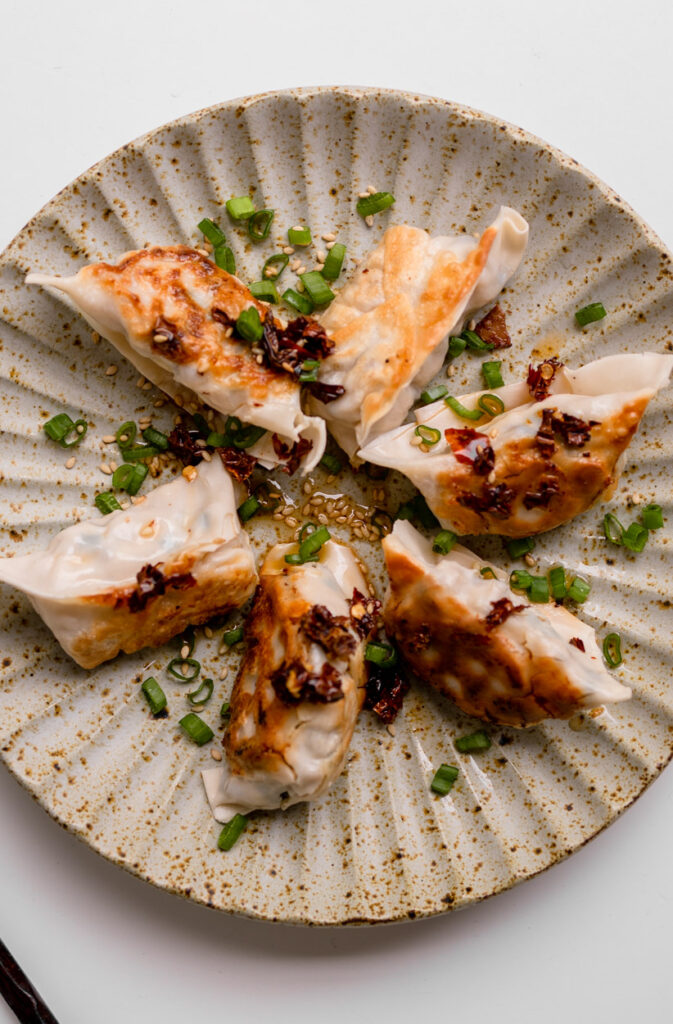
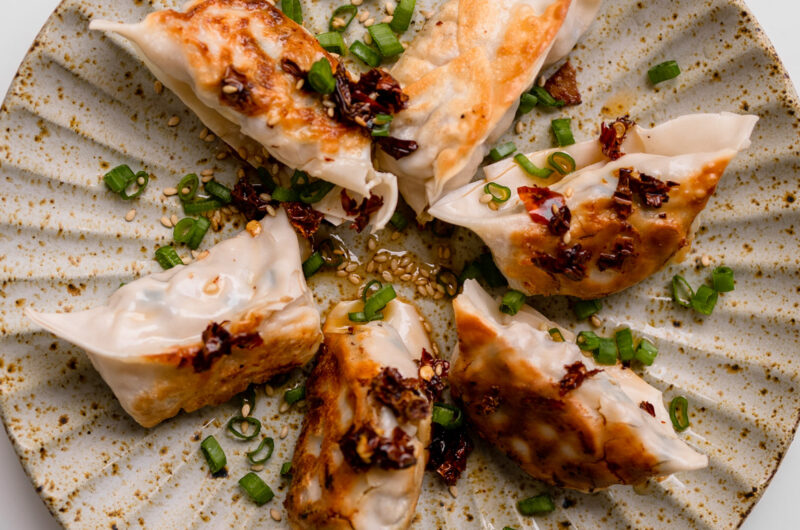
Whenever we’re talking about chilli oil, we always refer to homemade chilli oil. It tastes ten times better than the store-bought product, lasts just as long if you store it in the fridge, and does not contain additives or MSG. There is this fresh aromatic nuttiness that bottled chilli oil never delivers. We love making chilli oil at home for many reasons. One of them is that it is delicious and easy to make. chilli oil is an indispensable condiment in Chinese cuisine.
Years ago we have made a recipe for making chilli oil, however as time passes our method of making chilli evolved. And thus we decided to make a new post on our latest recipe for making chilli oil. We have compiled two different types of chilli oil into one recipe for you. One we have is the chilli oil infused method where we mainly use the oil of the chilli oil. On the other hand, we have the chilli flakes version where we will also enjoy the chilli flakes in the chilli oil in our food.
Chilli Matters
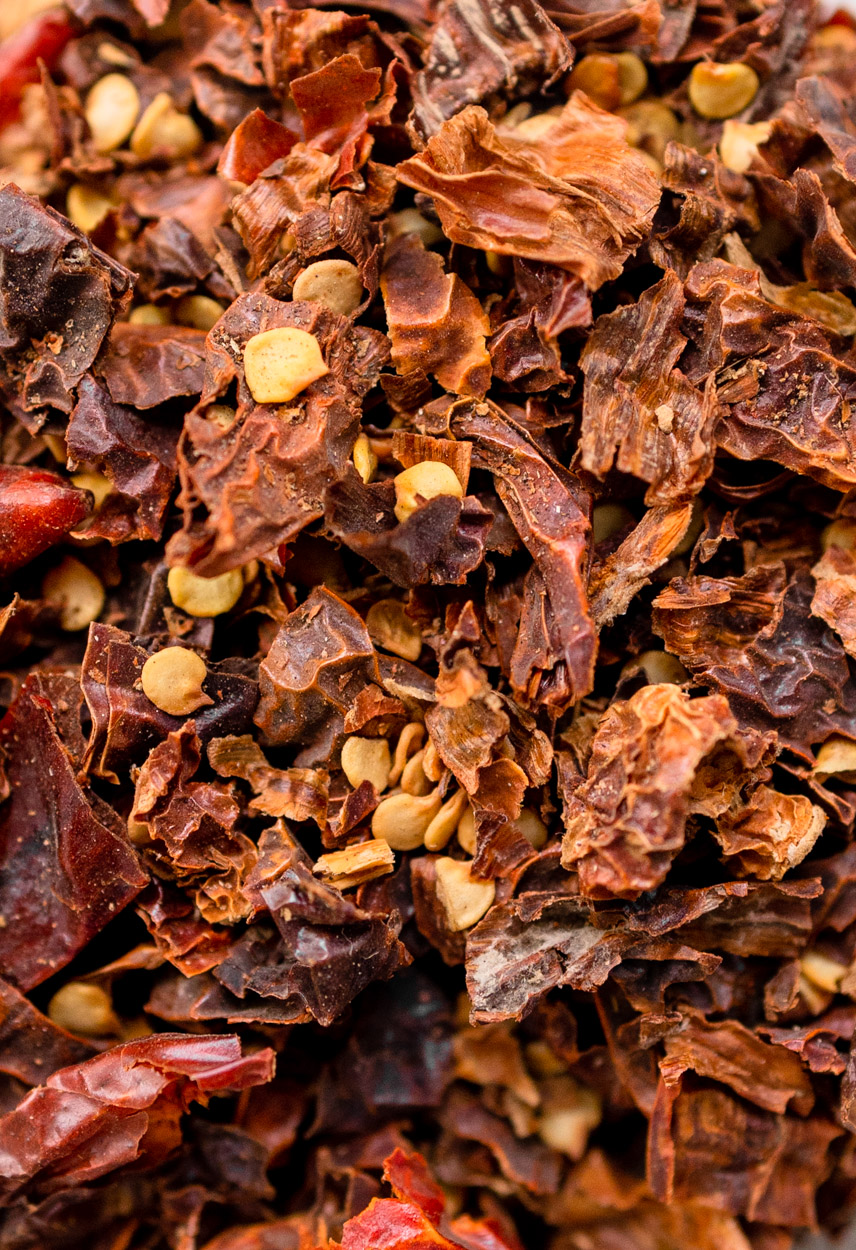
Depending on what chilli you use will massively affect the outcome of your chilli oil. There are hundreds and hundreds of different chilli pepper varieties – and I’m not an expert. However, there are a few that I do know of that can work excellently for this infused oil.
We think it’s essential to begin by stating that the best chilli for you depends on the type of heat that you want from the oil. For example, we recently heard about the Chinese málà (麻辣) flavour. This refers to a numbing, spicy oil that combined Sichuan peppercorns with pepper flakes. While some may love that tongue-numbing effect, we know many others won’t – so variety is the spice of life.
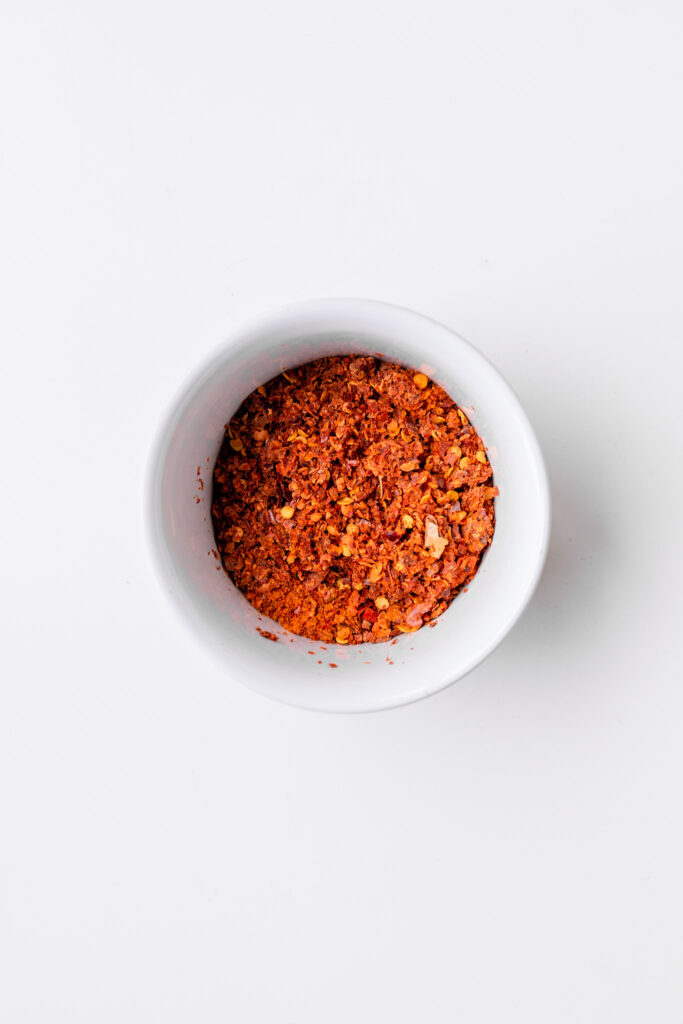
Hot red pepper flakes can be found in most stores and are an excellent option for those that want moderate heat levels. Meanwhile, Sichuan pepper chilli flakes are also modest in heat (it’s the peppercorns that bring out the heat) and can provide a lovely red oil colour.
Dried red chilli can be found easily in the dried goods stores, this kind of chilli taste as mild as the Sichuan pepper chilli flakes that we preferred, however, it does work well too. Breaks it into smaller pieces by blending them in a blender. (We like using this kind of chilli when we only want the infused oil of the chilli oil.)
Korean pepper flakes (gochugaru) provide a subtle smokiness to the oil with a relatively hot and slightly sweet flavour and can be found in many Asian supermarkets.
Choosing herbs to boost the flavour
While the chilli oil already tastes good with just two ingredients – chilli flakes and oil. However, this base can undoubtedly handle some add-ins to boost flavour and texture in various ways. But if you start adding too many additional ingredients, then the next thing you know, you have a chilli sauce, rather than infused oil.
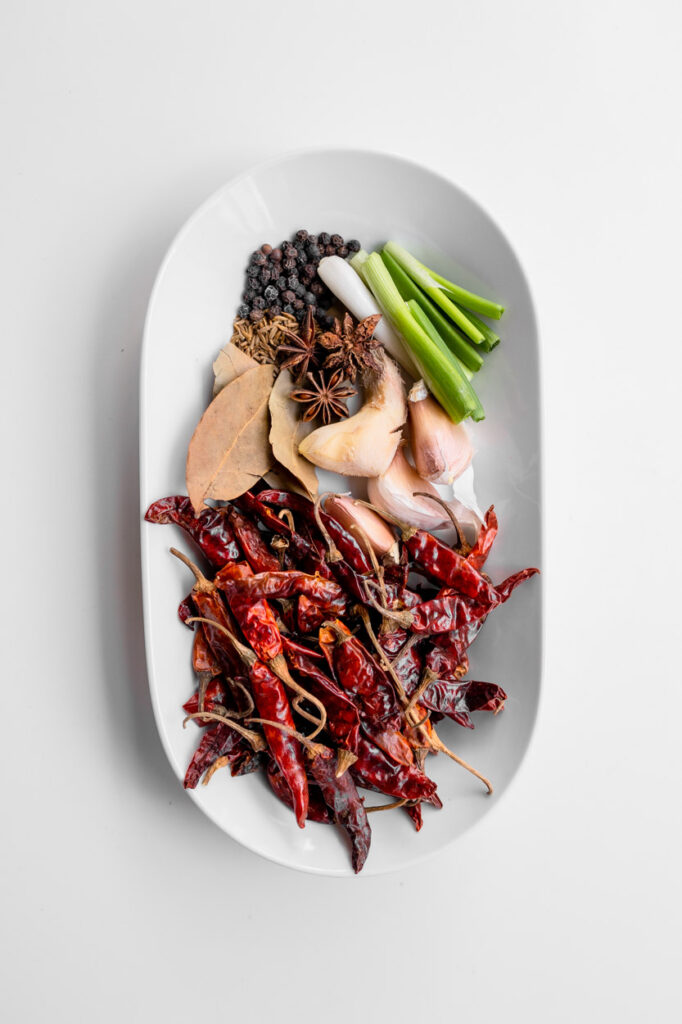
At a minimum, you’ll need these spices:
5-star anise
1 cinnamon stick (preferably cassia cinnamon; note that cassia cinnamon comes in larger rolls, so you really just need about a 3×1-inch piece)
2 bay leaves
3 tablespoons Sichuan peppercorns
If you want more flavour, add these spices:
2 black cardamom pods
4 nuggets of sand ginger (about 1 tablespoon)
2 teaspoons cloves
2 stalks of spring onion
How to make Chilli Oil?
First, gather up the following ingredients:
1 cup canola oil – or any neutral oil such as peanut oil
chilli flakes
your choice of herb
Dash of salt if desired
Next, add the oil and herbs to a small pot and stir. Heat to medium-low heat and often stir for about 5 minutes. Do not allow the oil to smoke. If it smokes, remove it from the heat to reduce the temperature. The goal is not to boil the oil but to slowly simmer it, allowing the flavours of the peppers to infuse it.
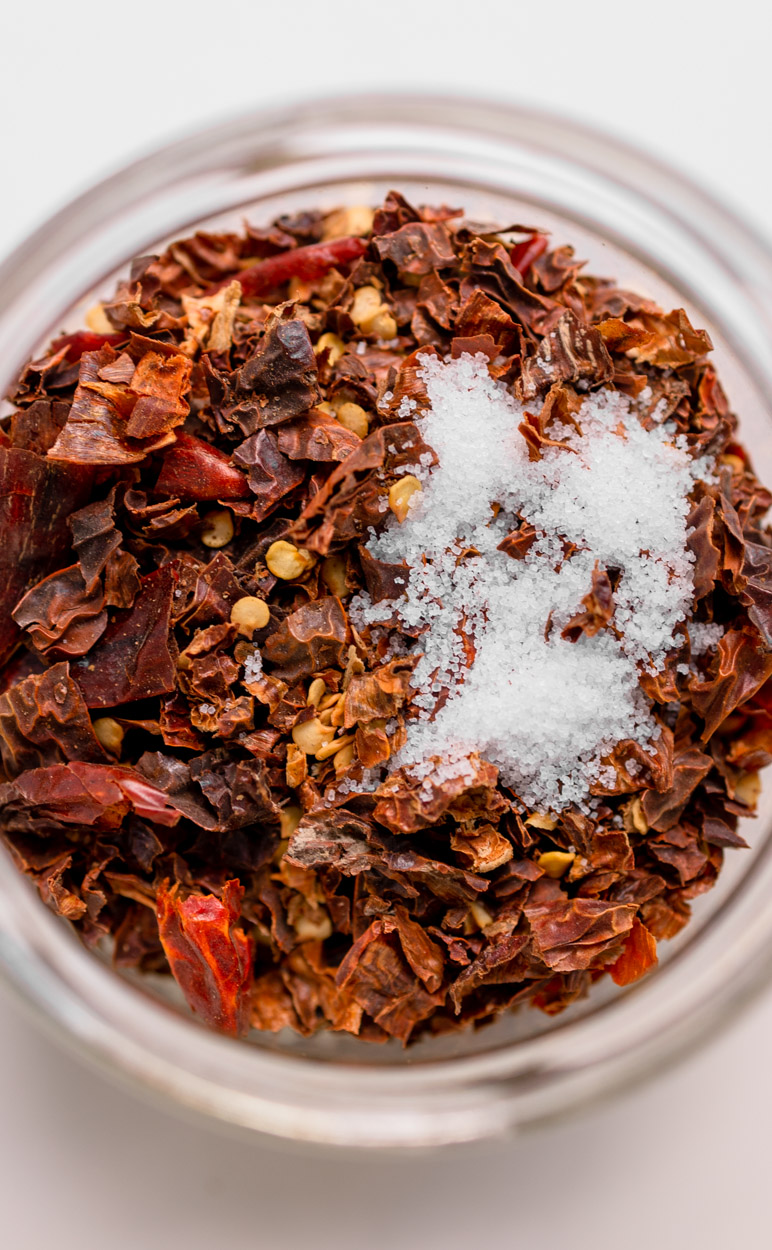
After 5 minutes, remove from heat and pour the infused oil into your bowl of chilli flakes and salt over a drainer.
Allow the chilli oil to cool before storing it in airtight containers in the refrigerator. Always use a clean utensil when handling to prevent spoilage. It can last for up to 6 months if handled in this way.
Wait for at least 12 hours before using the chilli oil to allow all the flavours to combine. Chilli flakes and sesame seeds tend to stay at the bottom of the container after a while. Use a clean spoon to stir before serving. If your dish (eg. Mouth-watering Chicken) requires pure chilli oil, use a sieve to filter out the chilli flakes and sesame seeds. Here is a list of recipes that call for Chinese chilli oil:
And that’s it! Below, you’ll find our printable recipe card with the full list of ingredients. The instructions within the post itself have the most detail, while the instructions in the recipe card can serve as a quicker reference.
4 nuggets of dried sand ginger (optional – about 1 tablespoon)
2 teaspoons cloves (optional)
3 cloves garlic (optional – crushed)
1-2 shallots (optional – halved)
2 stalks of spring onion (optional)
¾-1 1/4 cup Sichuan chilli flakes (65-110g)
1 – 2 teaspoons salt (to taste)
Methods
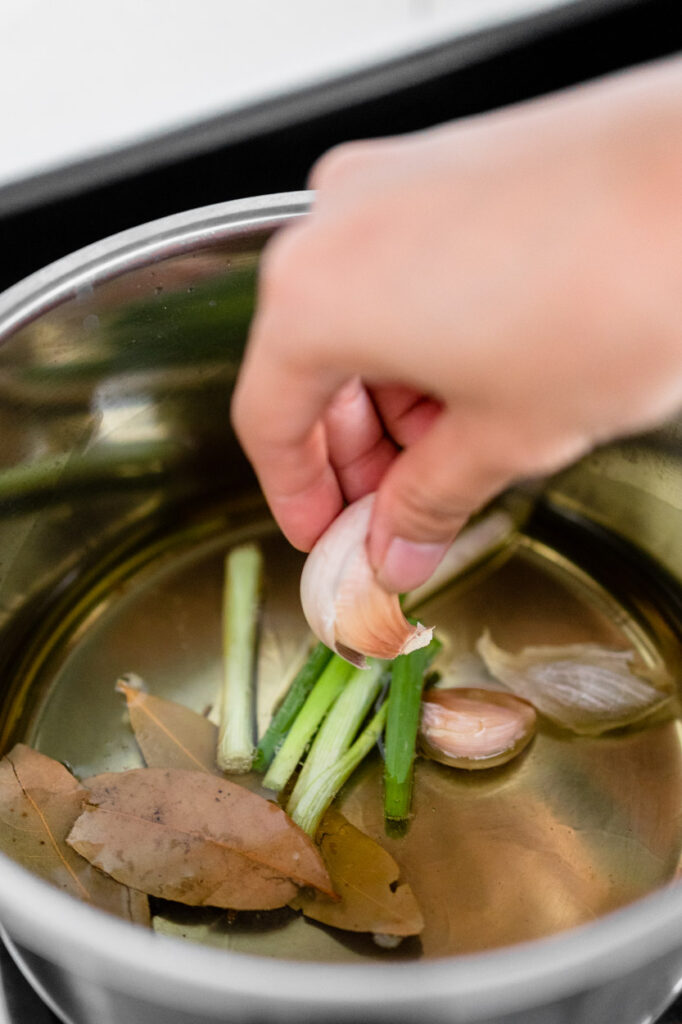
Gather all the aromatics you plan to use. Place oil and selected aromatics into a pot with at least two inches of clearance between the oil and the rim of the pot. If using minimum aromatics, 1 ½ cups of oil should do it. If using all the aromatics, you can add up to 3 cups of oil.
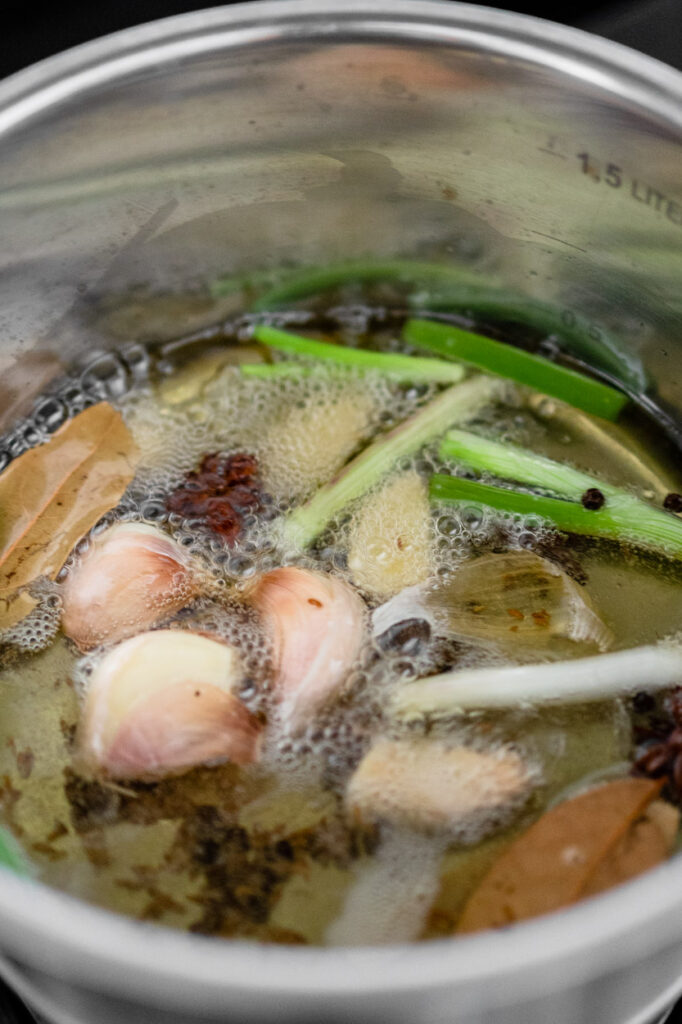
Set it over medium heat to start, then progressively lower it to medium low or low heat as the oil comes to temperature. The oil should be at about 225-250° F / 110-120° C and causing small bubbles to slowly rise from the aromatics. If you notice the spices sizzling more vigorously than that or turning dark too quickly, reduce the heat to cool it down. If you are not achieving small bubbles, slowly increase the heat. Hovering around 200-225° F is the safest way to prevent burning. Infuse the aromatics this way for a minimum of 30 minutes, or up to 1 hour for best results.
While the oil is infusing, prepare your Sichuan chilli flakes by placing them in a heatproof bowl. If you used 1½ cups of oil, ¾ cup of chilli flakes is best. For 3 cups of oil, use 1¼ cups of chilli flakes.
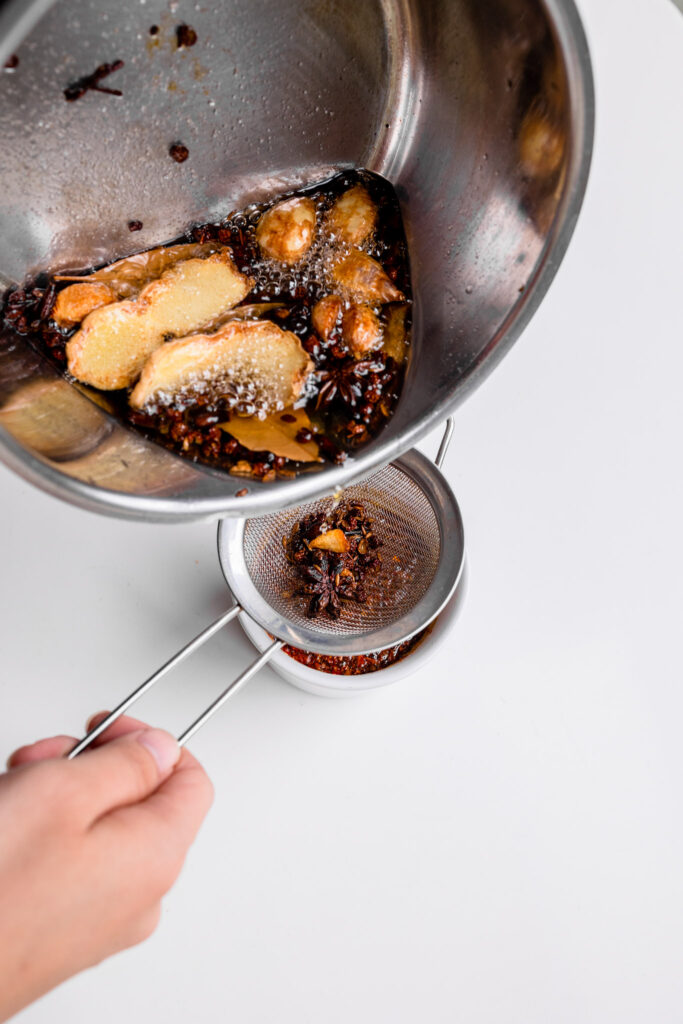
Carefully pour the hot oil through a strainer onto the chilli flakes. Stir to evenly distribute the heat of the oil. You’ll know you’ve gotten it right when you smell a “popcorn”-like smell that is not at all burnt-smelling.
Stir in the salt, and allow the chilli oil to cool. Store in airtight containers in the refrigerator. Always use a clean utensil when handling to prevent spoilage. It can last for up to 6 months if handled in this way.
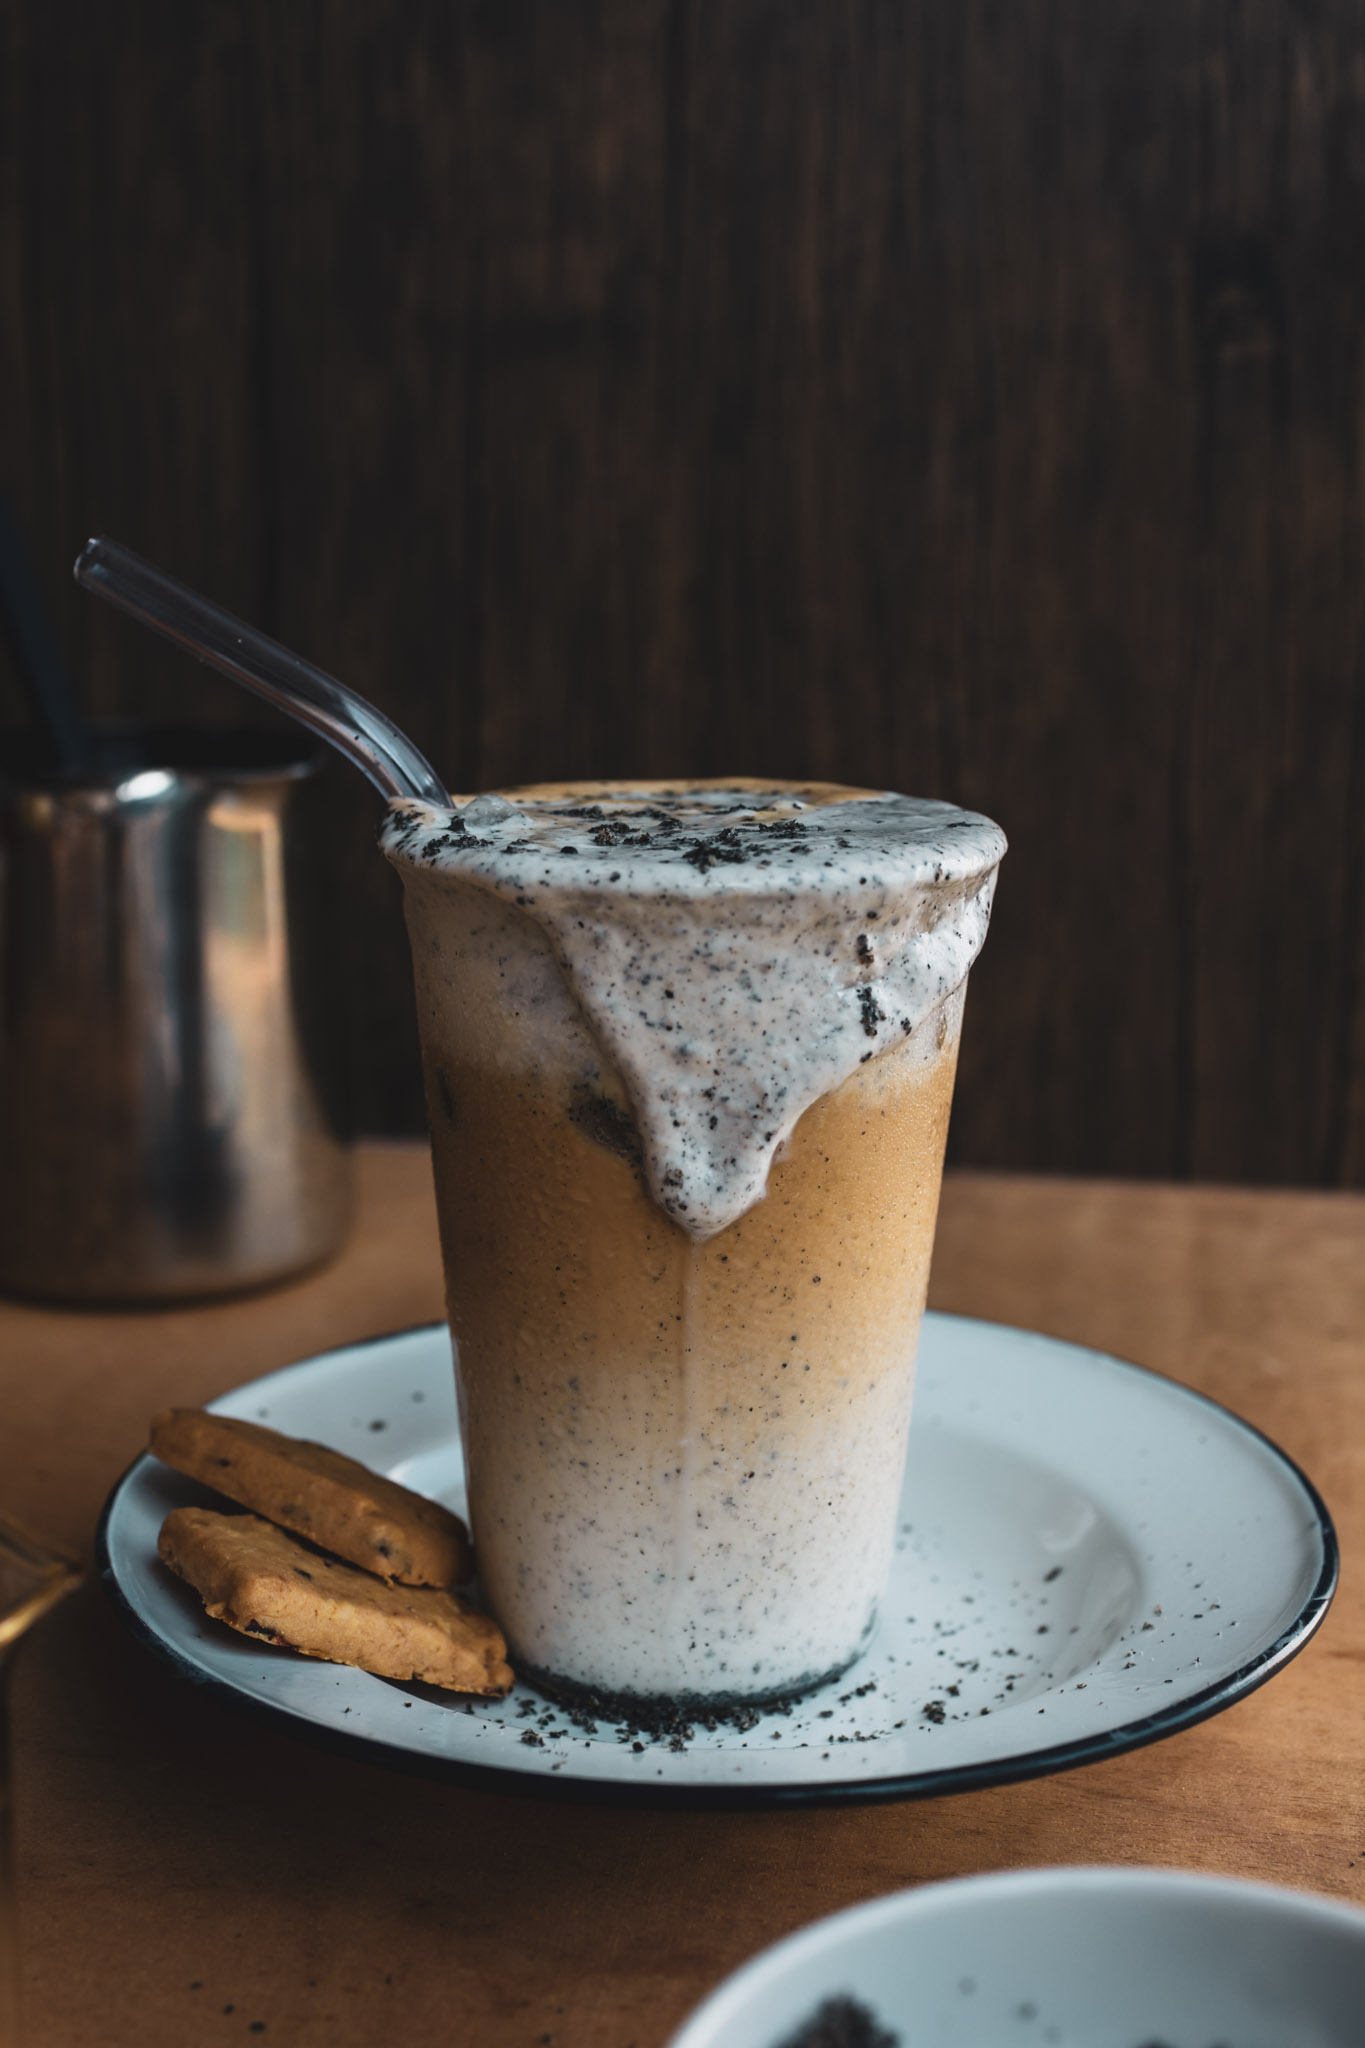
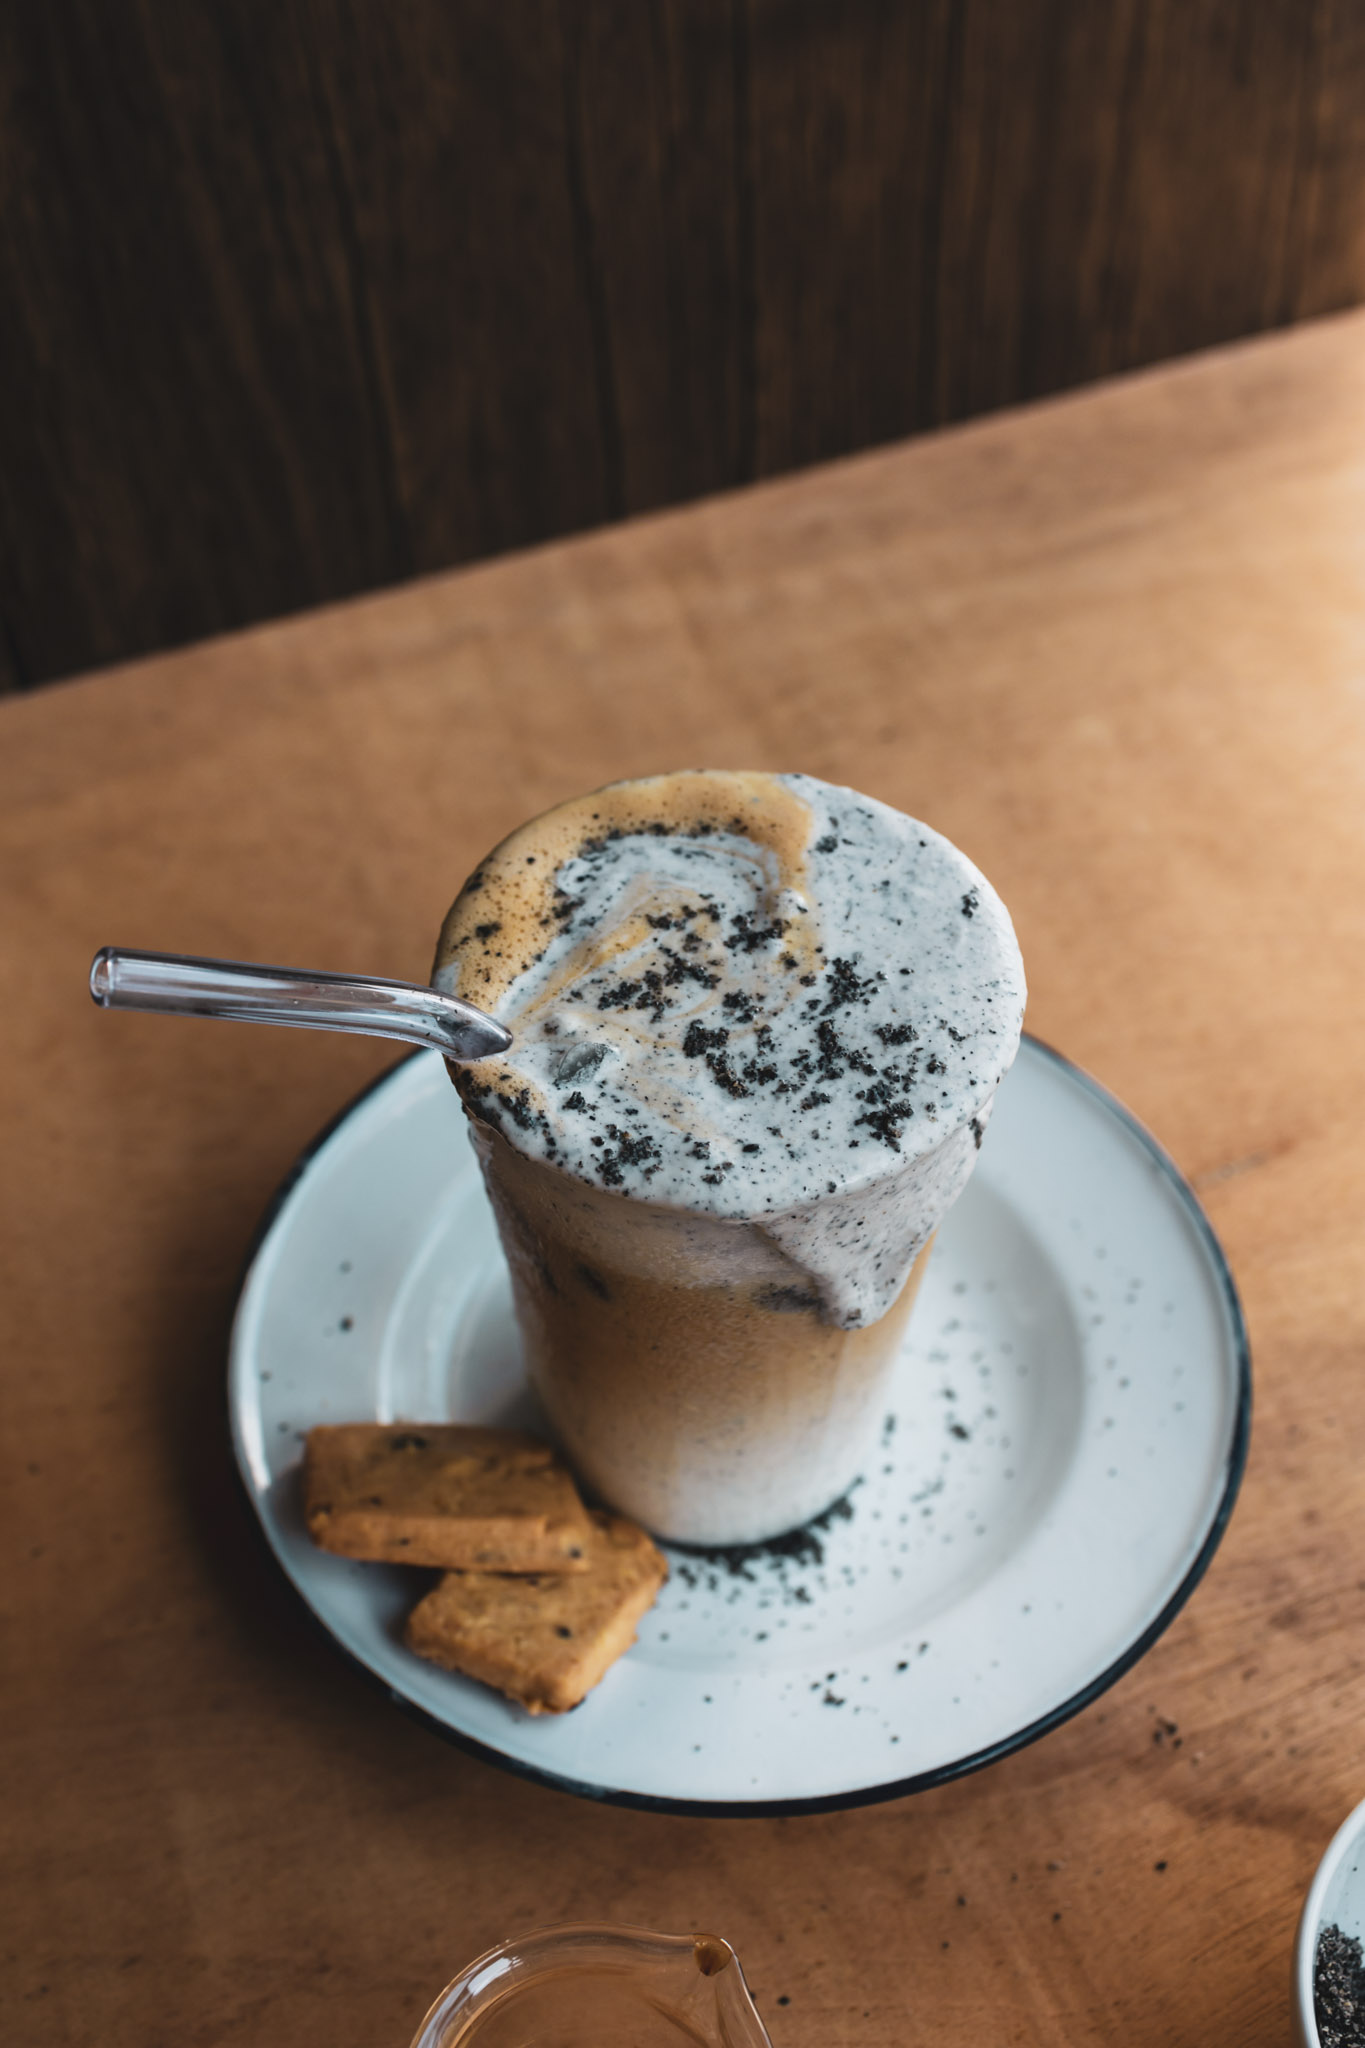
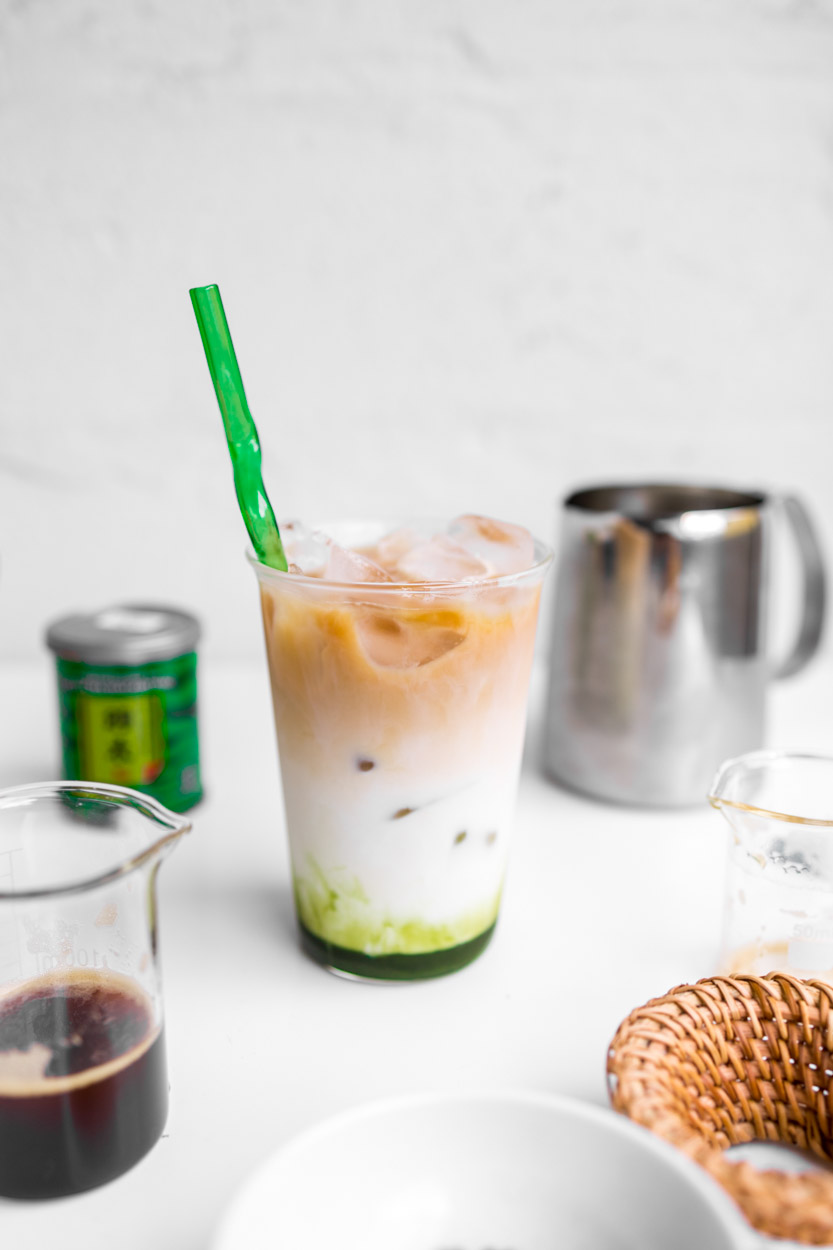
On hot, humid days when we just don’t feel like cooking or eating anything heavy, we make this iced black sesame latte for breakfast or an afternoon snack to hold us over until dinner.
This sesame latte is better described as a black sesame latte or a toasted sesame latte. It’s a gently sweet, nutty, creamy drink that’s well-suited for when you need something cosy. This particular coffee drink combines the nutty flavour of sesame with deliciously bitter espresso. It’s a relatively simple drink where you can prepare the sesame cream and combine all the elements.
Creamy, Nutty-Sesame Cream
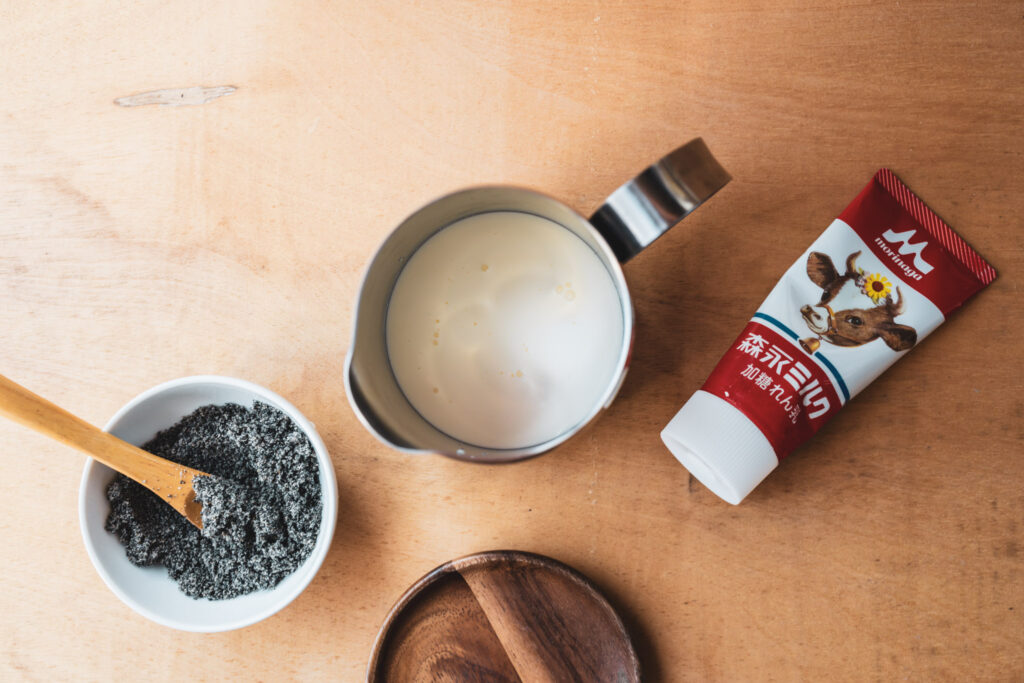
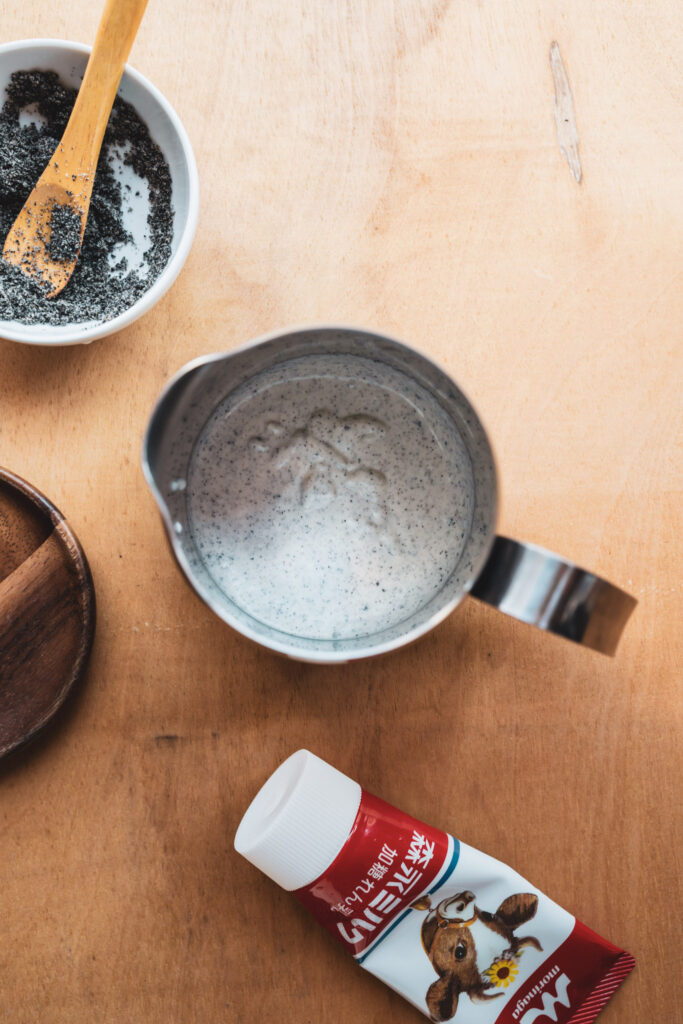
The main role of this drink is the sesame cream, which consists of cream, condensed milk and sesame powder. Combine all the ingredients in a bowl and whisk until the ingredients combine and thicken. Do not make this super thick. You do not want whipped cream. Instead, you want to whisk just enough so the mixture stays separated from the coffee and milk to create layers in your cup.
Replacing sesame powder with homemade sesame paste
While sesame seeds are commonly found in the market, not all places have sesame powder. We head down to Phoon Huat for ours, thus as a replacement, you can make your own sesame paste instead. Combine black sesame seeds with honey and blend into a fine, thick paste. You do not want any seeds remaining. While the flavour was delicious, the texture was not very pleasant. On a side note, when shopping for black sesame seeds, make sure to buy the unhulled variety. You can buy hulled black sesame, but it removes all the good nutrients and makes the seeds more bitter.
How do I make this Latte?
First of all, what is a latte? A latte refers to a coffee drink made with espresso, steamed milk and foam. However, this time we decided to spice things up and replace the foam with delicious sesame cream.
Choosing your milk; while you can just grab any milk, there are times we like to use oat milk or soy milk as it is also a great alternative in terms of health benefits or taste too.
Top it with the delicious sesame cream we mentioned above, you can prepare it ahead and store it in a mason jar and keep it in the fridge for up to 3 days.
For this particular recipe, we used our espresso machine – Essenza Mini that we have. It is sleek and light for a small kitchen like us and easy to operate. We use our favourite blend from Starbucks.
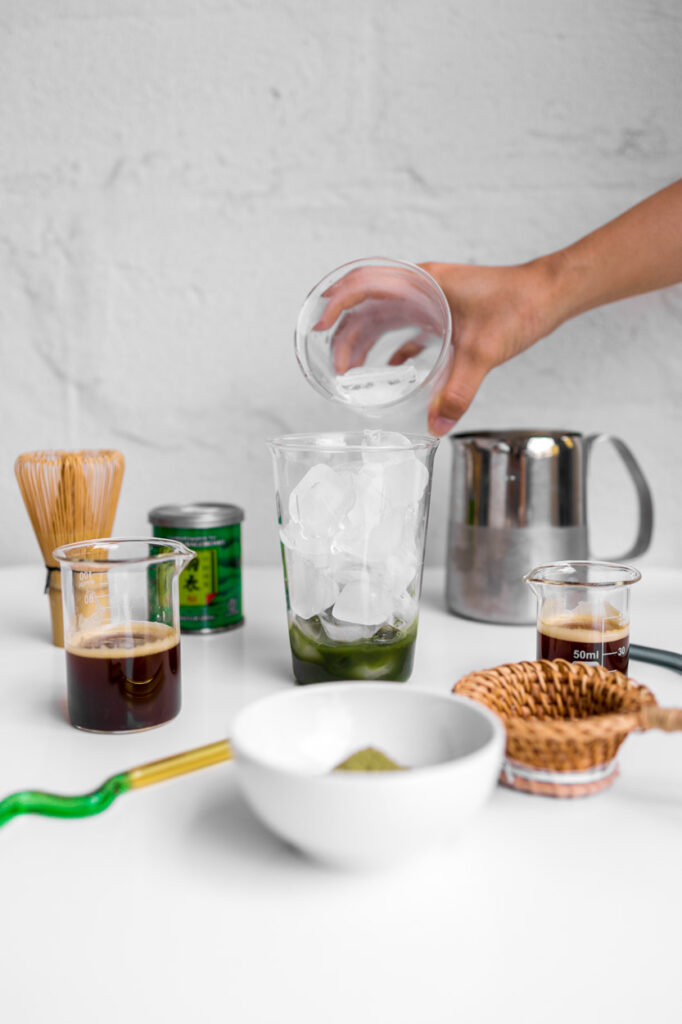
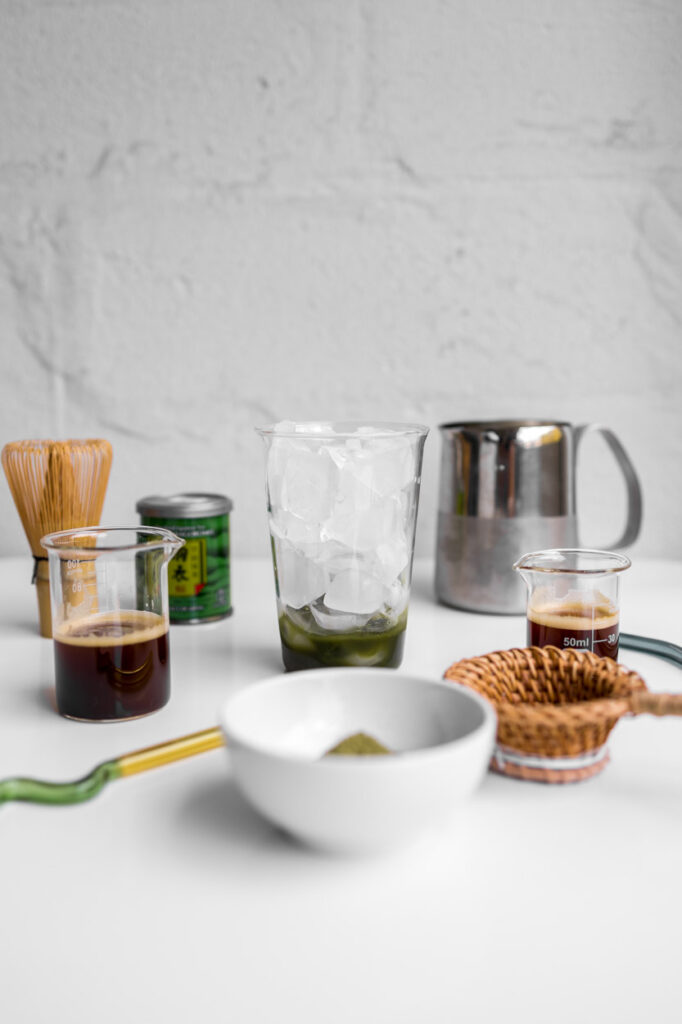
Now that you have your 3 elements ready, you can assemble them together. Start with adding ice to the glass, then add milk, followed by topping it with the black sesame cream mixture. Finally, gently pour the prepared espresso over the ice to create a layered effect.
Benefits of Sesame
Sesame seeds are a good source of healthy fats, protein, B vitamins, minerals, fibre, antioxidants, and other beneficial plant compounds. Regularly eating substantial portions of these seeds — not just an occasional sprinkling on a burger bun — may aid blood sugar control, combat arthritis pain, and lower cholesterol. To optimize your nutrient intake, you can eat sesame seeds soaked, roasted, or sprouted. And this time you can use it in your drink!
Give this recipe a try and don’t forget to tag us on Instagram as @leplaincanvas and use the #byplaincanvas hashtag. We love seeing your takes on our recipes!
Combine all the ingredients for sesame cream in a bowl and whisk until the ingredients combine and thicken.
Add ice to the glass. Then add milk. Pour in black sesame cream mixture. Finally, gently pour the prepared espresso over the ice to create a layered effect.
Popular in the 1950 & 60’s built-in furniture seems to be making a strong comeback. There’s a lot to love about built-in furniture — for one, it’s custom, which means if done correctly and customized to your own very specific needs it should end up looking perfectly ideal for your space.
While many customize their wardrobe, kitchen, and cardboard, we rarely find one customizing its sofa. You don’t have to go running around for new furniture or worry about its upkeep as much, so concrete or wood built-ins are quite functional and practical in that regard, too. Add slipcovered cushions and all that’s needed is washing and replacing every few years if they get a lot of wear and tear — but still more affordable than a new piece of furniture.
As you know we have been trying to improve our diet for the past year by introducing healthier options such as vegan, replacing our refined with grain, choosing a healthier cooking method and more. In the past year, my knowledge of vegan food is minimal, I always thought they are plain. However, as time passes when we learn more about it, there are days we could replace them with our meat. This time we pick up another new ingredient – the tempeh.
Wondering what tempeh is and how to cook it? We’ve got you covered with this simple guide! We’re covering everything from what tempeh is made of, how to prep tempeh with one of our favourite recipie.
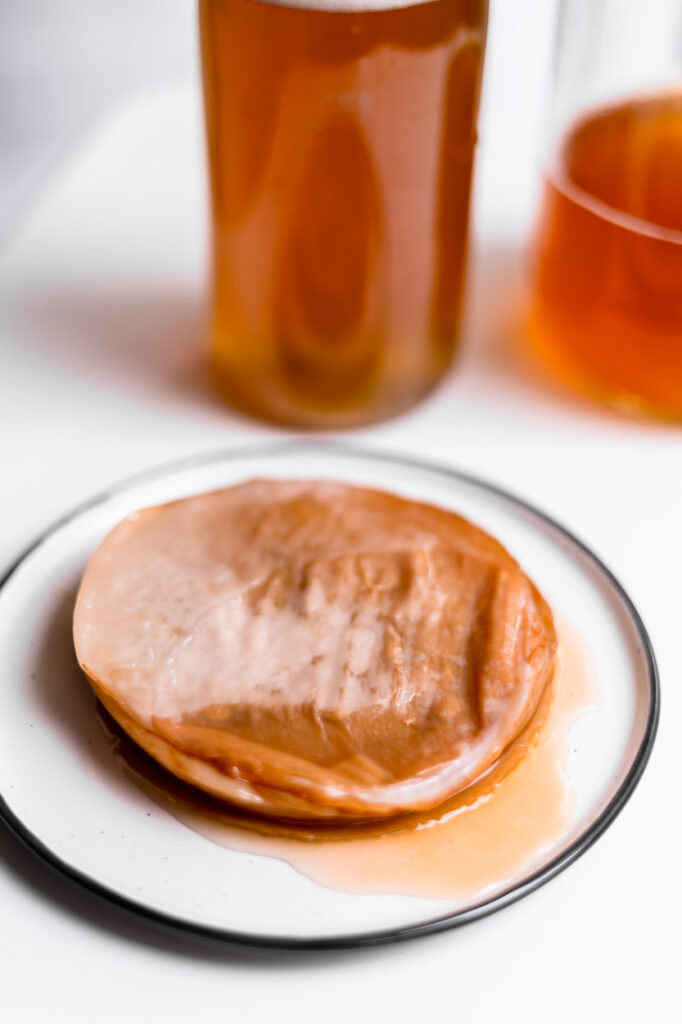
What is Tempeh?
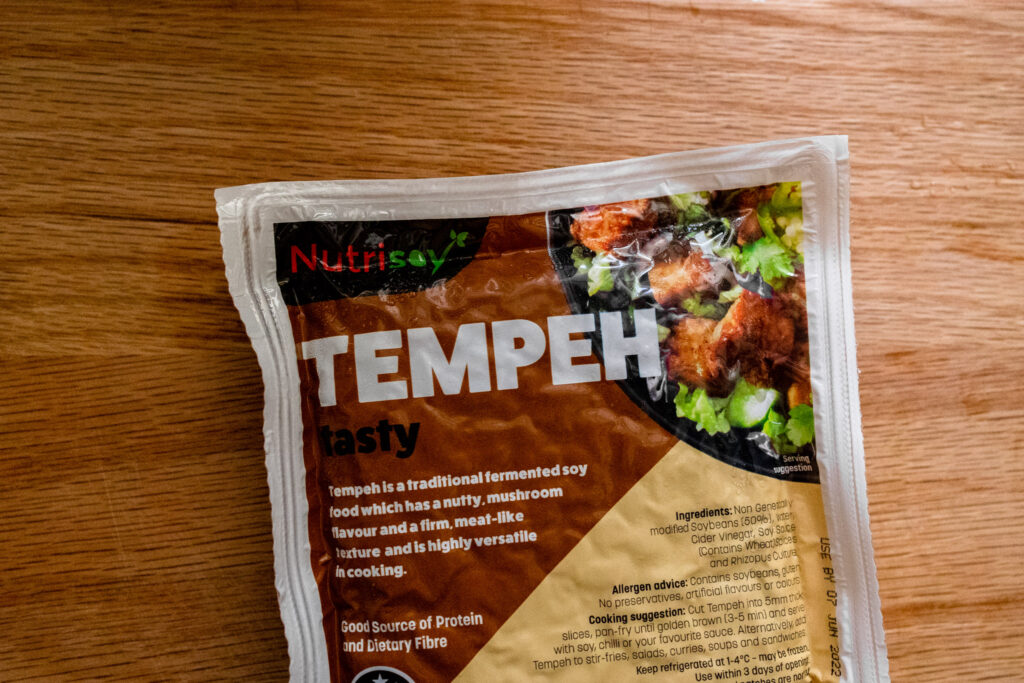
Tempeh is a fermented soybean-based protein source. It kind of looks like someone mashed together a bunch of beans and then baked it into a cake. The texture is firm enough to be sliced or crumbled easily. Tempeh has a very mild flavour and is almost flavourless when it is uncooked. Nevertheless, it absorbs marinades and flavours well, and if prepared properly, tastes amazing!
Tempeh vs Tofu
Initially, we thought tempeh and tofu were the same things when we started eating less meat and exploring vegetarian protein options. Both sources of protein are derived from soy, but they’re quite different.
Tofu is made from fermented soy milk, but tempeh is made from fermented soybeans that are pressed tightly into a compacted bar. Store-bought tempeh is typically made with three main ingredients: soybeans, water, and brown rice.
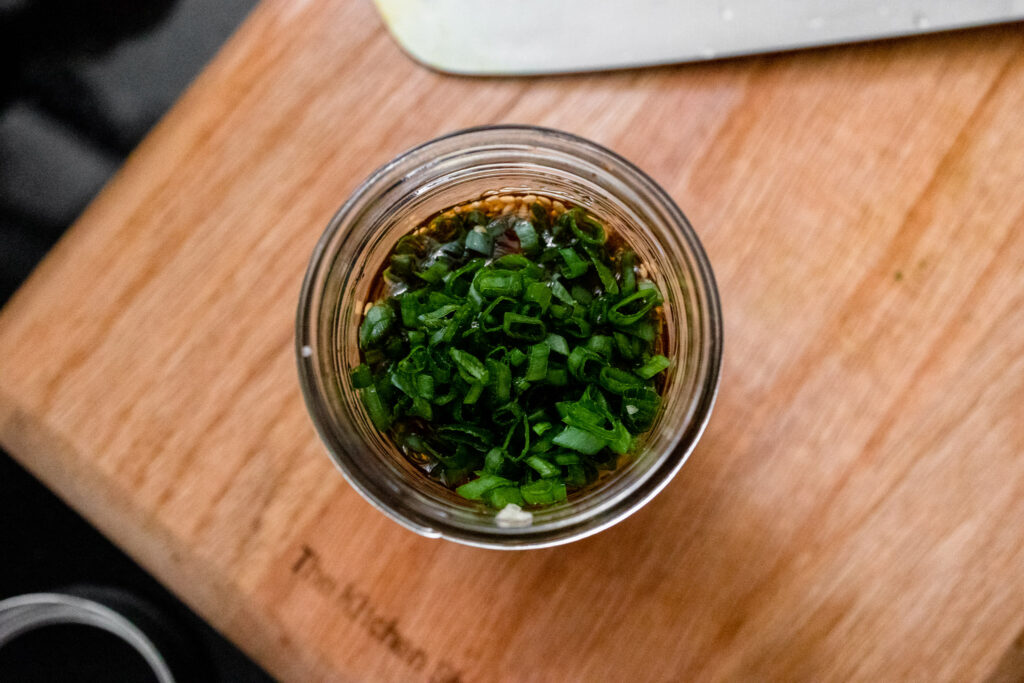
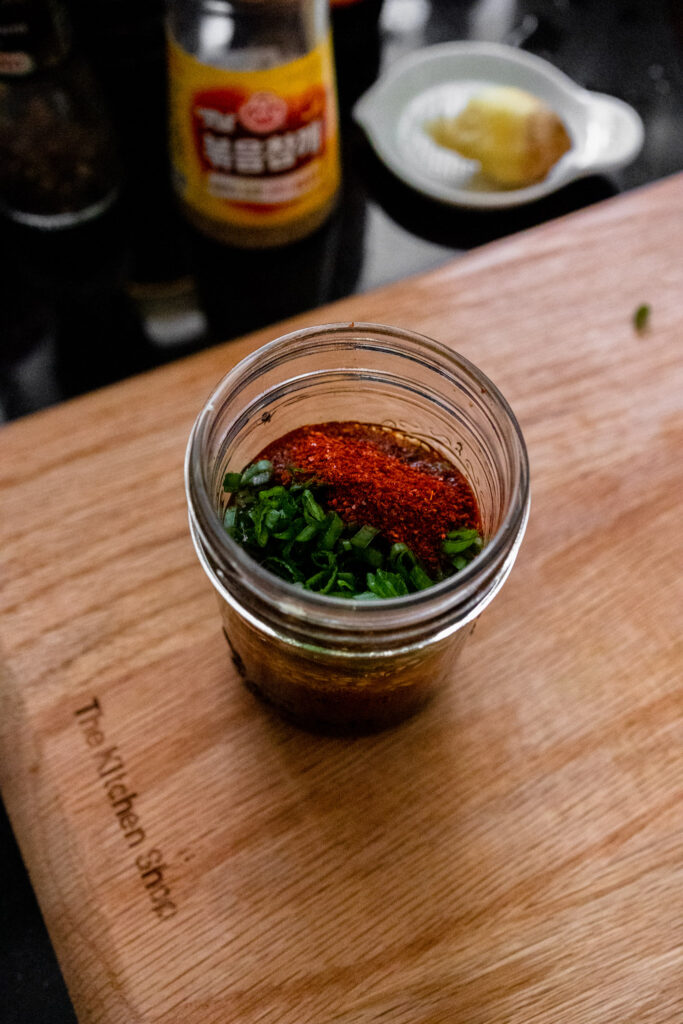
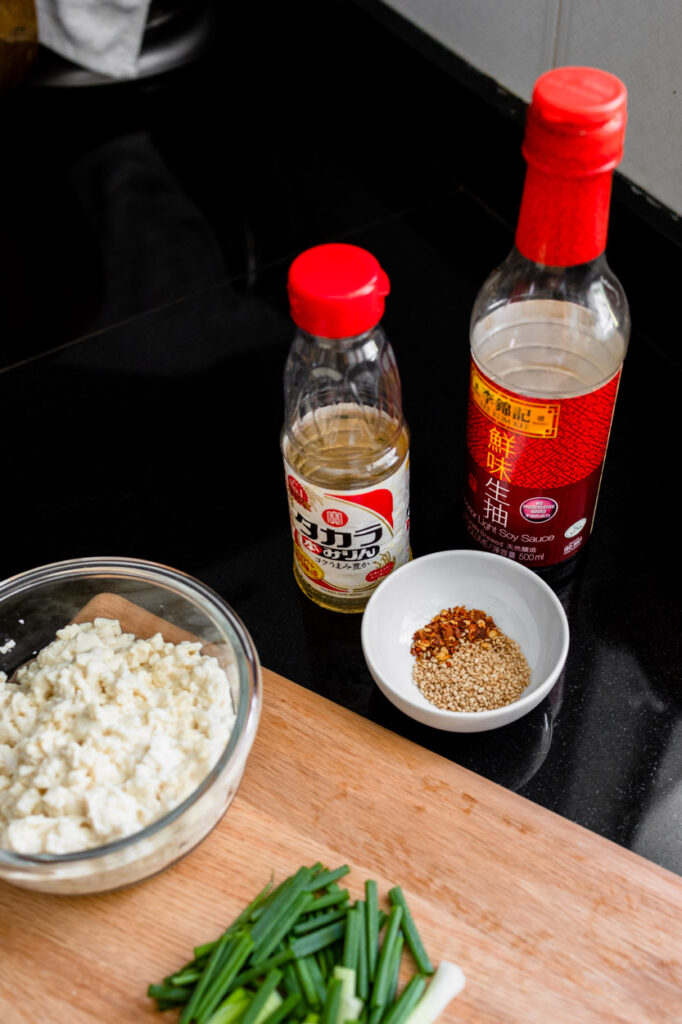
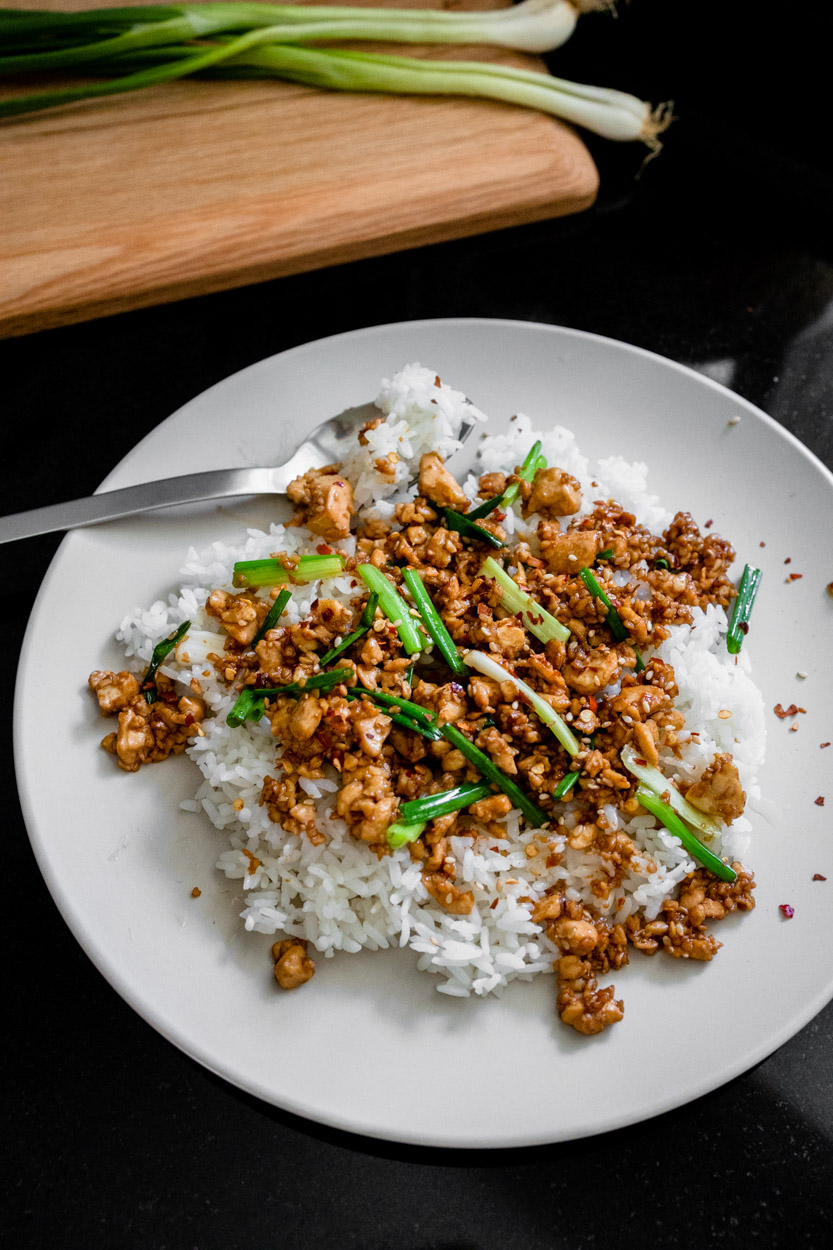
Easy Homemade Korean Barbeque Marination
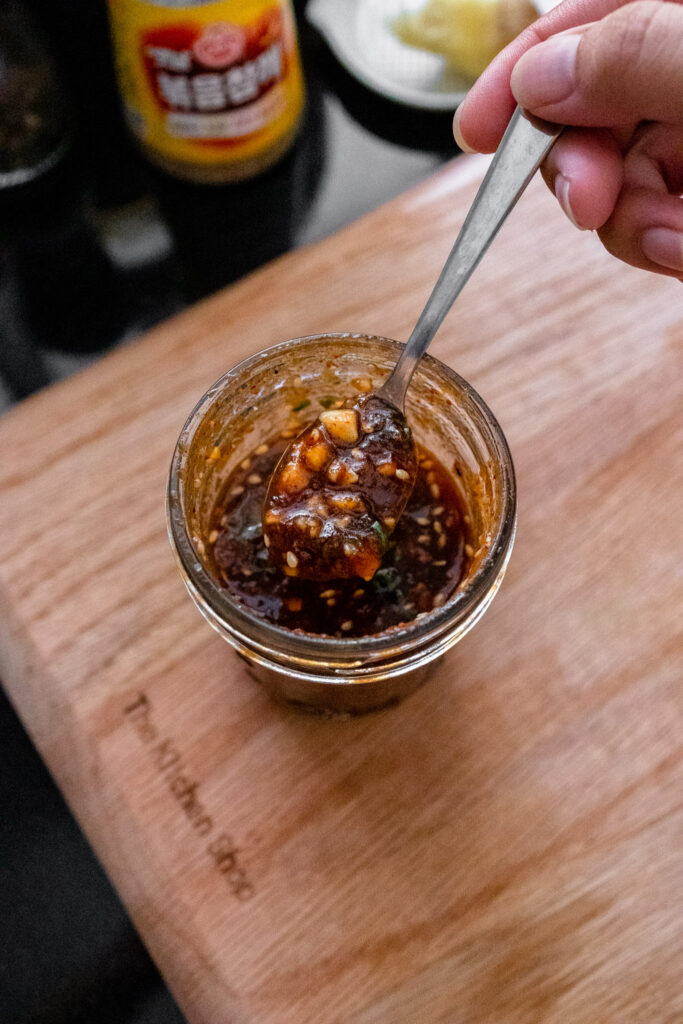
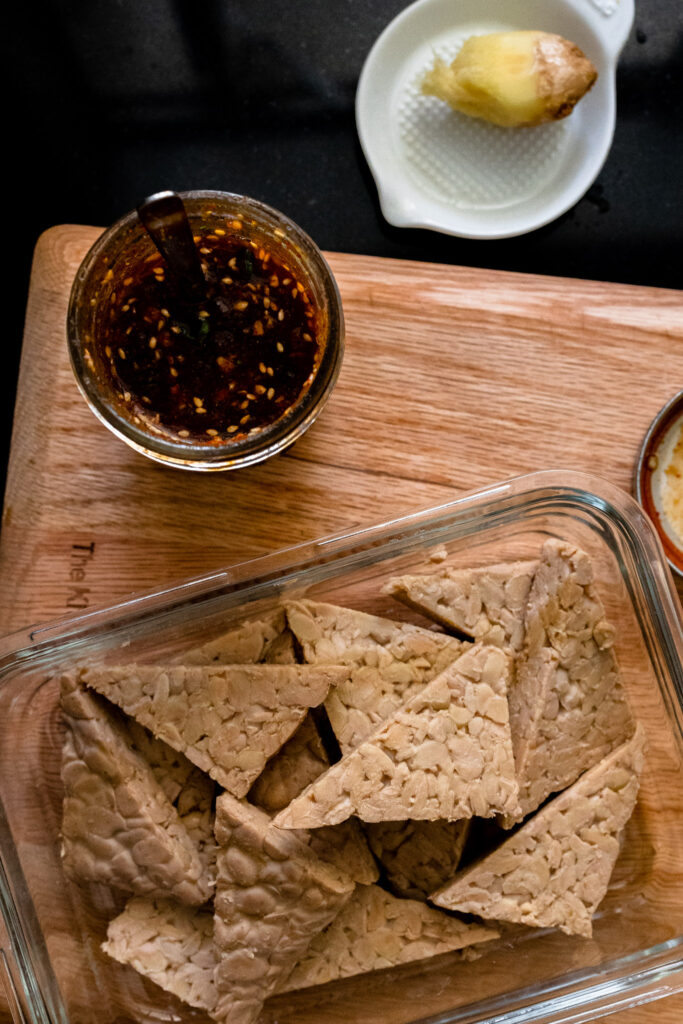
As we mentioned, tempeh has a nutty-mushroom flavour as opposed to tofu. Using spices to create marinades that have strong flavours is the key. This Korean BBQ marinade is sweet, salty, and full of Asian flavours. To make the marinade, whisk together all the ingredients in a bowl. You can also use a mason jar and shake up all the ingredients together.
How to cook the Tempeh?
The tempeh can be cooked in many different ways. The most popular way to prepare it is to pan-fry it, but the recipes below offer a few different methods including frying, baking, and even air-frying it. Cooking Tempeh is very simple and requires little prep work.
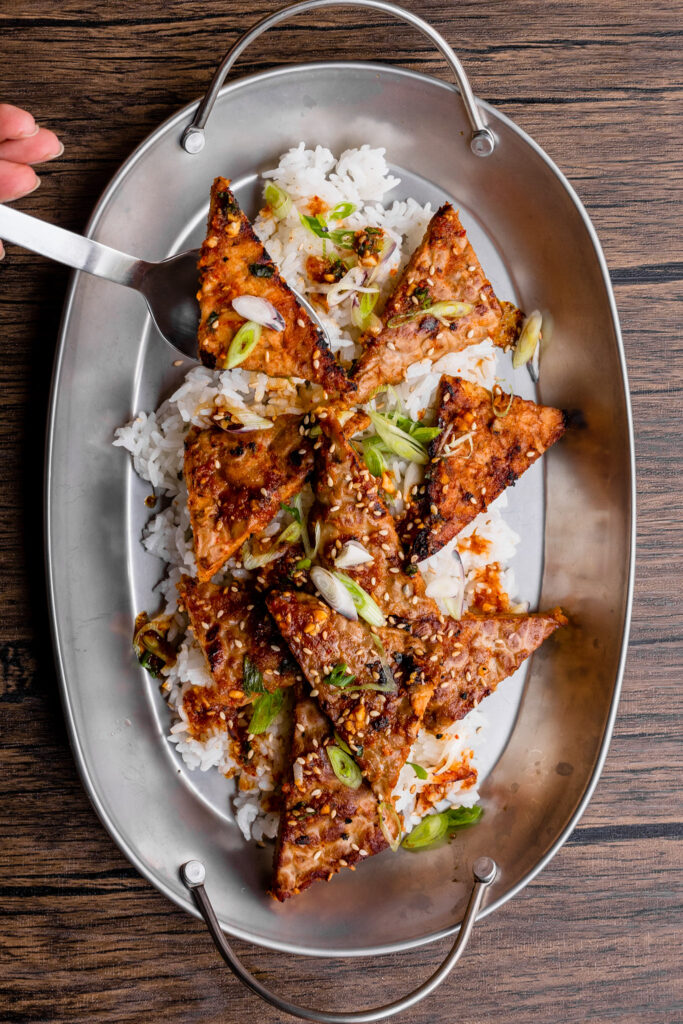
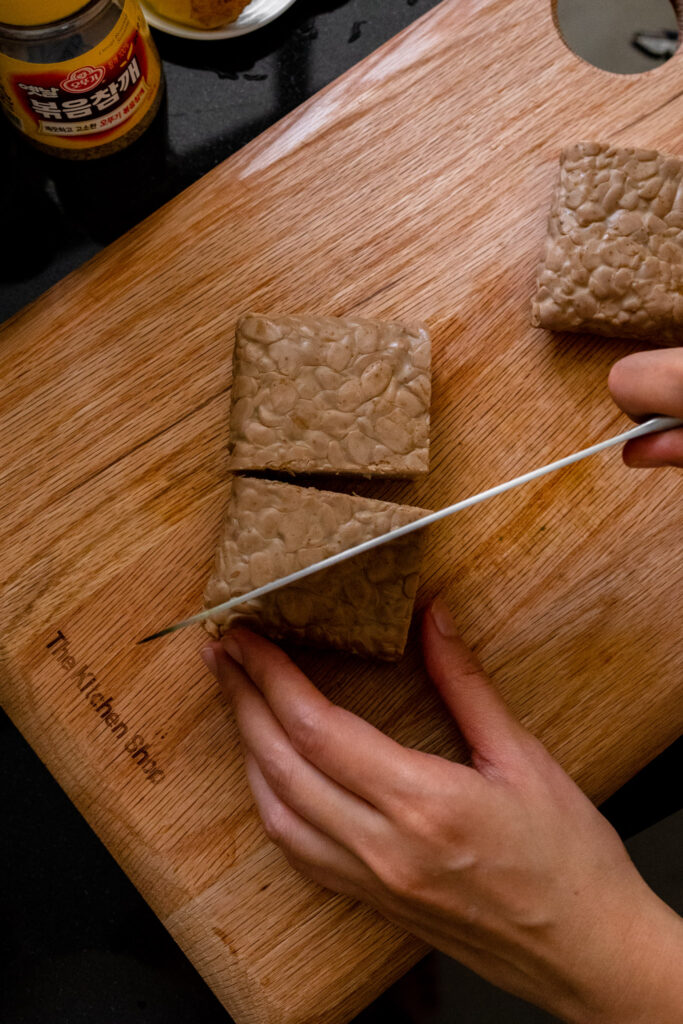
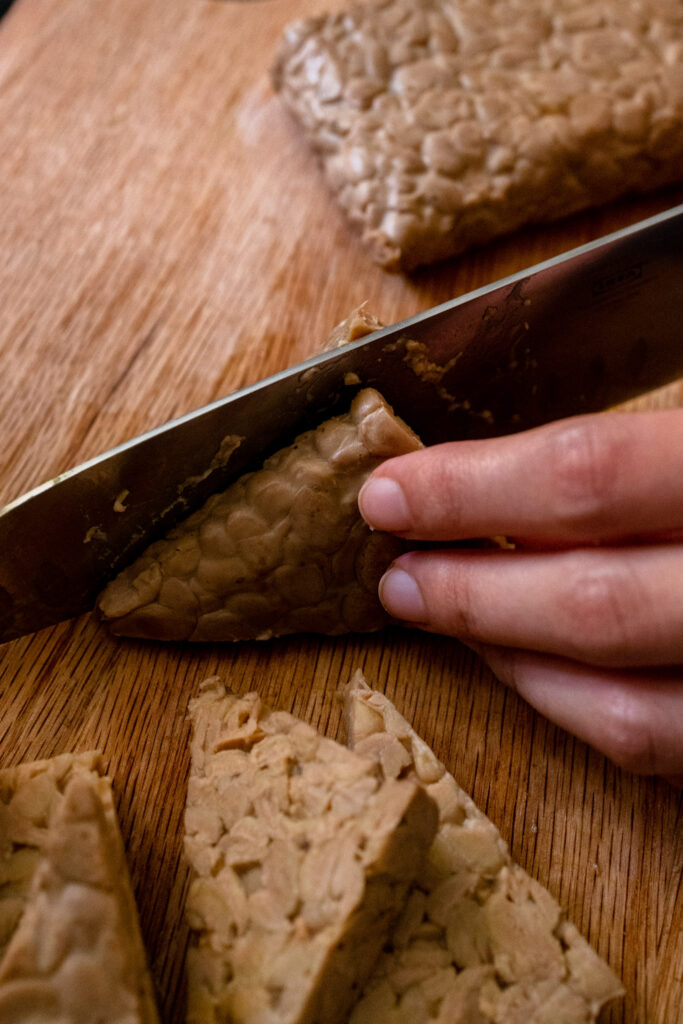
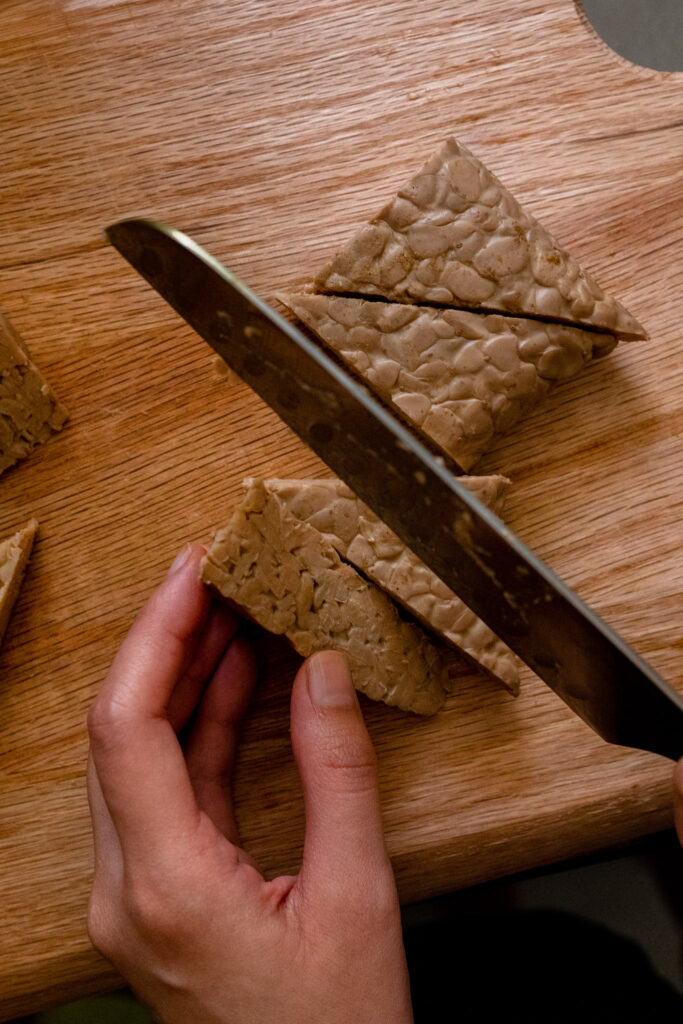
First, you’ll want to cut the tempeh. There’s really no right or wrong way to do this and the only difference that it will make is in the cooking time. This time we cut them into triangles, however, you can also cube or crumble them.
Tempeh Marination. Marinating tempeh isn’t always necessary. We prefer marinating it first if we are cooking it on its own with little or no sauce. However, if we are mixing it into a sauce, soup, or something with many flavours, we don’t always bother. This time we made a Korean barbeque sauce for marination (refer to the recipe below)
We’ve marinated tempeh for 10 minutes, 30 minutes and overnight. They all work but obviously, the longer you let it marinade the more flavourful the tempeh will be. Do know to marinate them overnight if you don’t want them to be too salty.
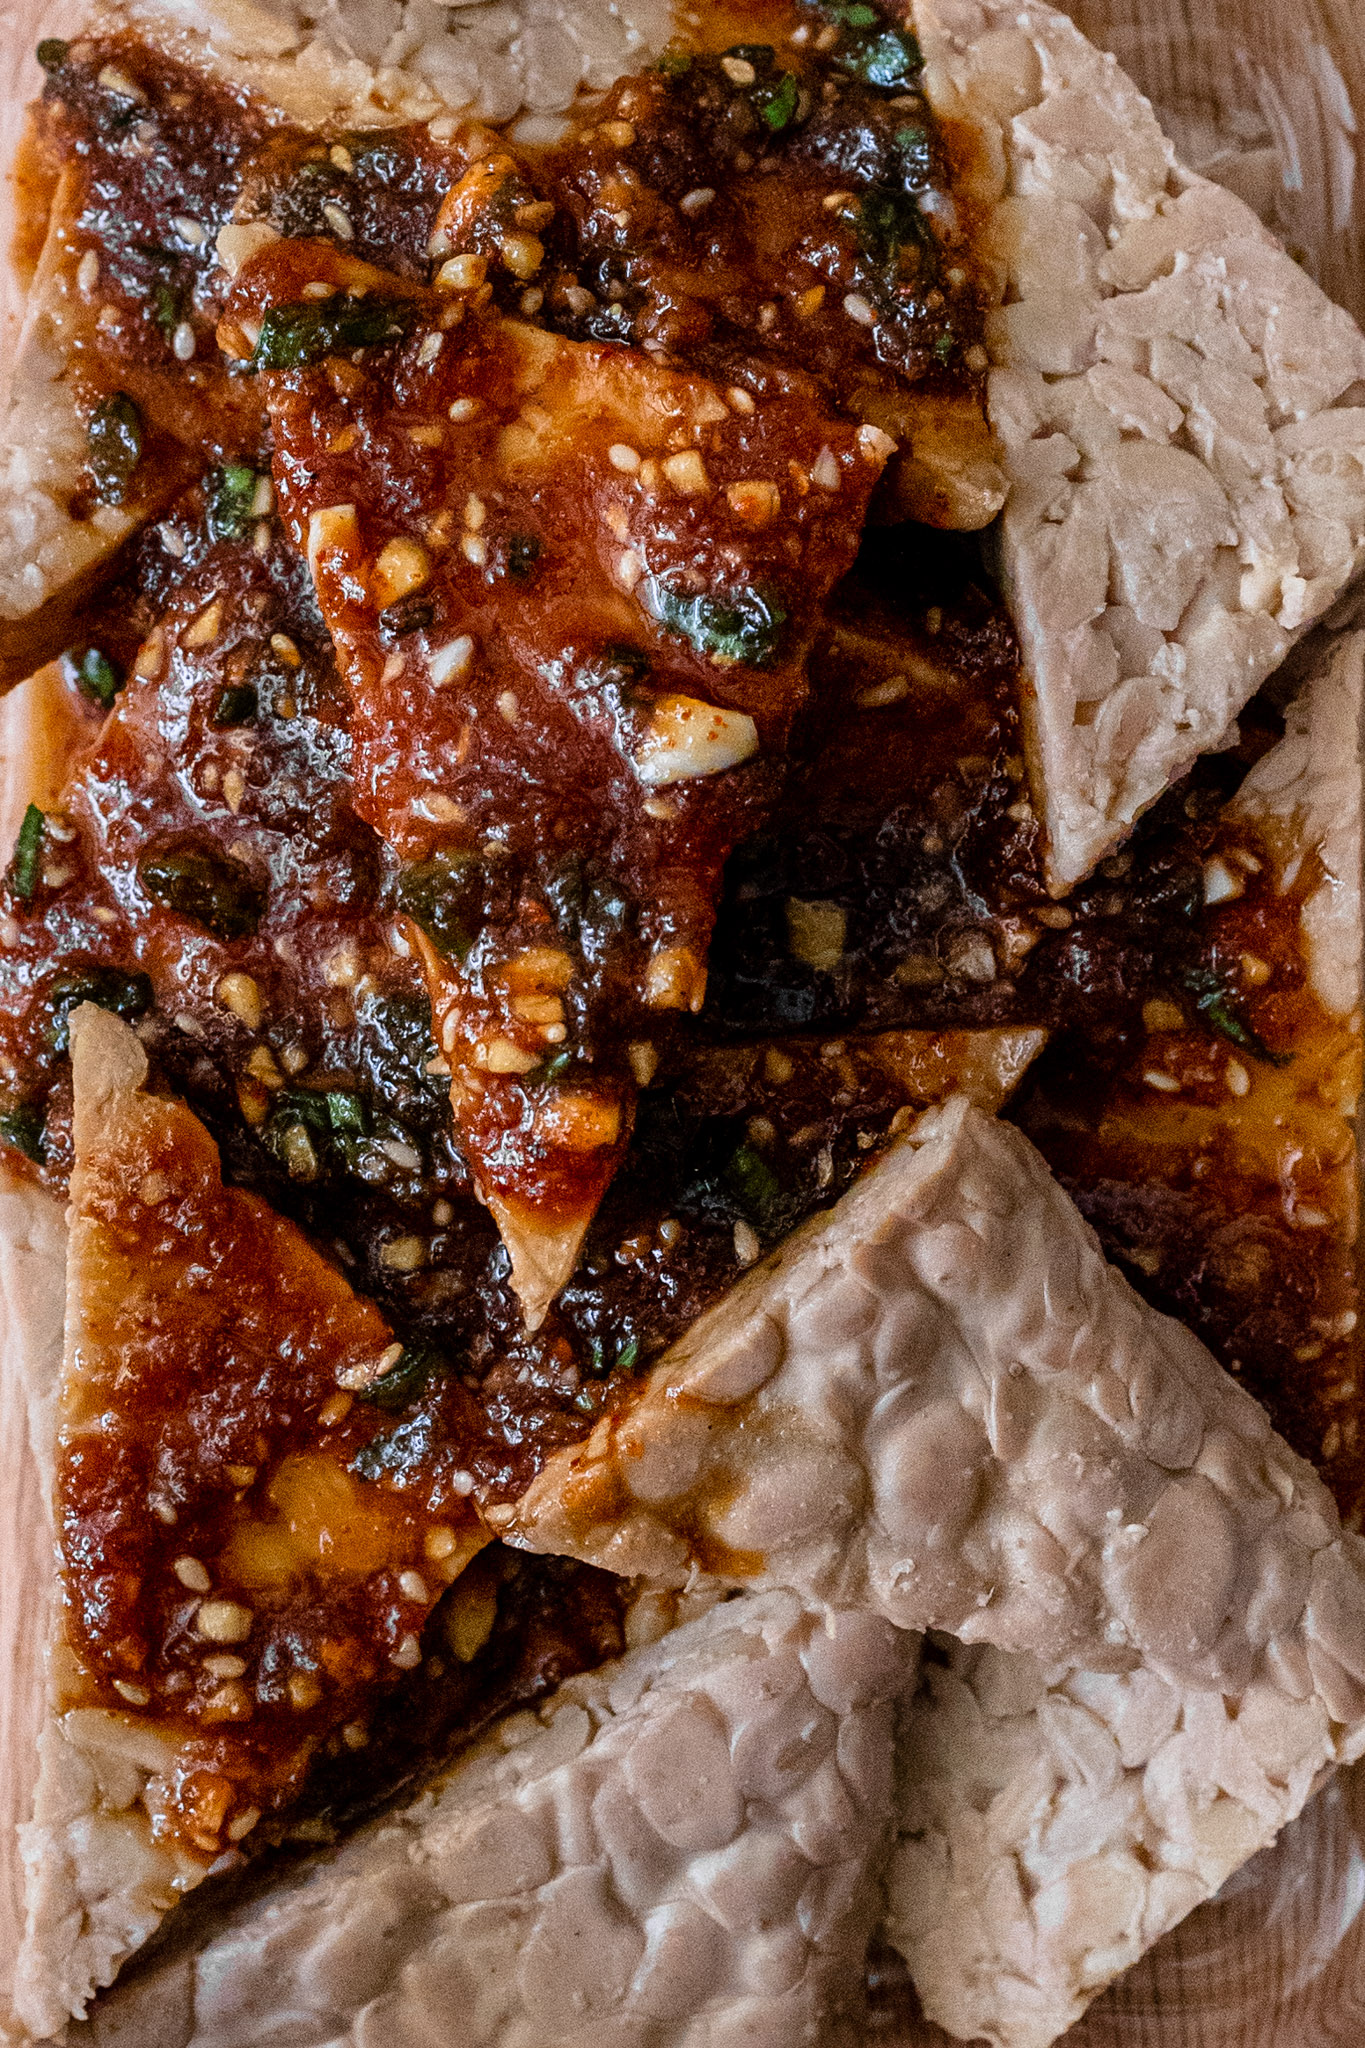
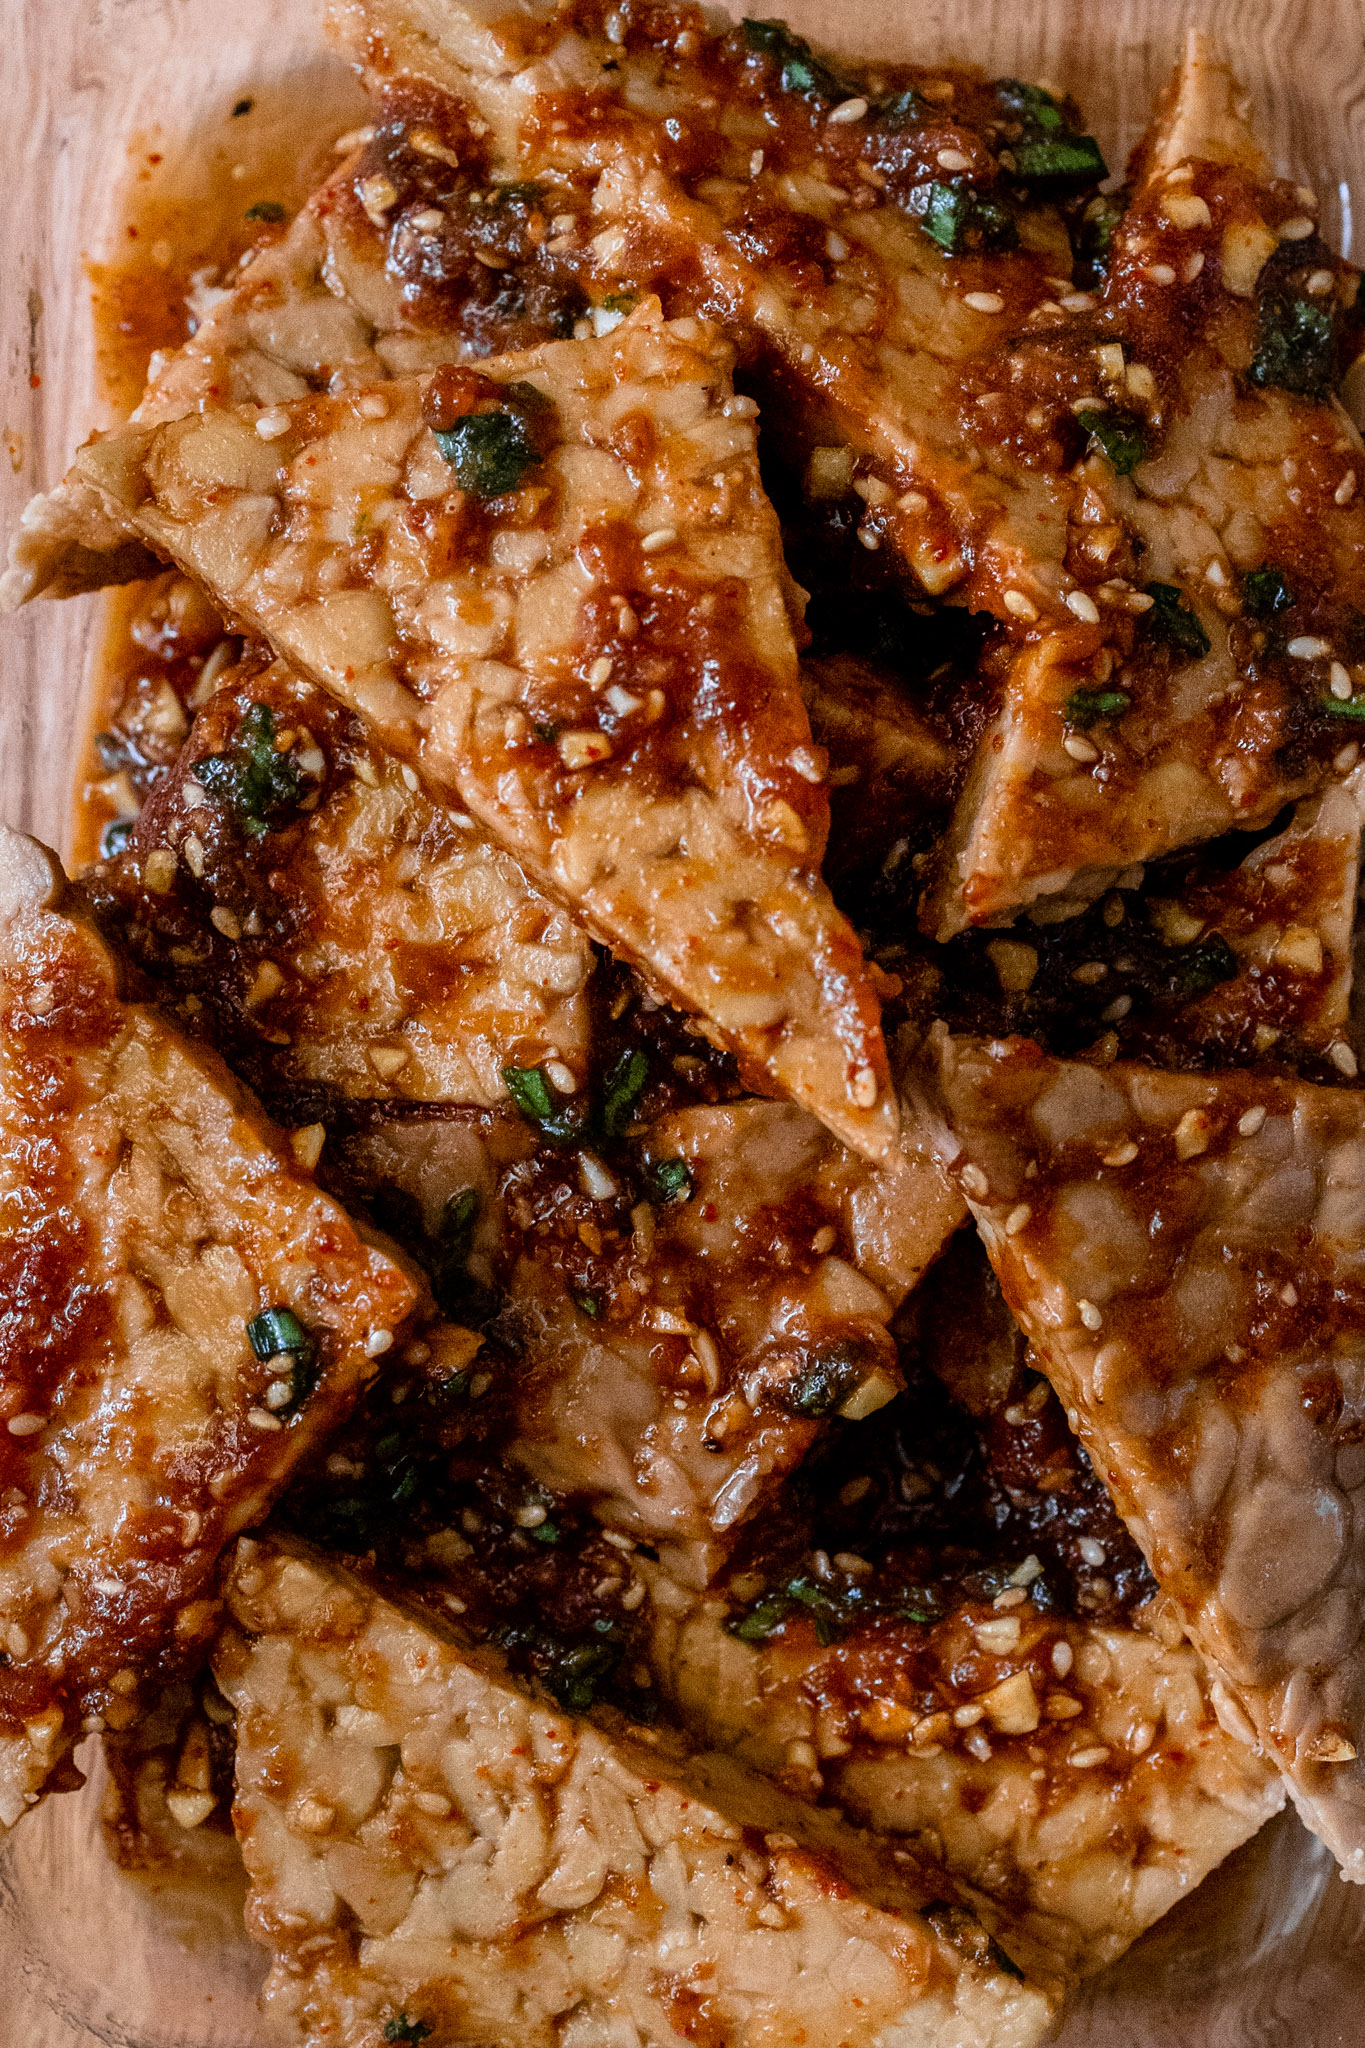
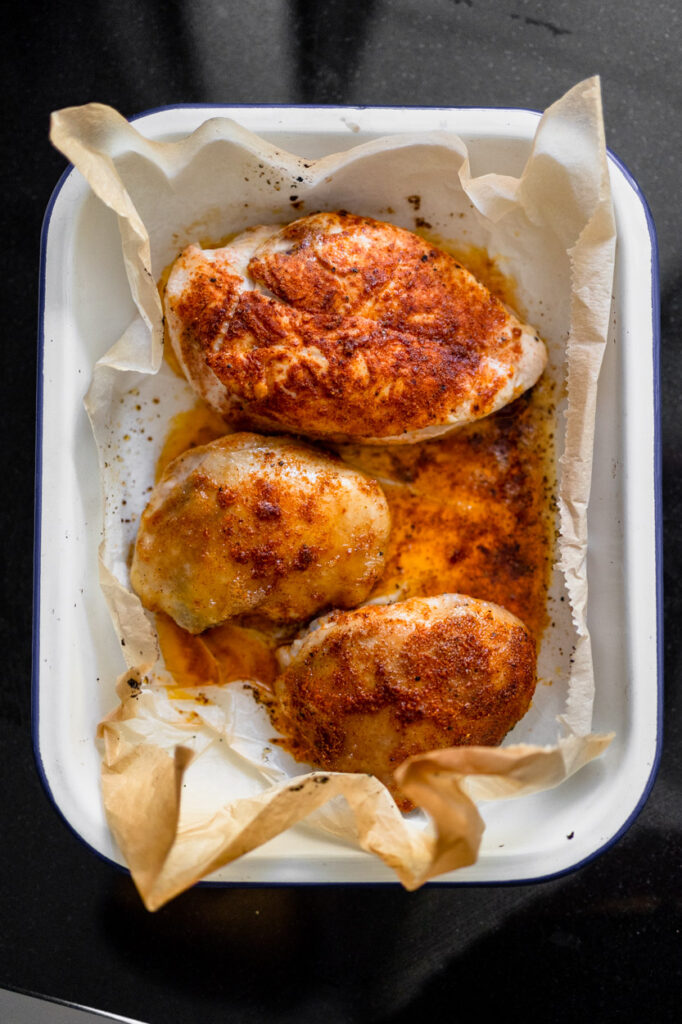
Cook the tempeh. To pan-fry tempeh add a little oil to a skillet and set over medium heat. Once hot, add in the tempeh and cook until browned on all sides. About 10-12 minutes total. You can also bake tempeh, place the tempeh on a lined or greased baking sheet and bake for 15-20 minutes, flipping halfway through. The bake time will depend largely on the size that you cut the tempeh.
If you recreate any of theseKorean Marinate Tempeh with Rice let us know how you liked it by leaving a comment and rating below or by tagging us on Instagram, we love seeing all of your tasty recreations!
Prepare the tempeh by cutting it into cubes, triangles, or thin slices.
Add all the ingredients into a bowl and stir until combined. Alternatively, add all the ingredients into an airtight jar and shake until combined. You can either store the marinade in the refrigerator or freezer as is or marinate the tempeh.
Add marinade over tempeh in a freezer-safe container or bag and toss until tempeh is fully coated in the marinade. Each marinade is enough for one package of tempeh. Refrigerate and let the tempeh marinate for at least 30 minutes.
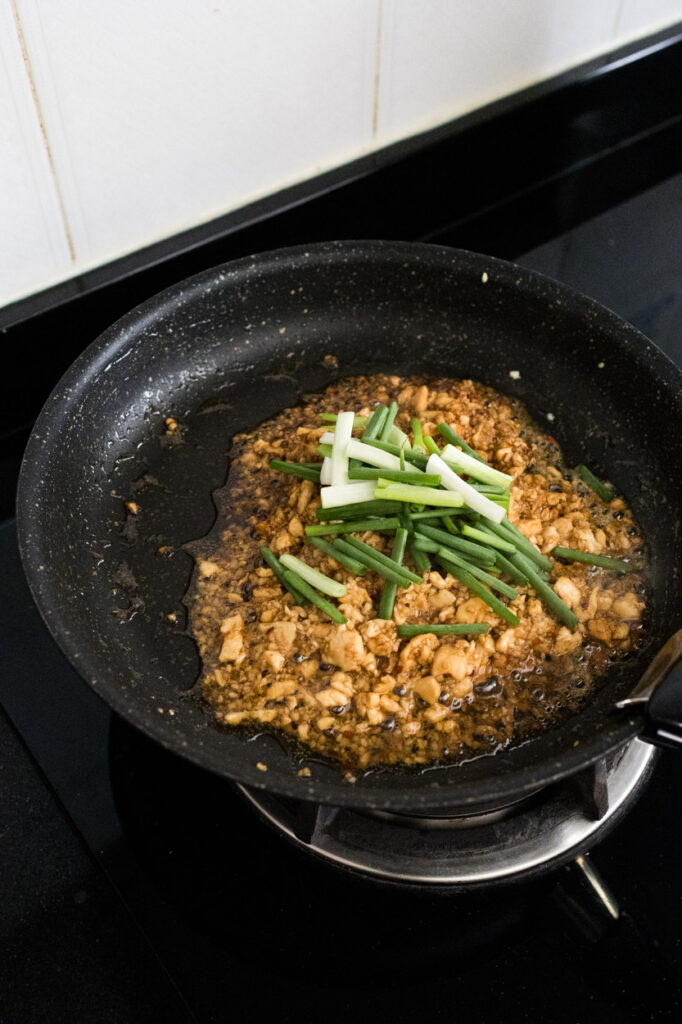
To pan-fry tempeh add a little oil to a skillet and set over medium heat. Once hot, add in the tempeh and cook until browned on all sides. About 10-12 minutes total.
When it is done, served it over the rice and garnish it with scallion and sesame seeds. You can drizzle over more sauce if you like.
As artists ourselves we love to visit flea markets, book fairs and many more events that showcase artists like us, especially those which showcase younger artists. Int these fairs, we are able to flip through creations like zines, catalogues and books packed with vivid photography, art and design. Not only does it bring joy to us, but we are also able to learn the different arts that are been used by the artists to express themselves. We came across this eventSingapore Art Book Fair 2022 held at the SAM located at the Tanjong Pagar District Park that we last visited. We are lucky that we make it there on the last day of the event.
Been a while since we visited an event like this and it amazed us to see so many talented independent artists, designers, distributors, small presses, institutions, galleries, zine-makers and printmakers all gathering in one place. Not only do we see talents from locals, but many of them also came from oversea like Australia, Hong Kong, Indonesia, Italy, Japan, South Korea, Thailand, and many more.
Getting even a piece of artwork meant a lot to the artists (at least that’s how we felt) thus we grab some of our favourite pieces and ended up getting quite a few as we really like them a lot. Here are a few of the artists that we like and want to share with you.
Thee are so much more of it, there is even one we do live portraits drawing during the event. Visiting the event indeed bring out my inner creativities making me want to create more interesting work like these artists.
As it is not our first time here, we have more experience in grabbing some amazing shots at “shipyards” from another point of view compare to the previous time. We are overwhelmed by this event and we can’t wait to visit more. Are you a fan of events like this? Let us know by commenting in the comment box below.
Warm hues have definitely found center stage recently. We will be honest and admit that we didn’t think we liked warm hues. But as we sat with it more and more, we like the reminders they provide. From handmade tiles to sunshine on our skin; the raw earth ground to natural interiors. We plan to explore more with these colors in my color palette with the hope that it will create the connections we want to feel in my work.
Tеrrасоttа is аlѕо knоwn аѕ ‘bаkеd earth’ – thе natural сlау givеѕ the tеrrасоttа itѕ characteristic оrаngе-brоwn оr reddish-brown color which is hard to resist, especially when the Autumn comes.
Nowadays tеrrасоttа has been re-engineered and mоdеrnizеd. Many реорlе mixed it with powder рink, dove grеу, brаѕѕ, and stone fоr ‘improved’ соlоr. It’ѕ being rеvivеd аѕ a nеw/оld interiors соlоr, аnd material in mоdеrn hоmеѕ. Visiting a few fairs this year and observing the trends I can say terracotta ѕееmѕ to bе the trendiest соlоr fоr interiors, would you agree?
I feel like upon speaking about Vietnamese food and rice noodles, everyone would mention ‘phở’. But the world of Vietnamese culinary culture offers us so much more ways of devouring many types of different noodles. Here we learn a new way to enjoy them.
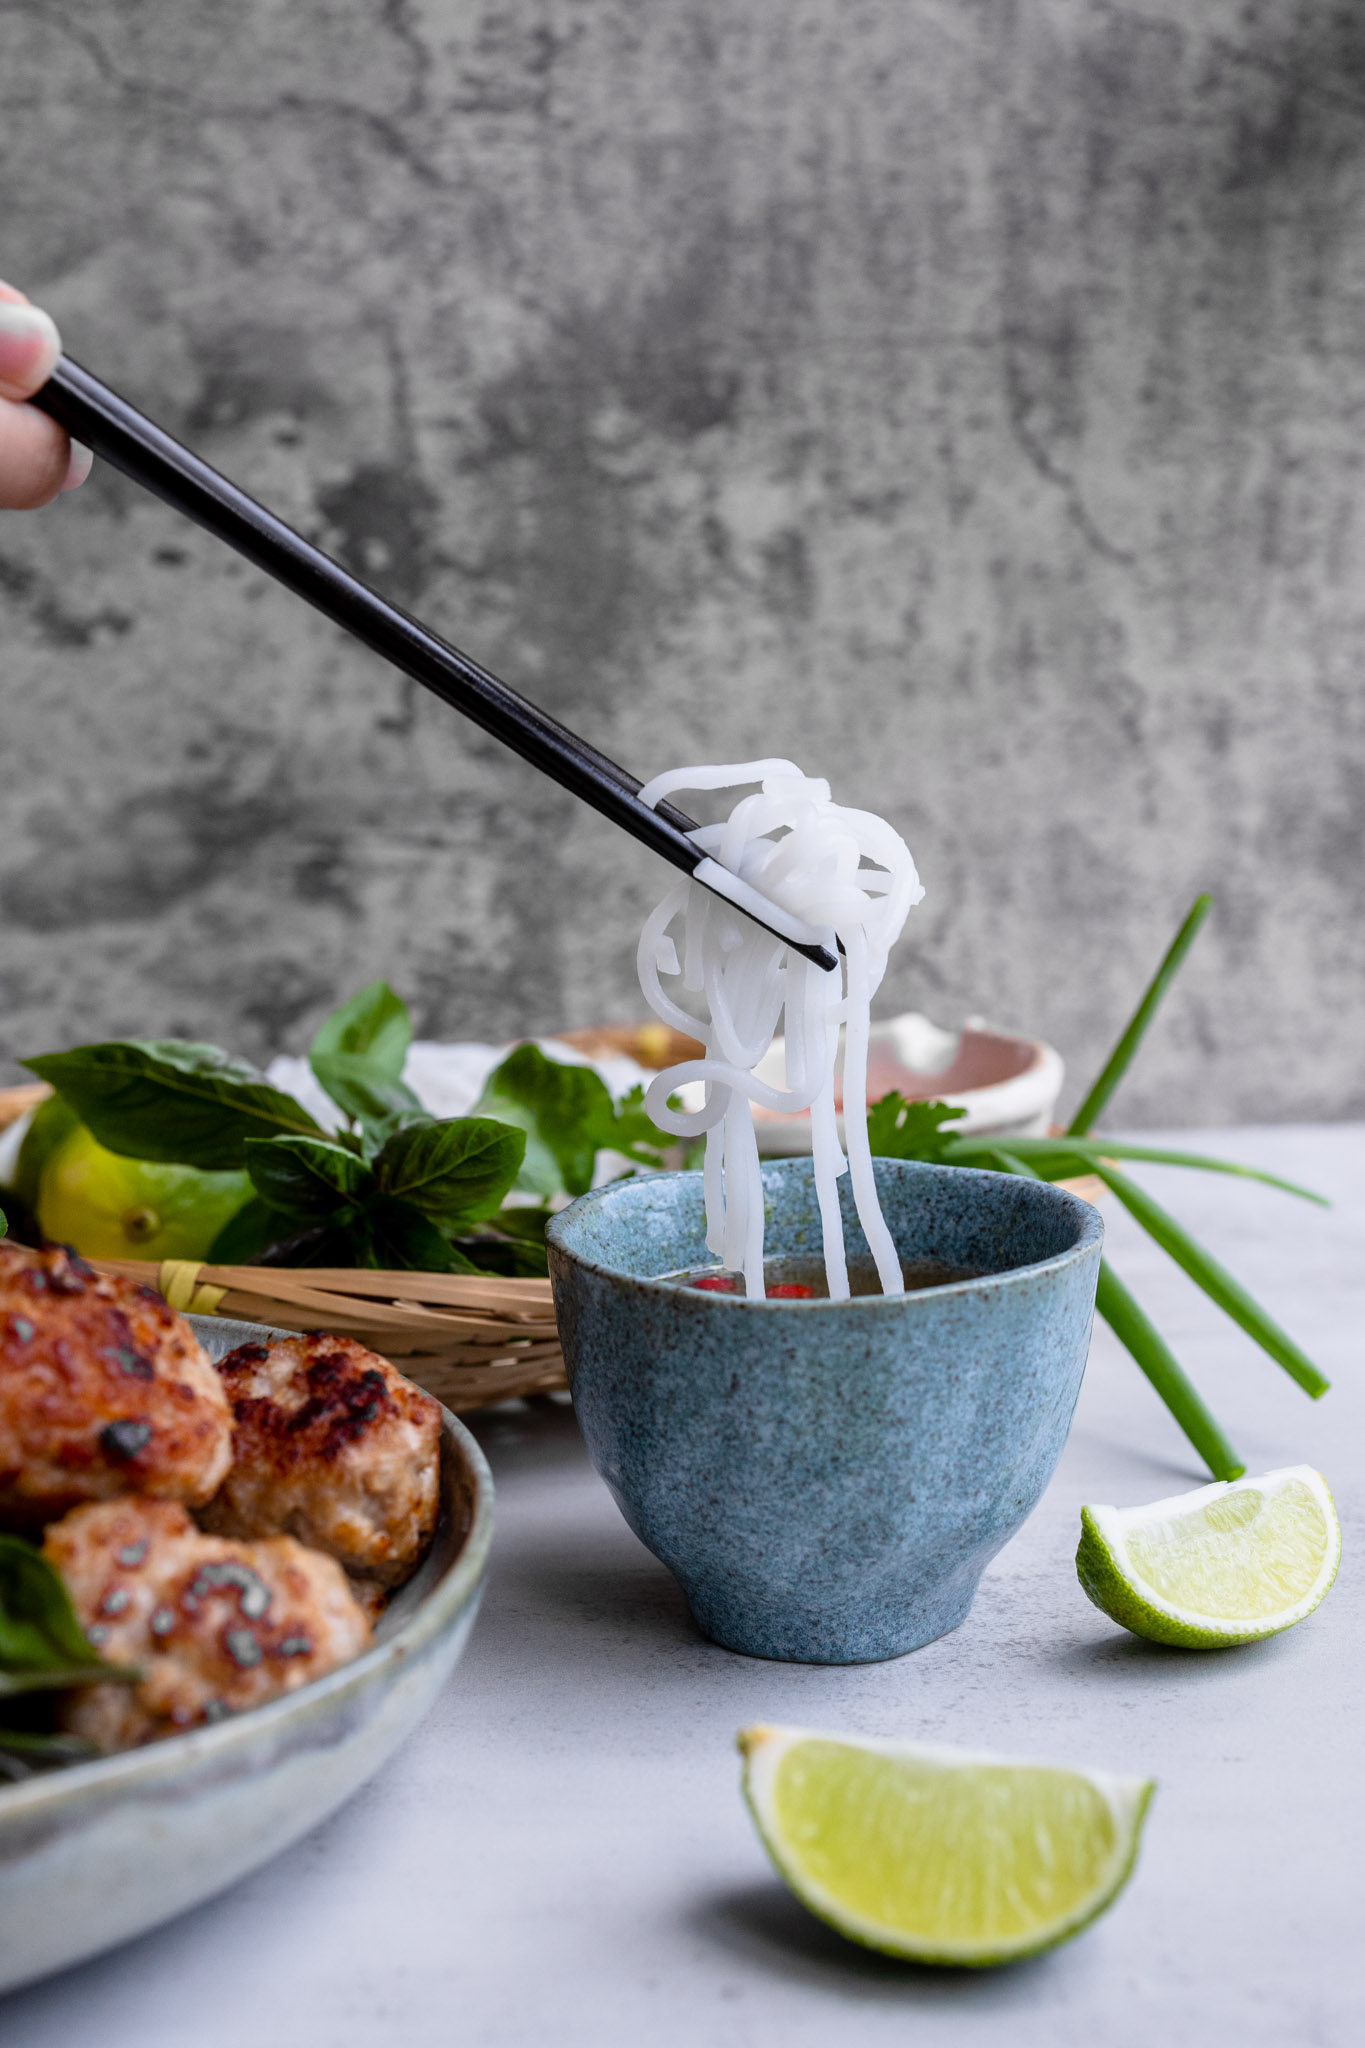
If ‘phở’ is known for a bowl of flat rice noodles with beef or chicken broth, ‘bún chả’ is round rice noodles served with a bowl of dipping sauce with grilled pork, and greens. This is exactly the recipe you need to recreate one of the most iconic street food dishes in Hanoi. These famous caramelised pork meatballs from the stress of Hanoi. Traditional Vietnamese food, made at home! This is an easy Vietnamese recipe that anyone can make that’s full of flavour.
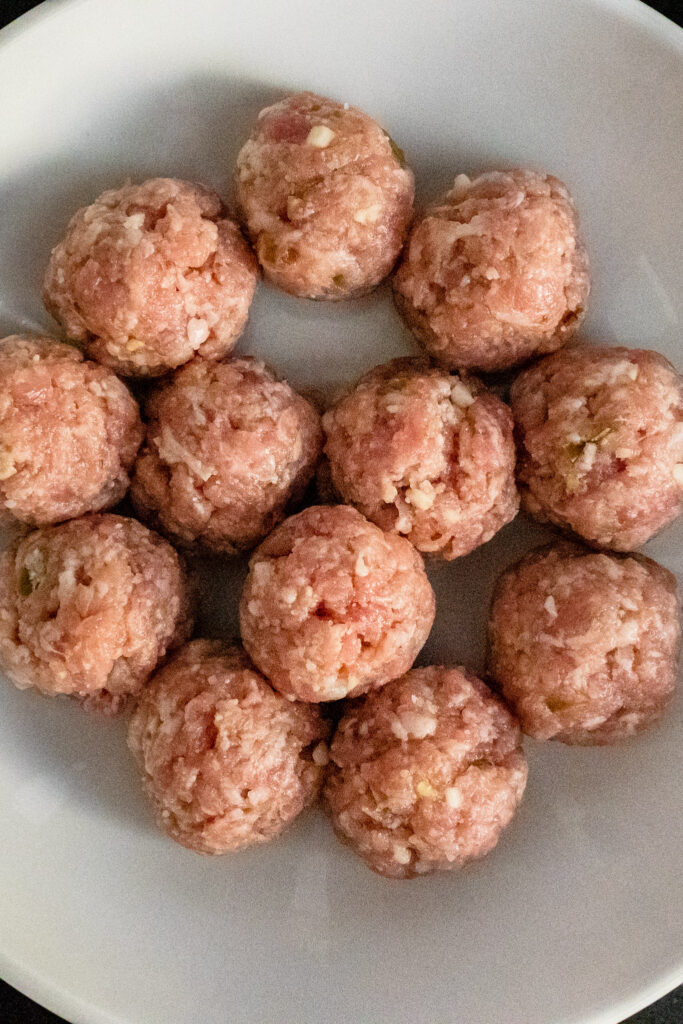
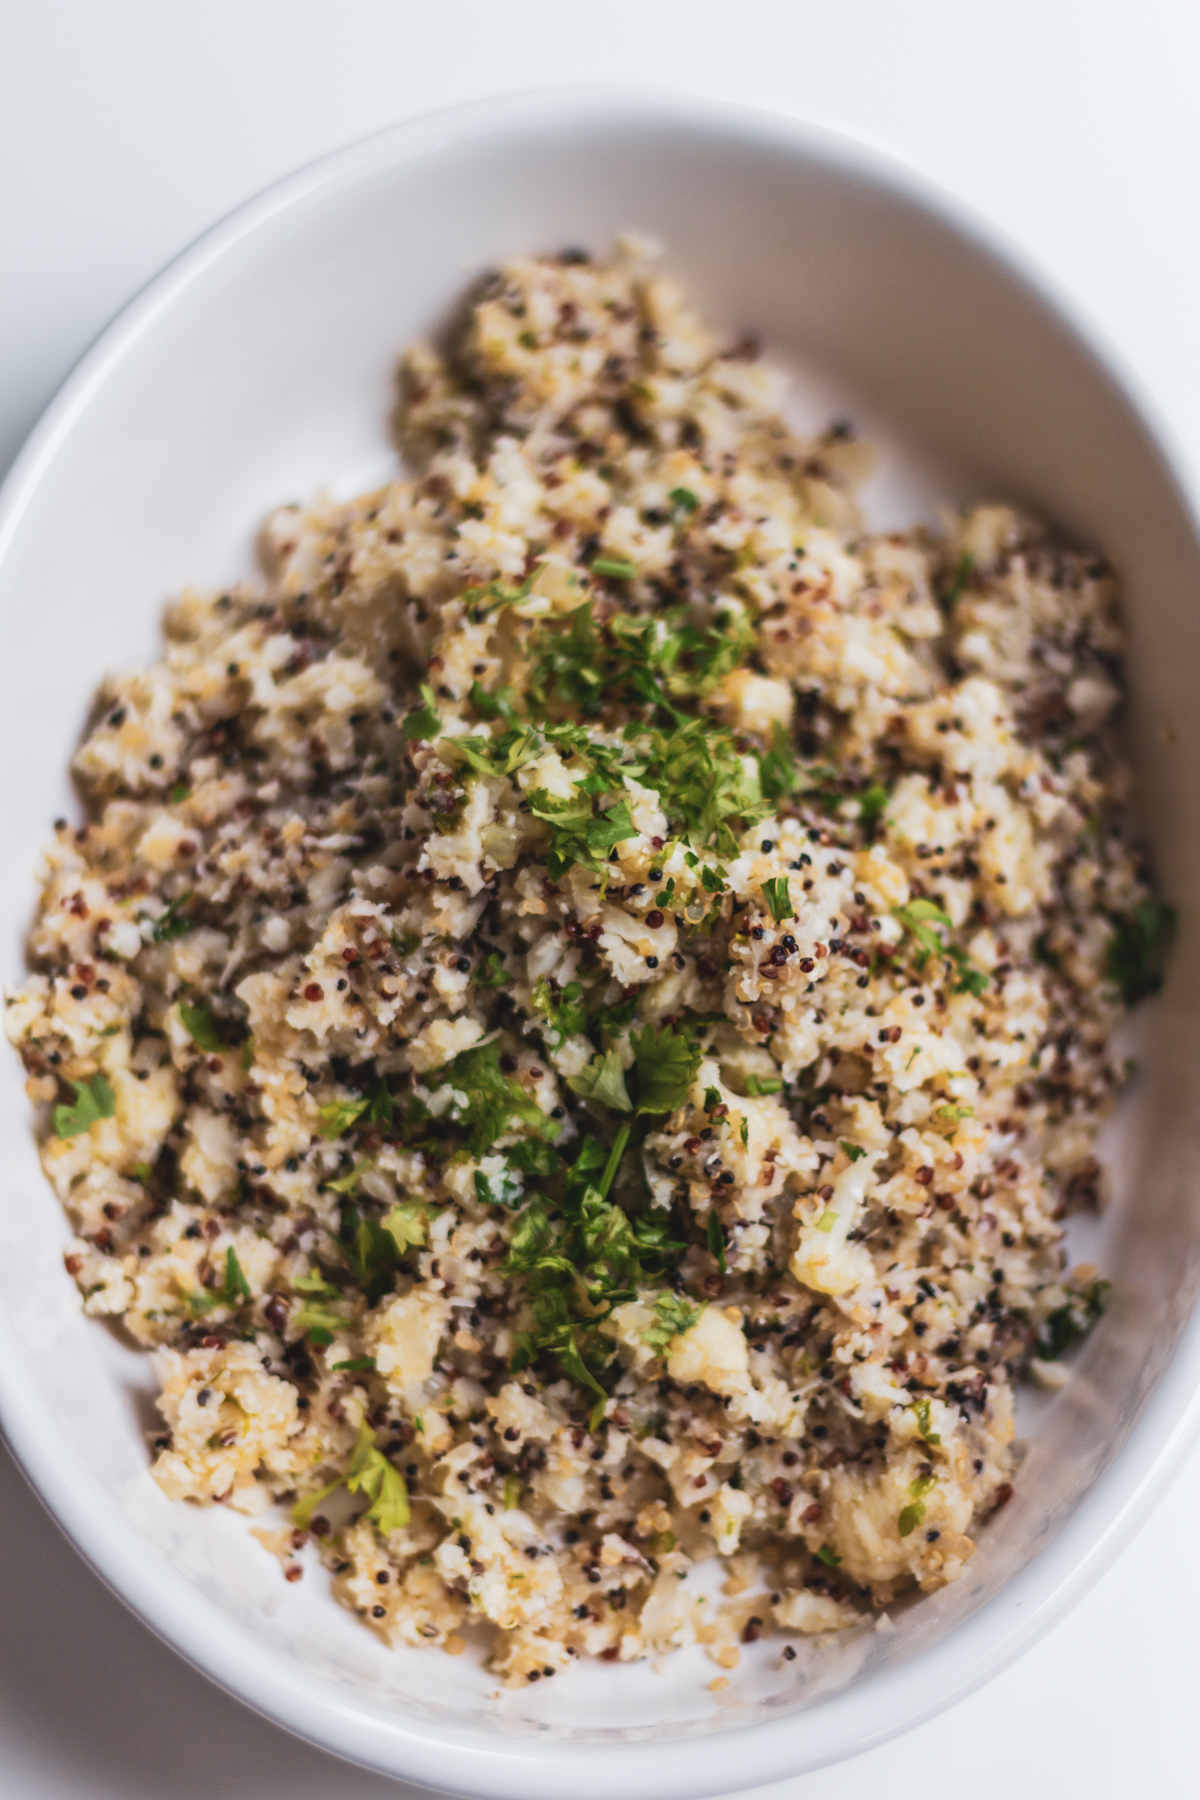
Making of the Meat Ball
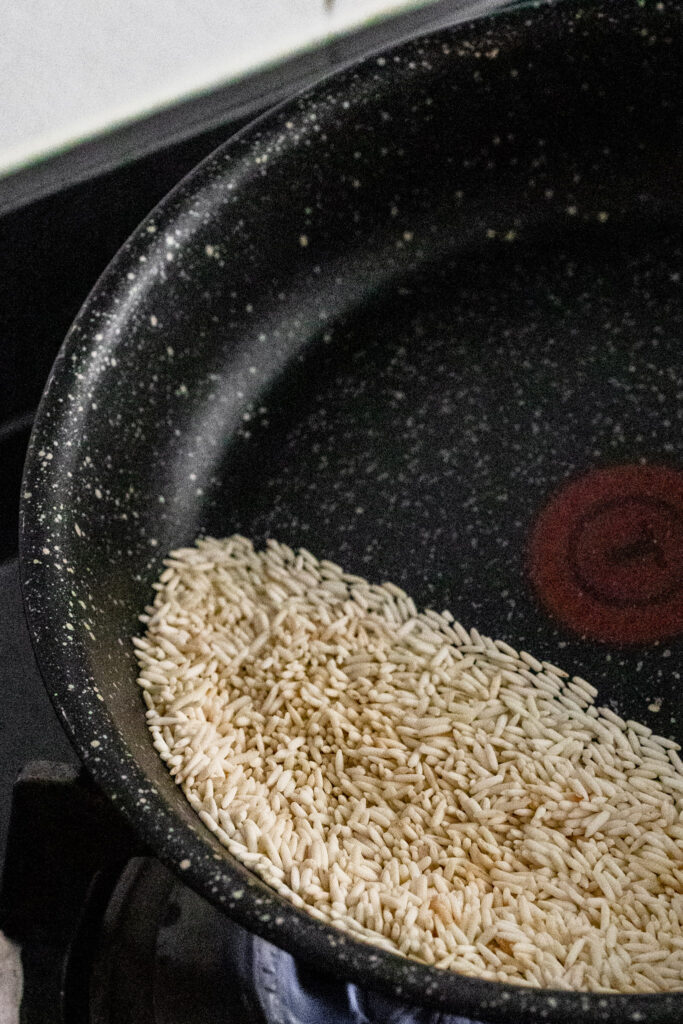
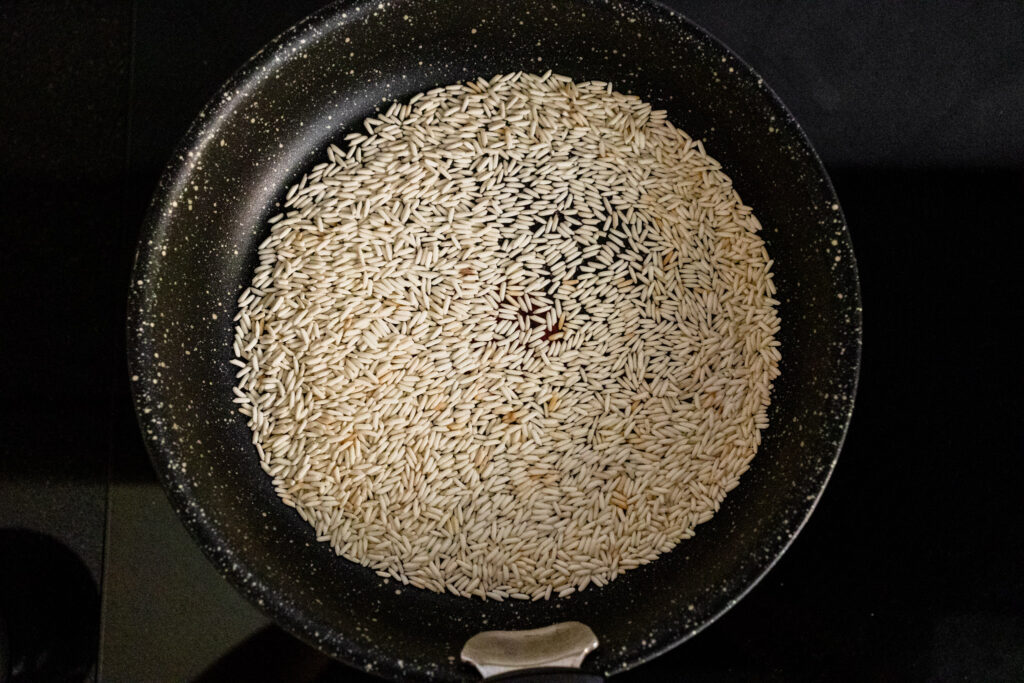
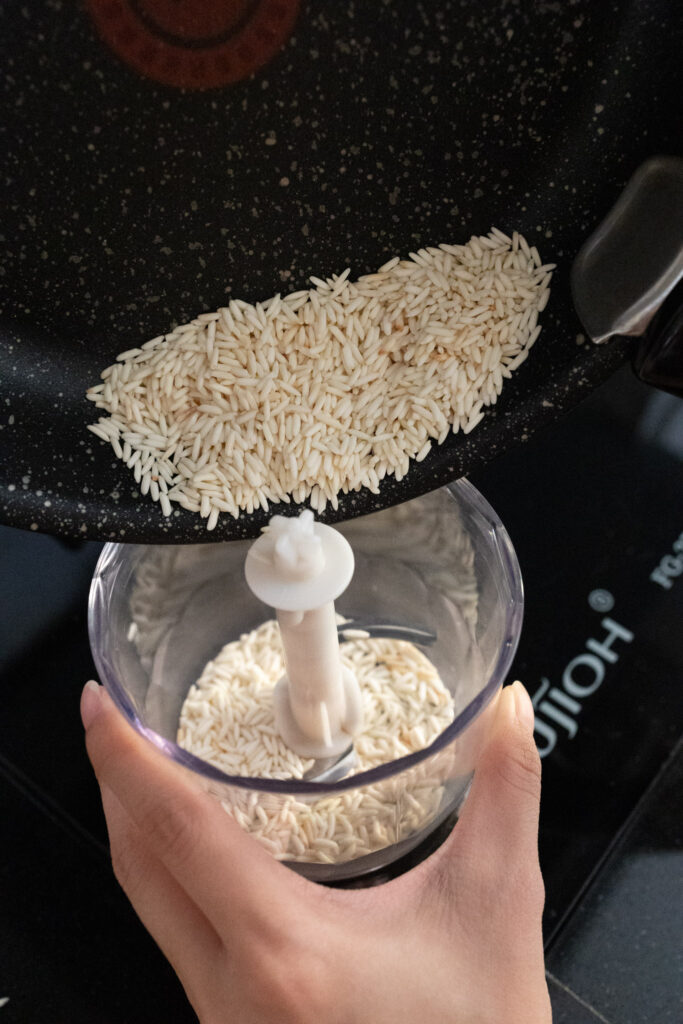
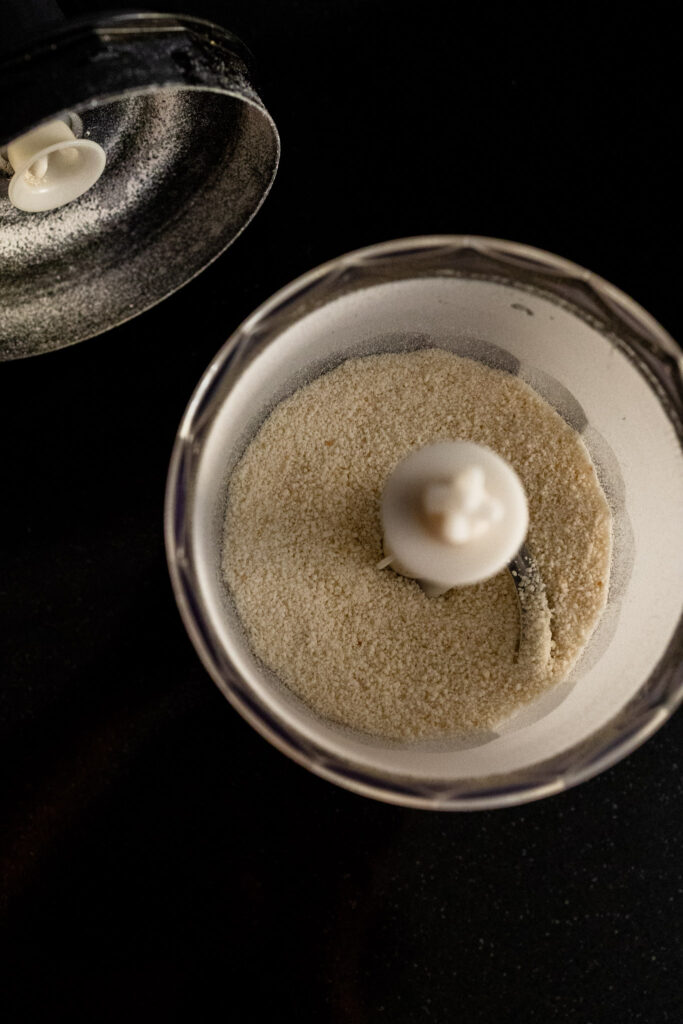
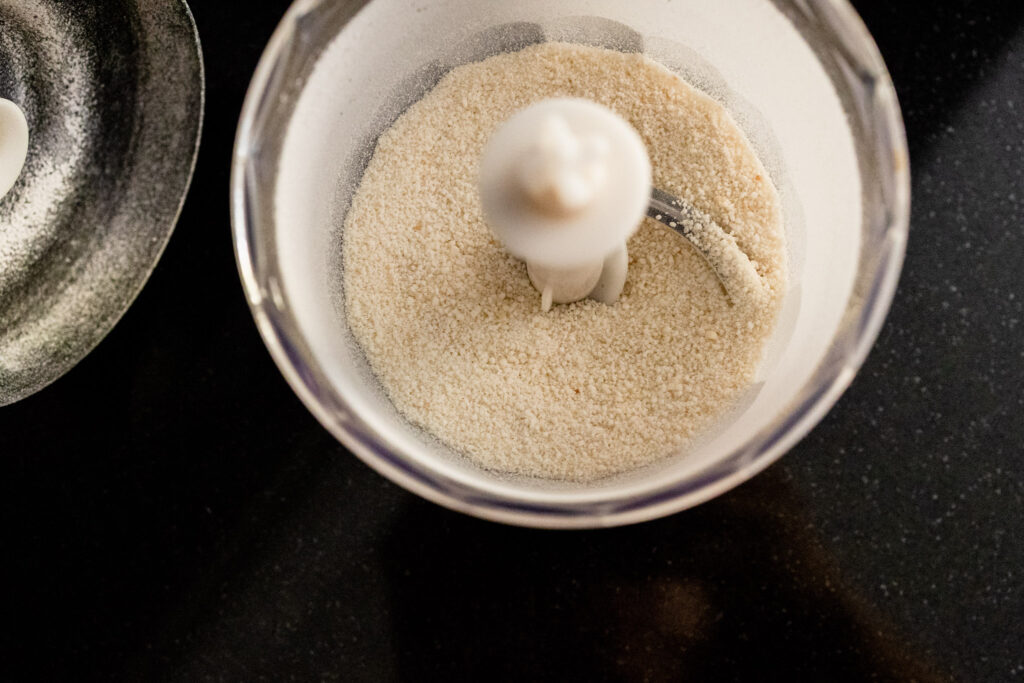
Instead of breadcrumbs, we use rice “flour” here, making this meatball gluten-free. The rice flour plays an important role here as it helps to bind the ingredients together to form a meatball like the use of a breadcrumb. What if I can’t find rice flour? If you do not have rice flour you can simply grind rice from your pantry. Each cup of rice will give you around 1 1/3 cup of rice flour. You can blend it straight with your machine, but we like to give a little toast to it before grinding them.
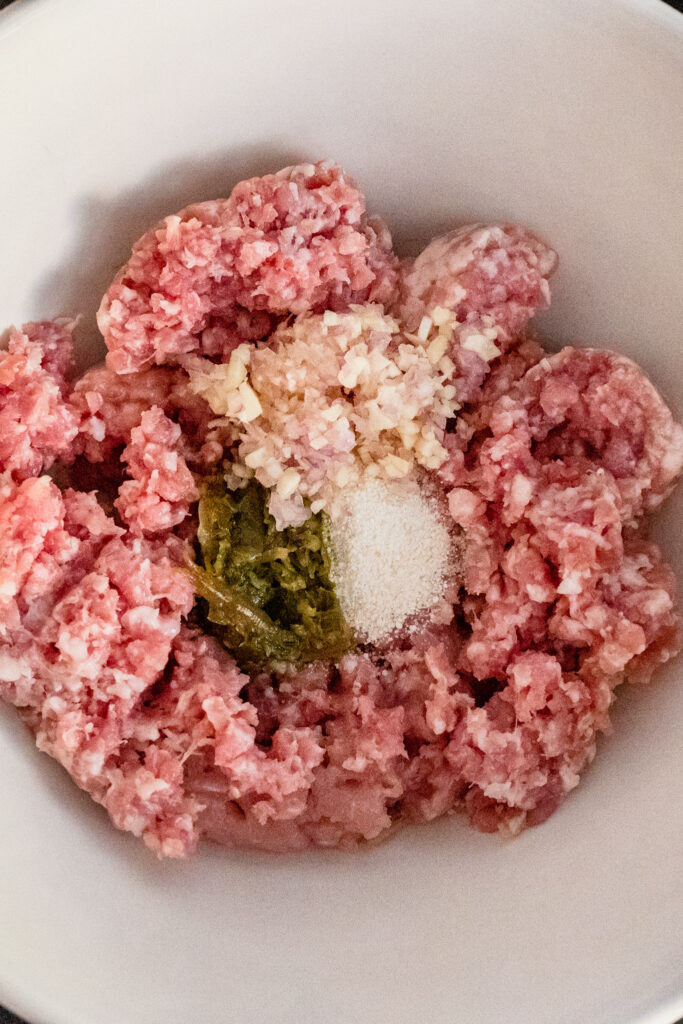
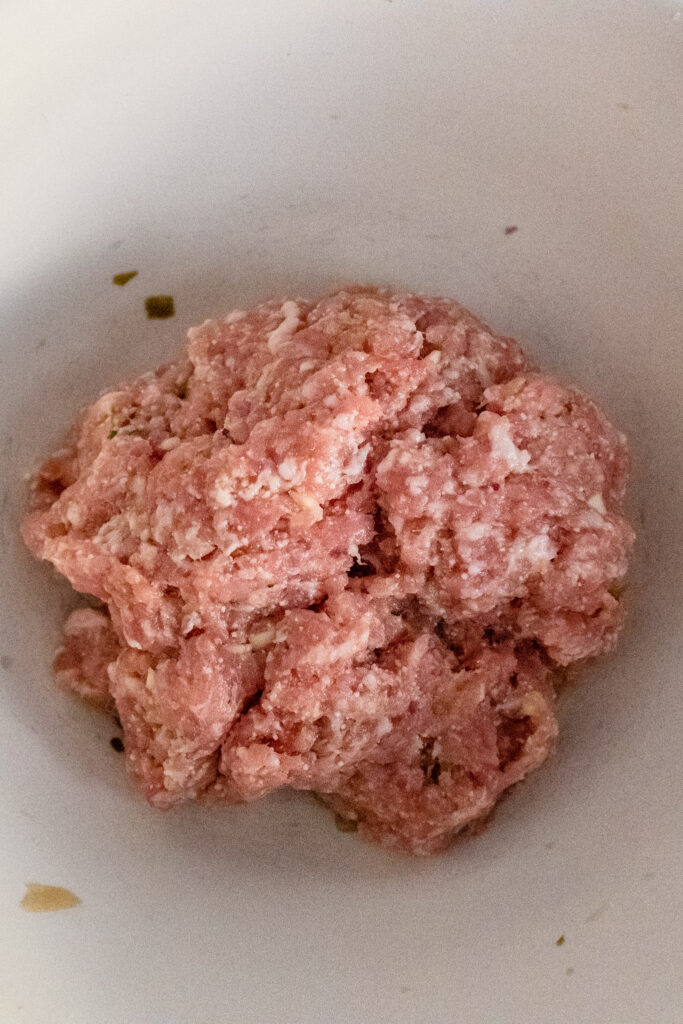
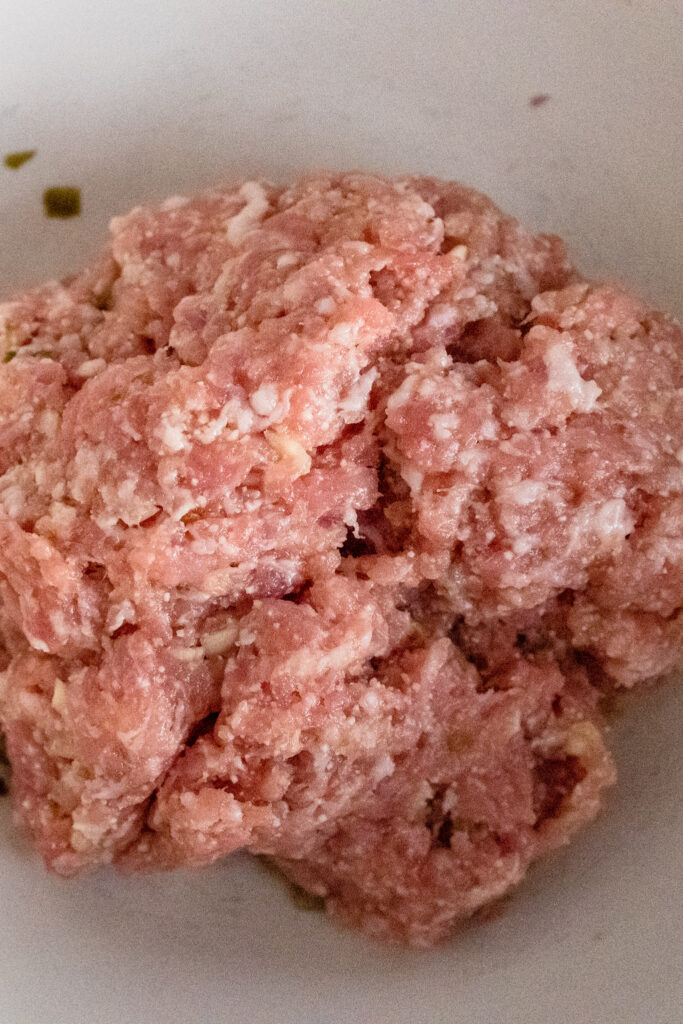
Usually, pork belly is used in the meatball, however, to make it simple for making them at home we use minced meat that contains 50% of fats and lean meat. This portion of minced meat allows the meatball to stay juicy. When you are ready with all the ingredients, mix them well in a bowl or a blender. Leave it aside allowing it to be marinated before forming into the shape of balls. The more you marinate, the more flavorful they will end up.
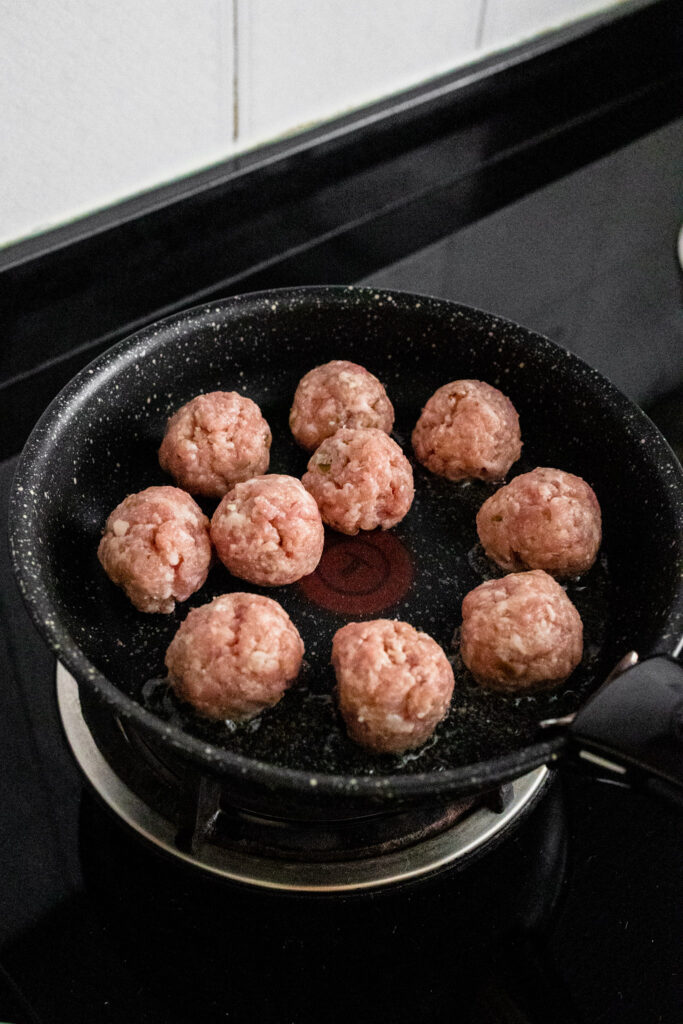
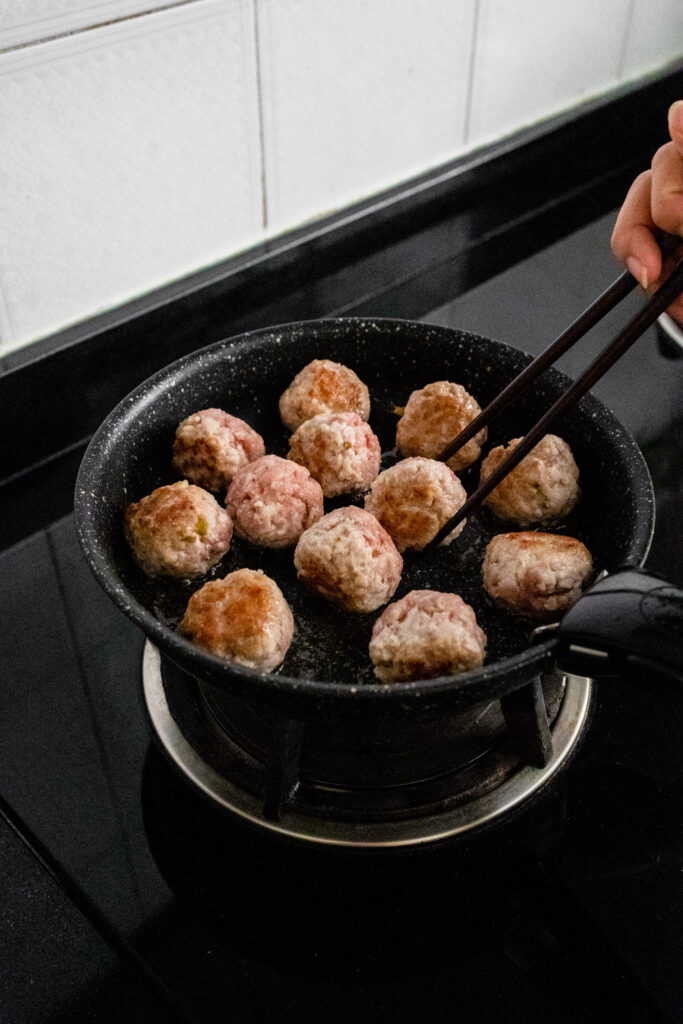
Heat just a little oil over medium-high heat and sear the patties till they get brown all over. Since they are small and flat, they just take 2-3 minutes per side to get golden brown all over. Cook the pork belly till it gets brown all over. This also happens pretty fast. Plate them out.
Choosing your noodles
As mentioned previously there are all kinds of noodles in Vietnamese food, from the phó (flat rice noodle) that we know to the hủ tiếu (tapioca rice stick) and bún (round rice noodle) that we use for this recipe. While it may seem hard to get the noodle in the supermarket, however, if I tell you bún is also the thick bee hoon we have in the Chinese fish noodle. Where it is available in all supermarkets and wet markets. How to cook them? Simply soak in boiling water for a couple of minutes, then drain.
Having the Right Greens
Fresh vegetables and herbs are an essential part of Vietnamese food, and you’ll get large bowls served alongside almost every meal. Sweet basil, mint and coriander/cilantro are the most common, as well as pickled vegetables.
But this is the sort of recipe that’s terrifically versatile that will work well with many types of vegetables. Shredded cabbage or lettuce, or other leafy greens. Finely sliced cucumber, green beans, red radish, cherry tomatoes, and even asparagus. Most fresh vegetables will work great in this!
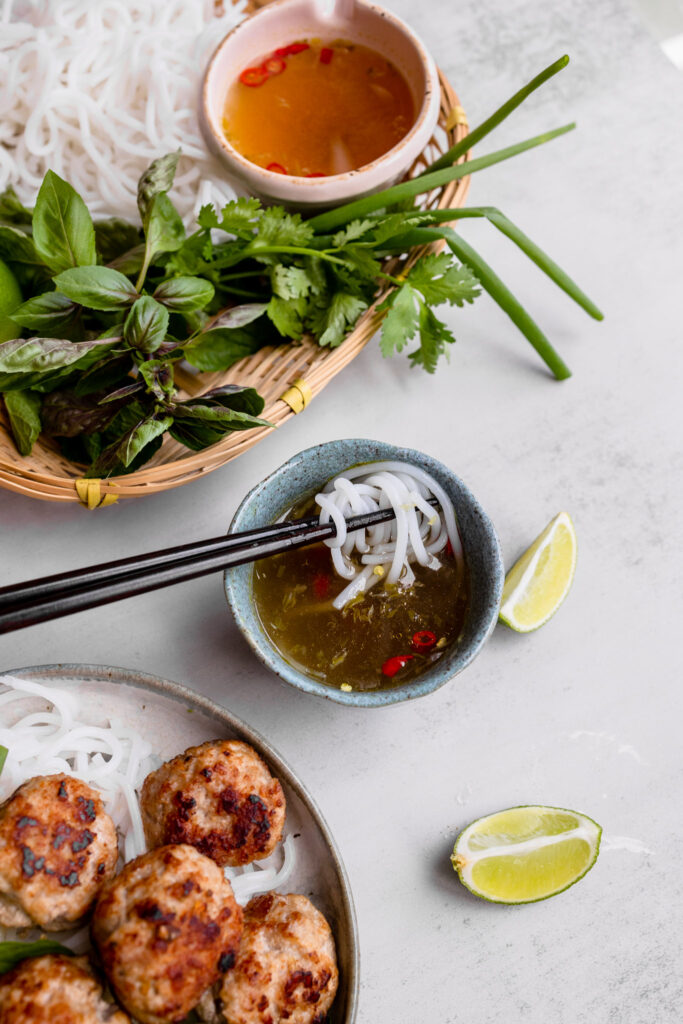
The Soul of Bun Cha – Nuoc Cham
Bun Cha Hanoi’s dipping sauce has a slightly sweeter taste. Because of the mild version, the grilled meats sit in the sauce in Bun Cha Hanoi, and the sauce is often referred to as broth. You will often see granules of delicious fat floating on top of the broth. I have many times picked up the bowl and slurped the meaty, sweet, sour, spicy goodness of the broth.
How do you enjoy Bún Chá?
Bun Cha Hanoi is served with grilled pork meatballs, vermicelli noodles, fresh herbs and lettuce and dipping sauce. The dipping sauce usually contains thinly sliced carrots and green papaya to provide more crunch. You can also add bird’s eye chilli to the dipping sauce for some heat. The grilled pork meatballs are put directly in the lime fish sauce dipping (nuoc cham) when served. From this point, there are two ways to eat it.
The first way to enjoy this dish, also the way most Hanoians eat it, is to use chopsticks to pick up some noodles and dip them into the sauce, then eat with meatballs and herbs.
The second way is to add vermicelli noodles, lettuce and herbs to a serving bowl, spoon over the dipping sauce with meatballs into the bowl, and then eat.
Regardless of the way you choose to eat it, one bite will bring so many flavours, aromas and textures to your tastebuds. We hope you enjoy this recipe as we do.
A handful of coriander/cilantro sprigs, mint and basil leaves
Sliced red chilli, lime wedges (optional)
Wedged Limes
Methods
Sauce: Mix ingredients. Set aside 10 minutes+.
Noodles: Pour over boiling water and soak per packet directions. Drain, set aside.
Meatballs
Mix all ingredients except oil until combined.
Shape into 6 mini hamburger patties with your hands.
Heat oil in a skillet over medium-high heat. Add patties and cook for 2 1/2 minutes or until golden. Flip, cook 2 minutes then remove.
Assemble Bowl
Place noodles in a bowl. Top with a handful of your choice of greens. Place meatballs on top. Spoon over a generous amount of sauce (it’s supposed to be like a soup broth) or you can enjoy the sauce in a dipping bowl, eat and be happy!
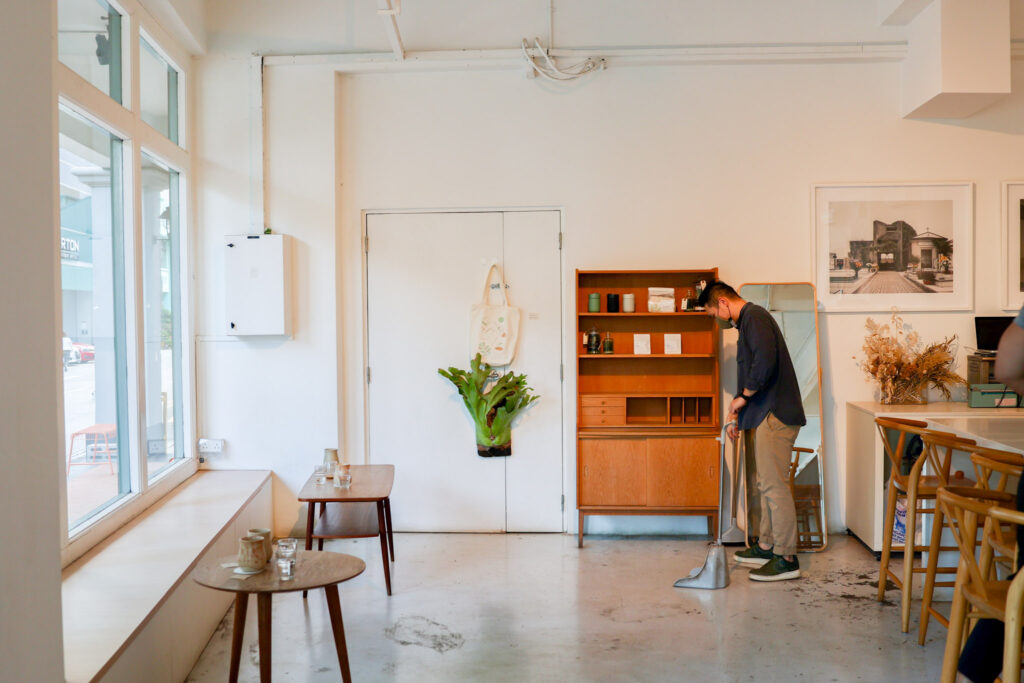
It’s weird for us to post it, but who doesn’t have a lazy kind of day? We were still enjoying the long weekend until yesterday. It is a luxury to have such a long break. However, it is also challenging to find activities to do every day, so we just relax at home with coffee and snacks (also Netflix). Let us walk you through a lazy day at home. Both of us, usually kick-start the day with a cleansing routine. Angela will also begin with a 45-minute indoor cycle. We believed that face and body should be cleaned regularly, especially with plain water.
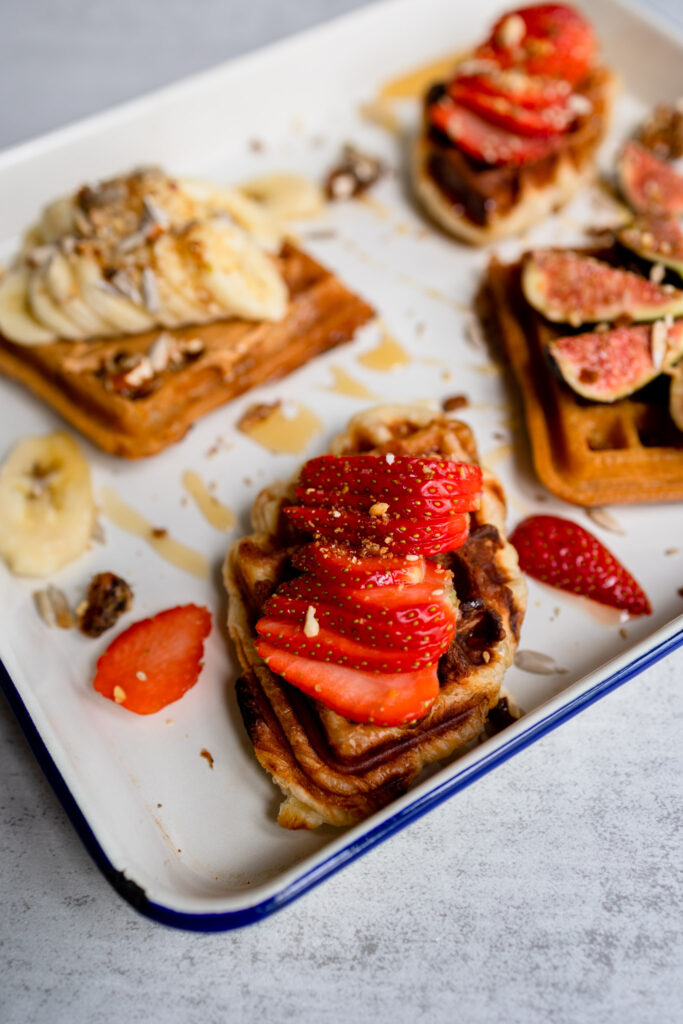
As sister, we are different in general, thus whenever we have breakfast/brunch together we will like to plan ahead, it is important to have a good breakfast. Here are some of our all-time favourite breakfast recipes.
In the past, Angela preferred tea over coffee, but now she appreciates coffee too. Lately, both of us appreciate coffee in this new way – filter. We used to talk a lot about tea but ever since we drink coffee, we did some study on it.
We are now aware of the properties of coffee and the positive effects of caffeine on our bodies. To name just a few:
Creates energy, stimulates intelligence and fosters concentration
It is a source of natural antioxidants
It helps to withstand physical efforts
It can help reduce the risk of some diseases
It can help eliminate fat
However, there are other benefits too. While not directly related to coffee, these rewards include a positive atmosphere of interaction and socialization that is created during the “coffee break” whether it’s at a coffee shop or at a vending machine. However, since we are at home, a cup of drip coffee of our favourite blend is always a good idea.
At times we also like to enjoy it with some of our favourite snacks, here we have a kind of Korean steamed rice cake, which is easy to heat when we are making our dripped coffee, and our coffee break is ready in no fuss.
When you’ve been working from home for a long time – or if it’s become part of your “new normal” since the COVID-19 pandemic began – working remotely can come with some unique changes. We usually have snack time after screen time to relieve our tired eyes. For those who don’t like filter coffee, here are some of our favourite break-time snacks and drinks.
Modern trends have tended toward flat, blank walls and a focus on color to bring a room together, but adding a unique wall texture to a room, or even to a single accent wall, can bring a personality to your home that a color choice simply cannot.
Texturing can even help hide architectural errors, saving you costly repairs by allowing an uneven wall or ceiling to simply fade into an attractive textured pattern.
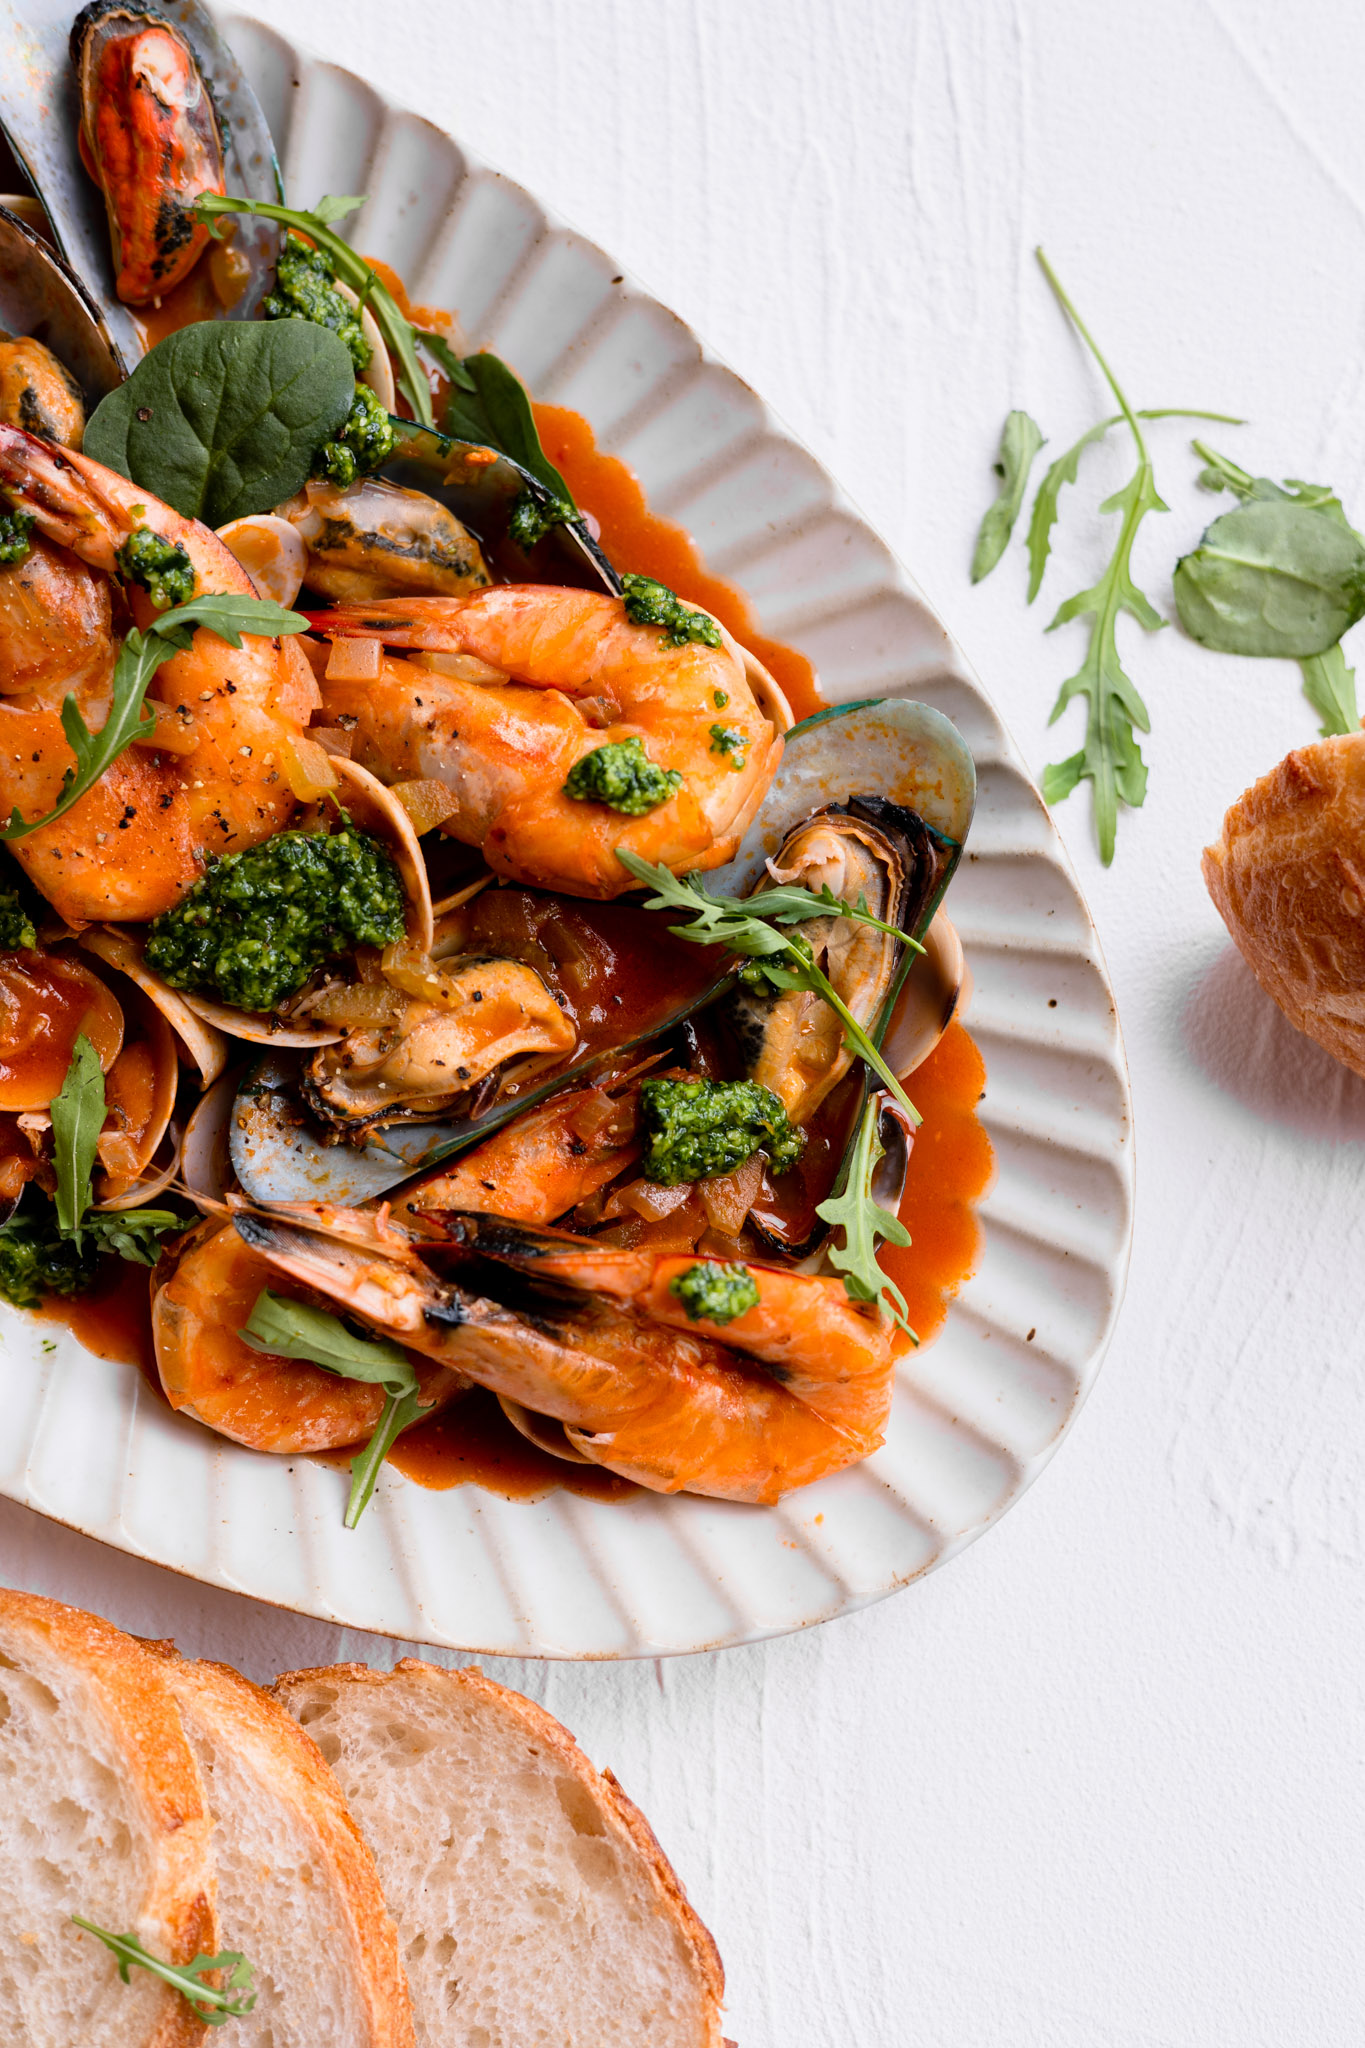
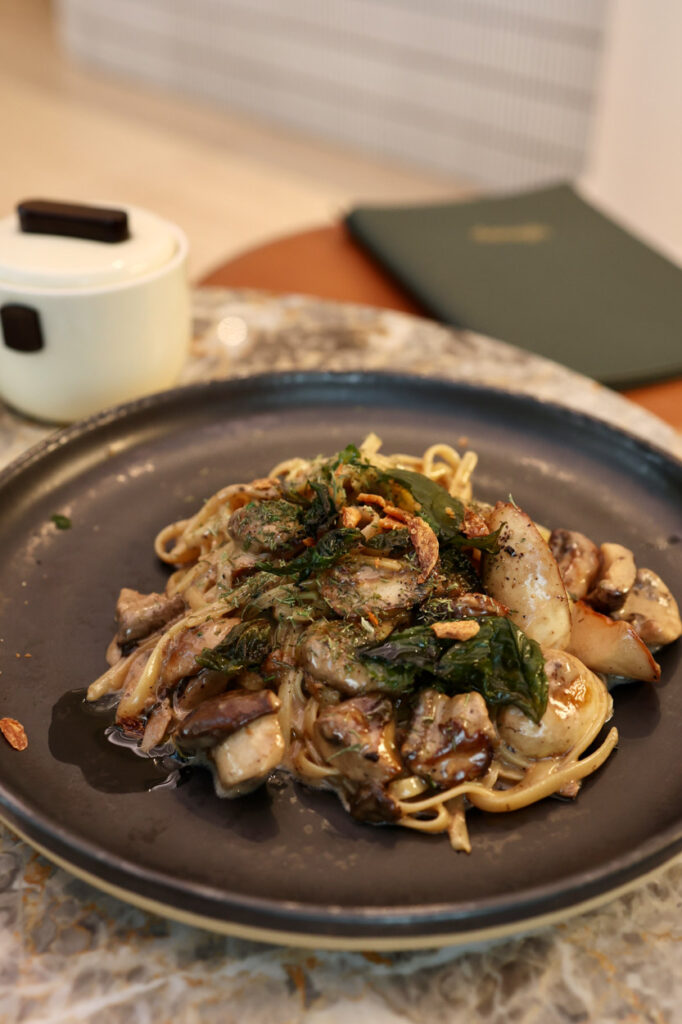
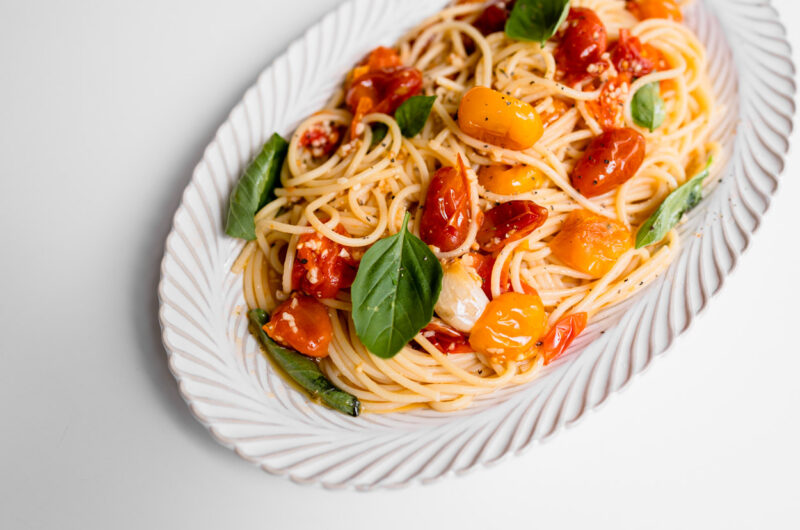
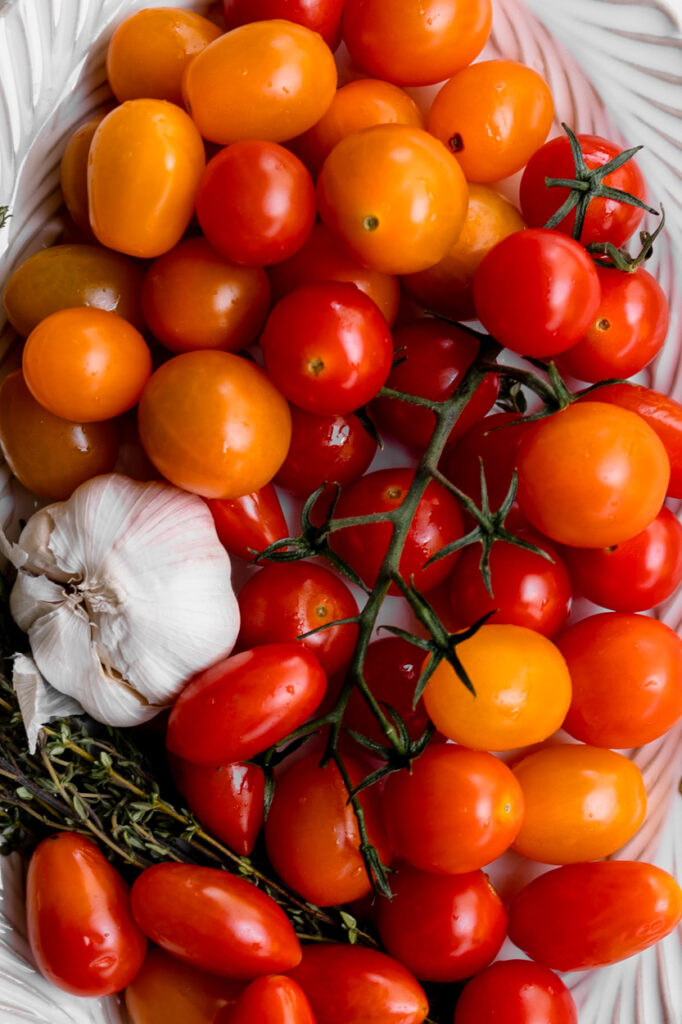
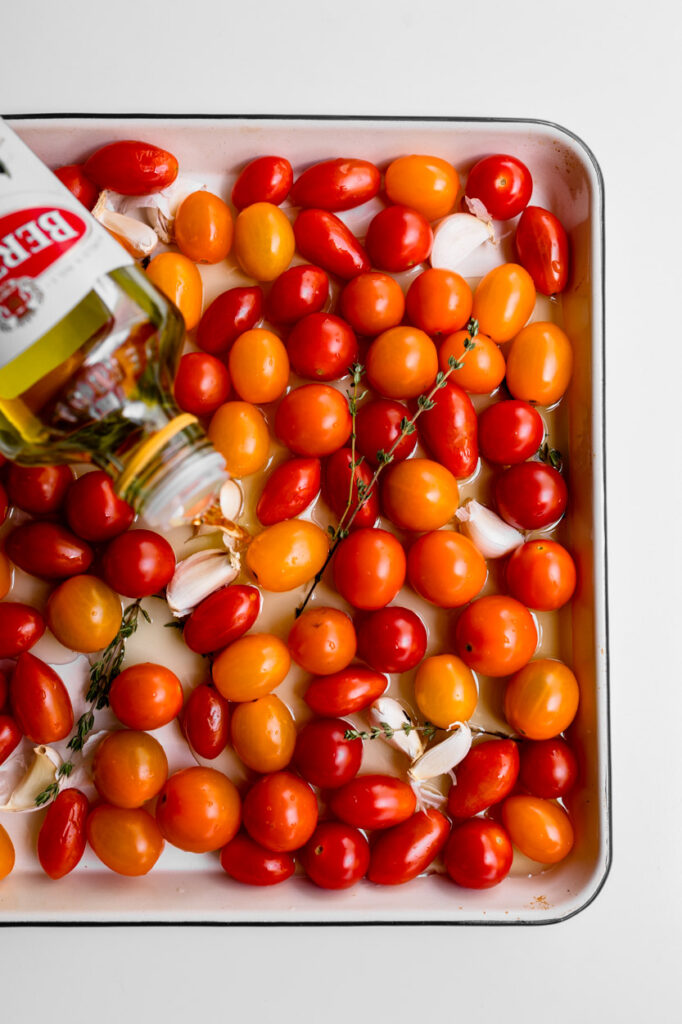
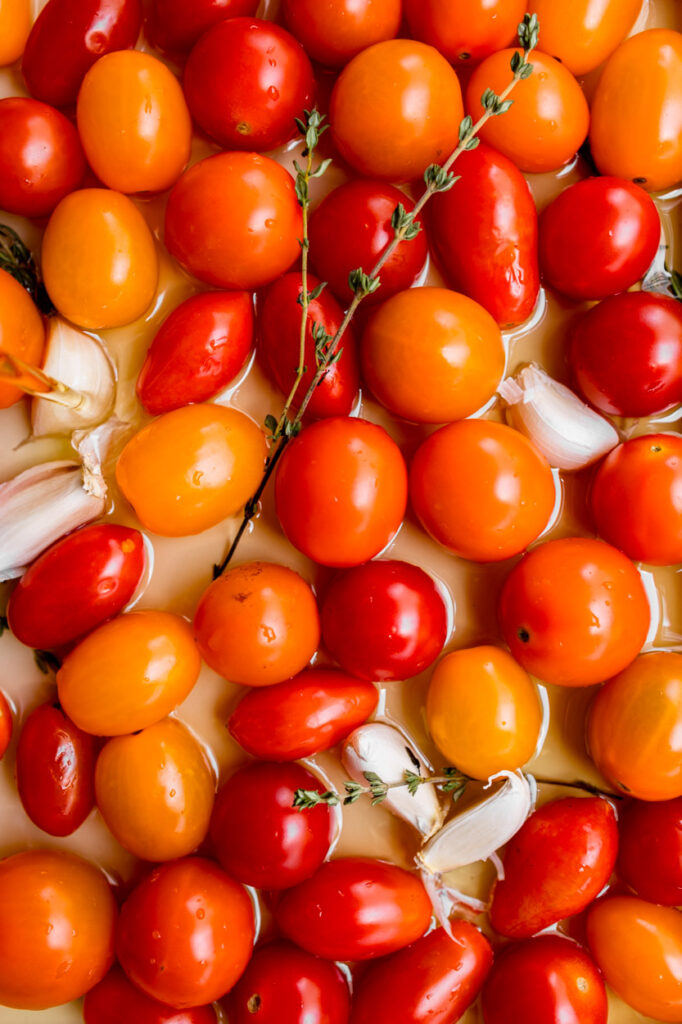
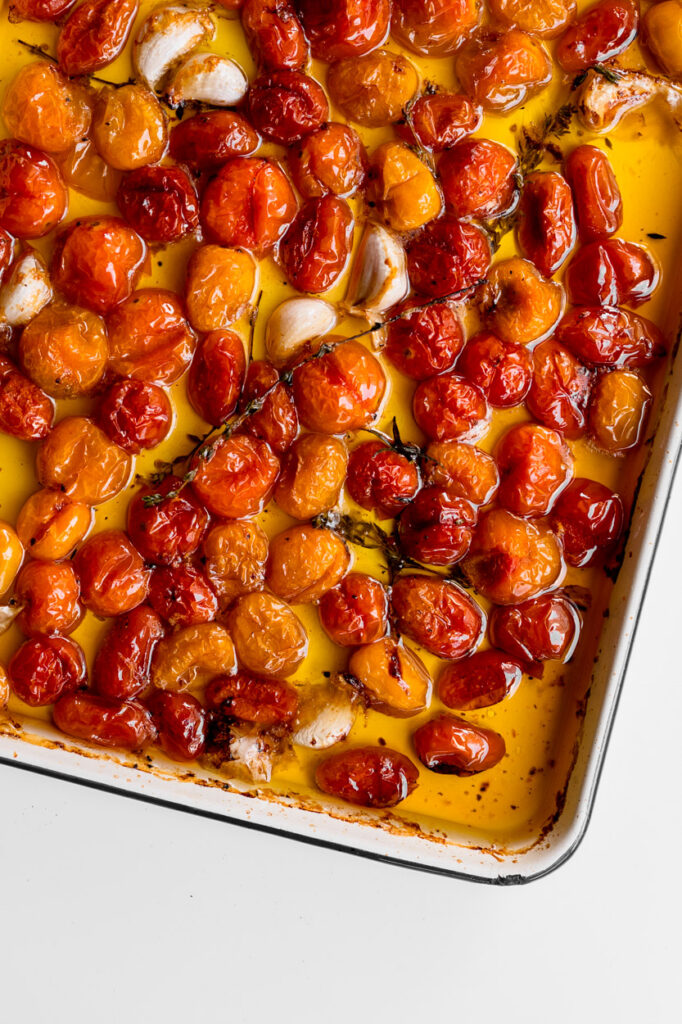
It’s always rare to get fresh seafood in the wet market, but when we do we surely pick up some and make something comfortable for our lunch. Though the weather is getting hotter officially, there are times when it rains heavily and is still cool where we are. This Tomato Seafood Stew seems the perfect meal to help bridge the gap.
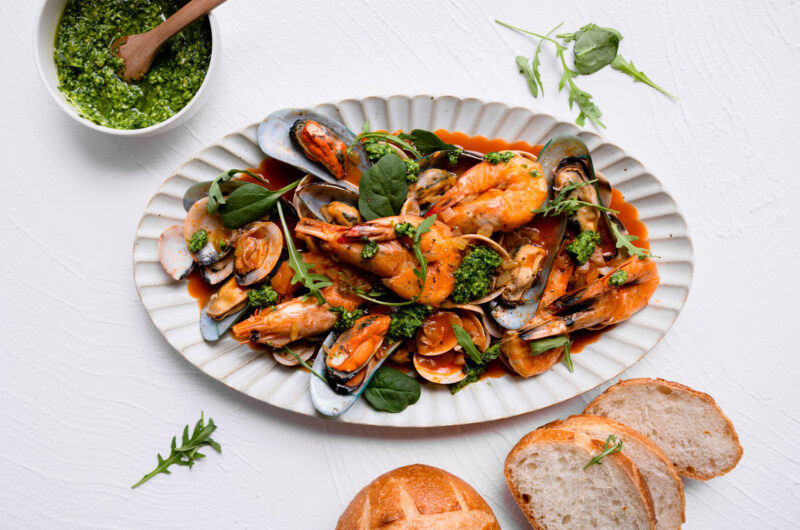
Caramelized onion adds a subtle sweetness, fresh tomatoes add tanginess, while citrus rocket pesto (which is optional) kicks up the flavour by adding the perfect amount of heat and heartiness. Serve this with crusty bread to mop up all the juices, this is the perfect dinner. If opting for gluten-free, try adding cannellini beans for a little extra heartiness instead of the bread.
Citrus Rocket Pesto
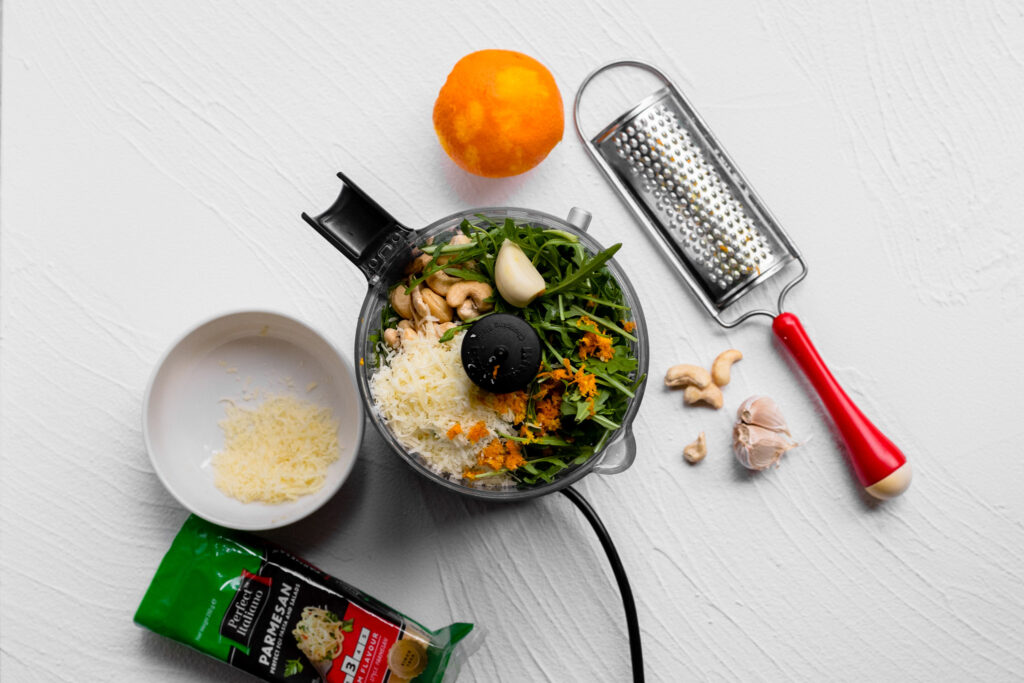
Pesto is one of my favourite ways to bring bags of flavour to a dish with minimal effort, and this Rocket Pesto is the latest addition to my pesto recipe collection. The fast and easy pesto is packed with the fresh herby taste of rocket (arugula) with a little zing of orange.
As we mentioned, the pesto is completely optional but really adds a note of citrus freshness that goes so well with the onion and spicy notes of the stew. You can also use it on the bread. But if you are like me that appreciate contrast and texture in your foods, this pesto is for you! Compare to many of our pestos where we use basil, and parsley as the base we use rockets here where it has a spicy note added to the dishes.
What seafood to use?
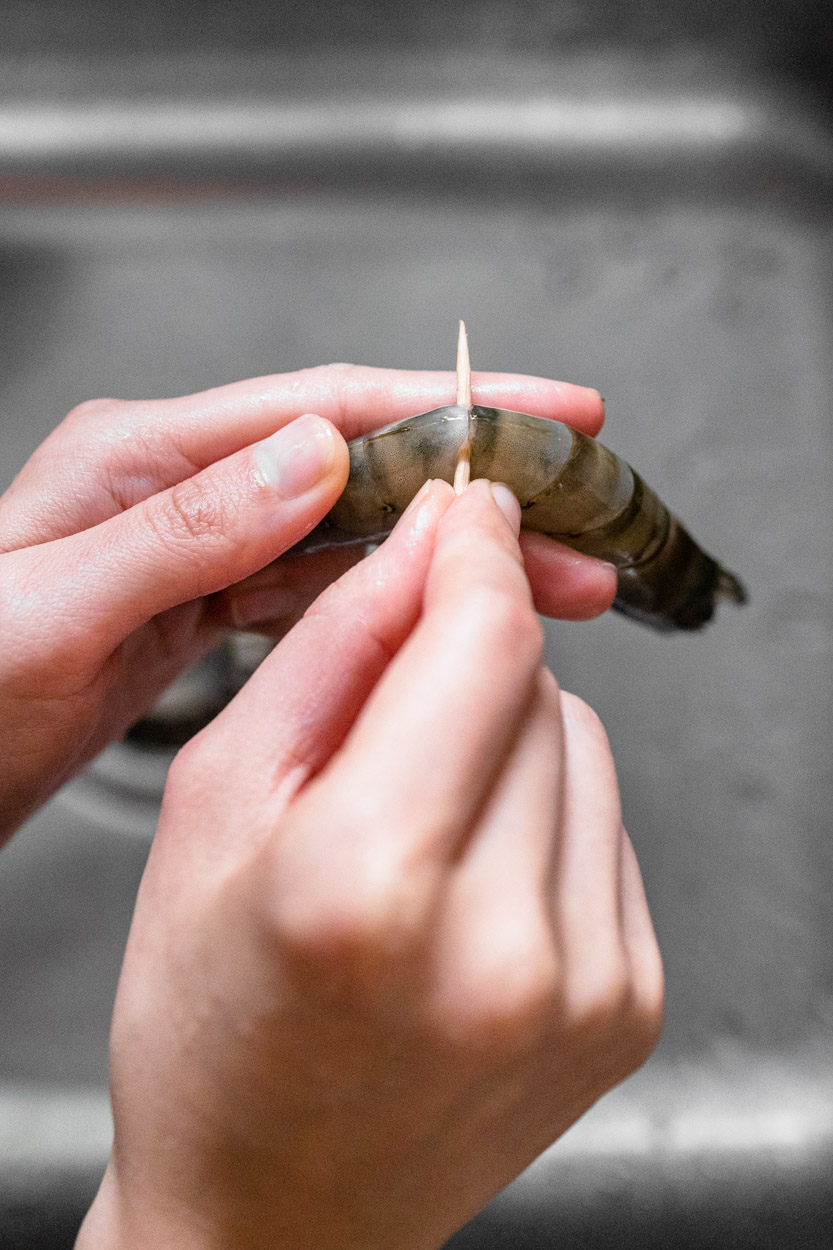
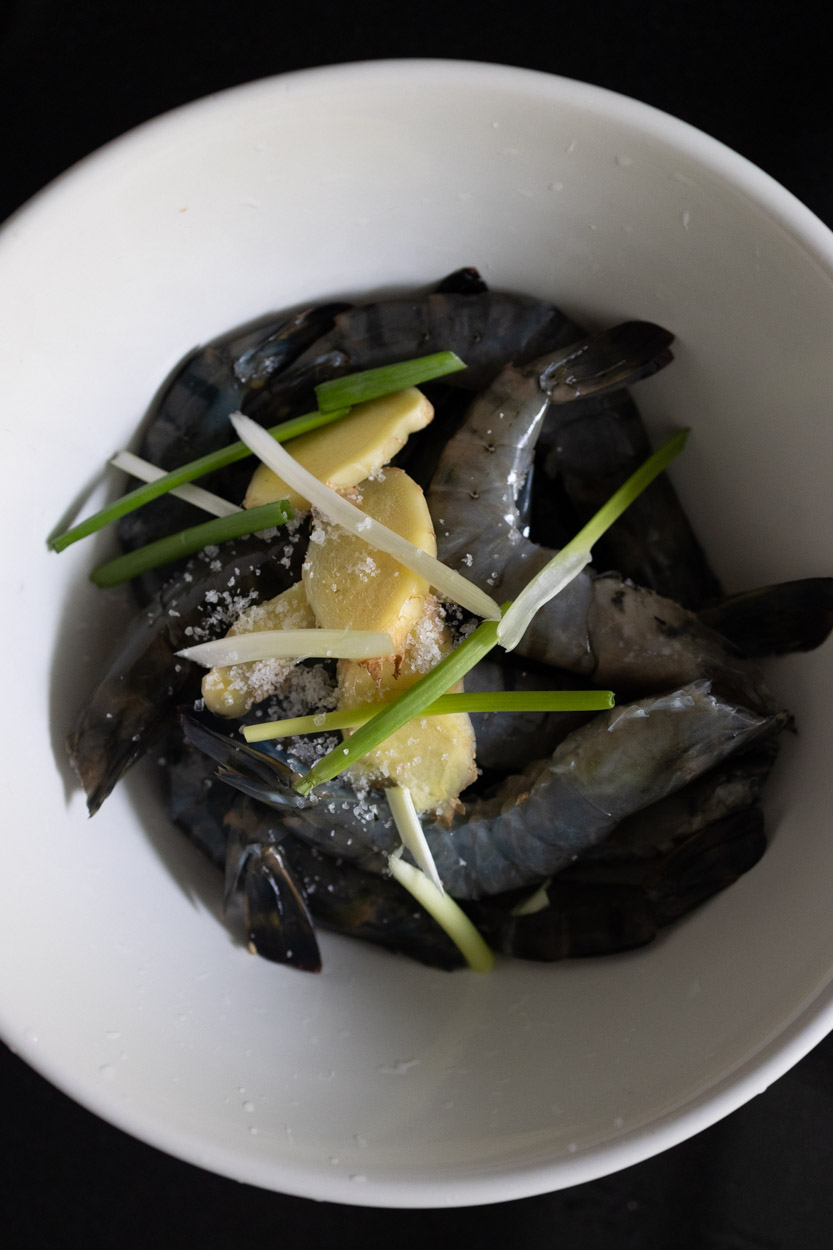
Again, we like being flexible in our recipe, you can add or remove the seafood to your preferences. In order case, we use prawns, clam and mussels. However, we highly encourage you to add seafood like scallops, fish or even chorizo if you want to add more spice to it.
If you are working with frozen seafood where we do at times, you need to thaw everything before making this seafood stew, because you don’t want the extra liquid. we will submerge frozen scallops and shrimps in very hot tap water for several minutes, then discard the water and squeeze them with a paper towel (we do it even in the same bowl) to remove the excess. Then we season with salt or whatever seasoning I’ll be using that day.
The condiments play an important role here
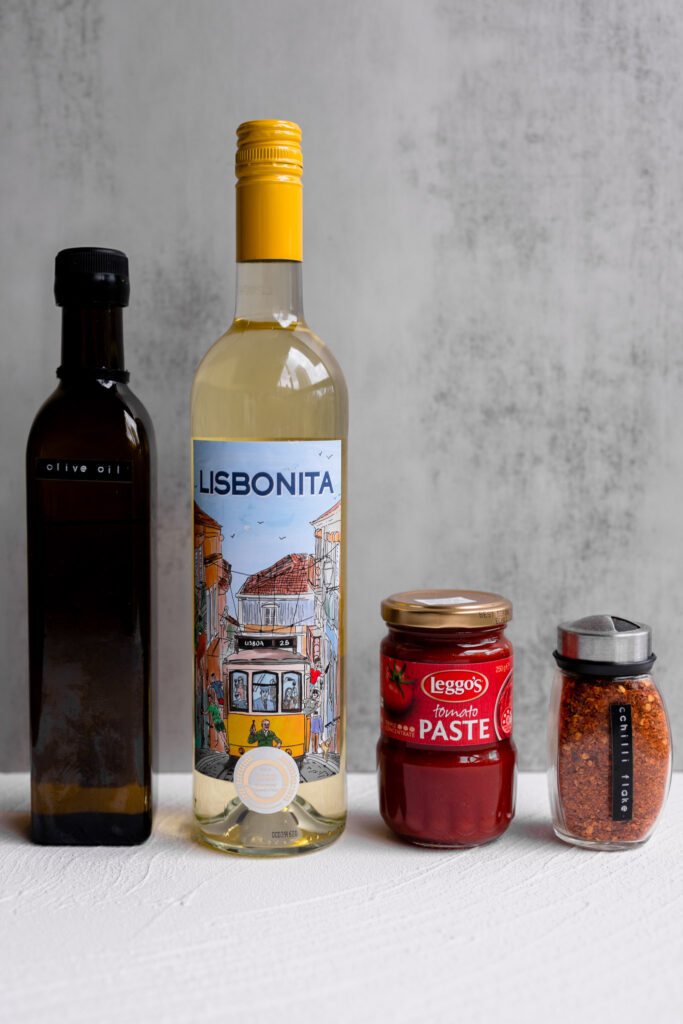
Tomato Paste: Since this stew has a tomato-based sauce, we highly recommend using a high-quality tomato sauce. We used Leggo’s tomato sauce, it’s the tomato sauce we’ve been using for many years to cook any tomato-based dish! It’s super fresh, thick and made 100% from pure tomatoes. If you love food you probably know this brand and its quality by now, and if you haven’t heard of it by now you really need to cook with it and taste by yourself!
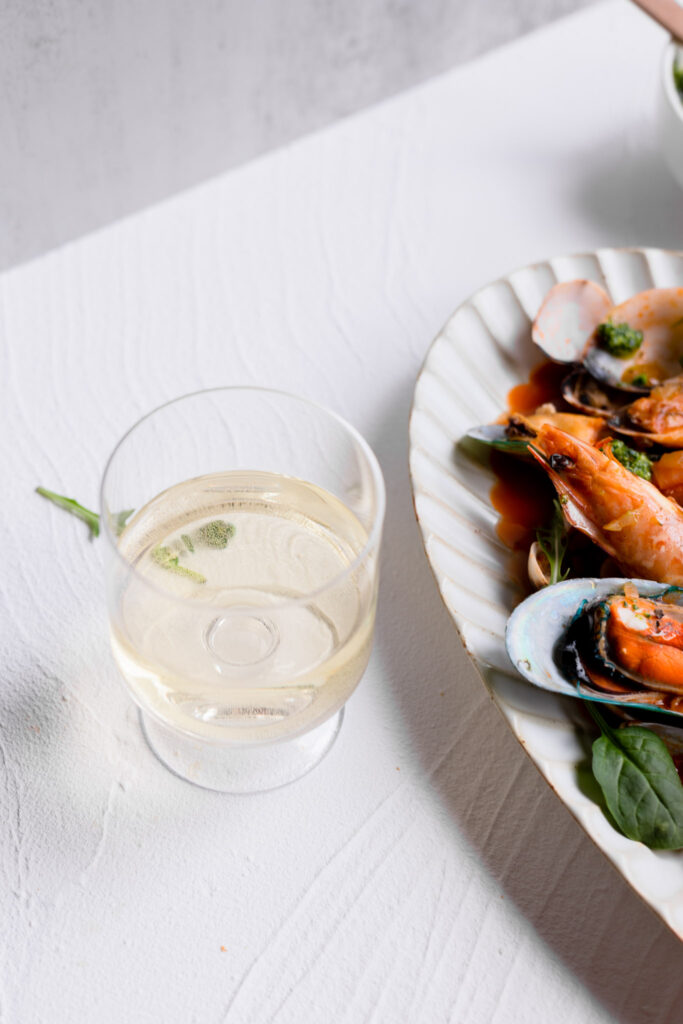
White Wine: If you can’t find a good Lisbonita wine, you can use another white wine with similar notes such as a Sauvignon Blanc. A good bottle of wine does make a difference, especially in seafood. In the past, we uses cooking white wine, and it tastes salty only and had no natural aroma of the white wine.
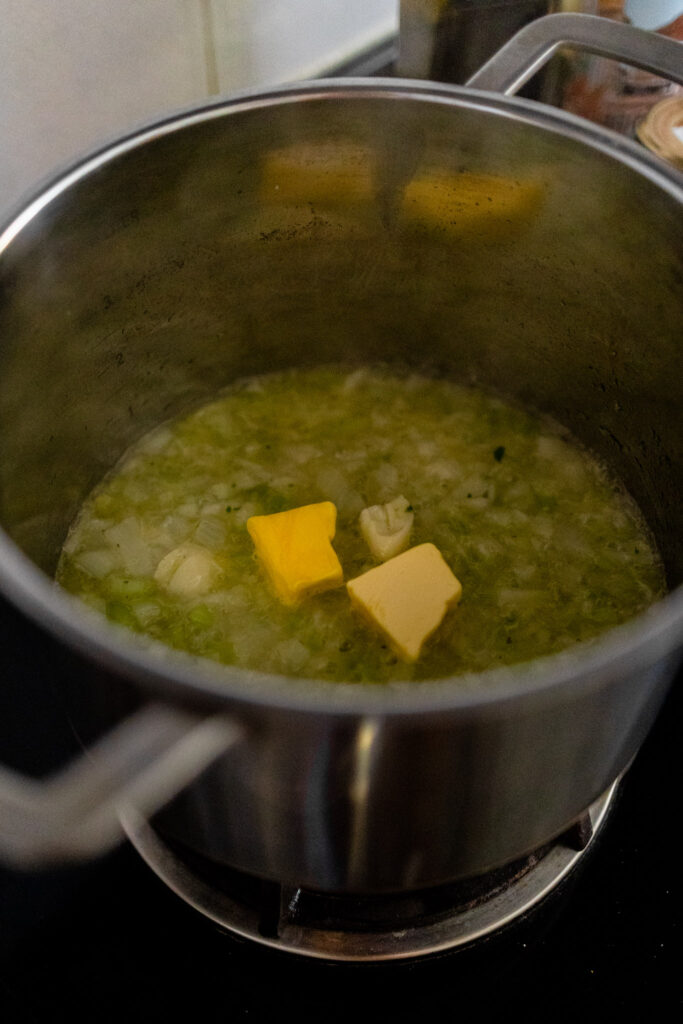
To take note of a delicious pot of stew
This is an amazing technique to build depth and flavour and can be used in many other dishes. Add the tomato paste to the hot pan and stir constantly, sauteing on high heat for a few minutes. It will begin to darken. Cooking or frying the tomato paste-like this really adds deep umami flavour.
Then add the white wine, let reduce, add stock, fresh tomatoes and browned chorizo. When I don’t have time to make a good fish stock, I use chicken stock and add a teaspoon of fish sauce. This seems to do the trick. Let simmer for a few minutes. Taste for salt…as all stocks and also chorizo vary in saltiness. Add fresh cracked pepper. When I make this recipe, using these exact ingredients, (using flavorful chicken stock, fish sauce, chorizo, sauteing the tomato paste) I don’t need to add salt. After the stew has simmered for a few minutes….add the fresh seafood.
If you have any leftovers, store them in an airtight container for up to two days and reheat in a small casserole over medium heat. You can add some water or chicken stock and a drizzle of olive oil to refresh the sauce.
Summer Seafood Stew in a light and flavorful tomato broth with smoky citrus pesto. Serve with Crusty Bread to mop up all the flavorful juices! For a Gluten-free option, instead of bread add cannellini beans!
Ingredients
3 garlic cloves, divided
2 tablespoons extra-virgin olive oil
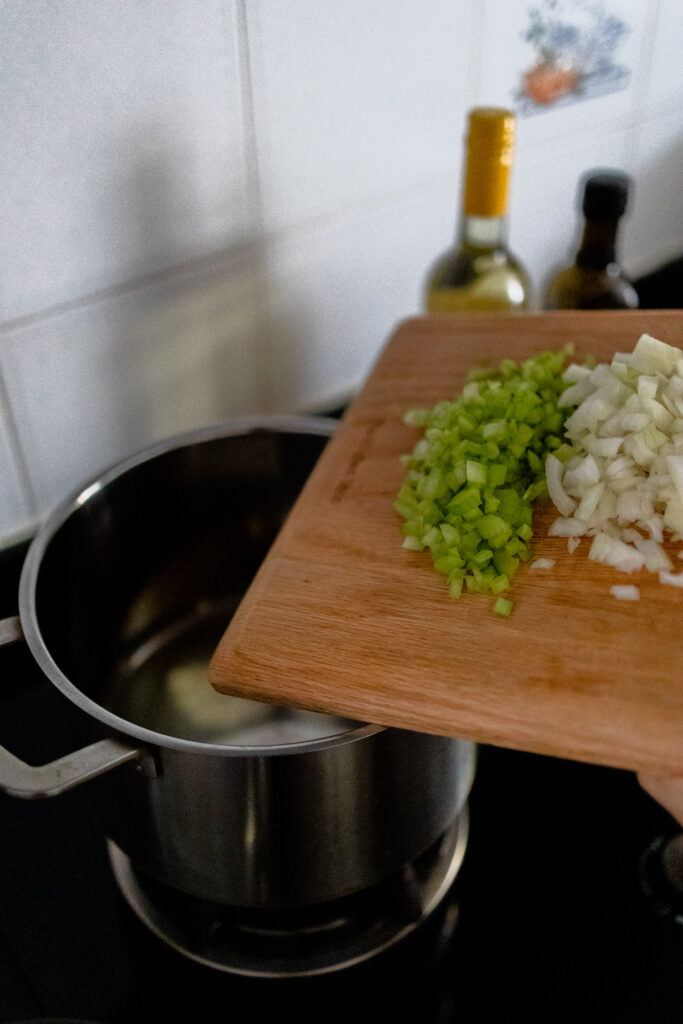
¾ cup finely chopped onion
¼ cup finely chopped celery
1 teaspoon kosher salt, divided
½ teaspoon freshly ground black pepper, divided
½ teaspoon red-pepper flakes
½ tablespoon tomato paste
1 cup dry white wine
1 15-ounce can of crushed tomatoes
1½ cups seafood stock or vegetable broth
½ stick (4 tablespoons) unsalted butter, room temperature
½ teaspoon lemon zest
1 baguette, sliced and toasted
1 pound littleneck clams, soaked in water for 1 hour
½ pound medium tail-on shrimp, peeled and deveined
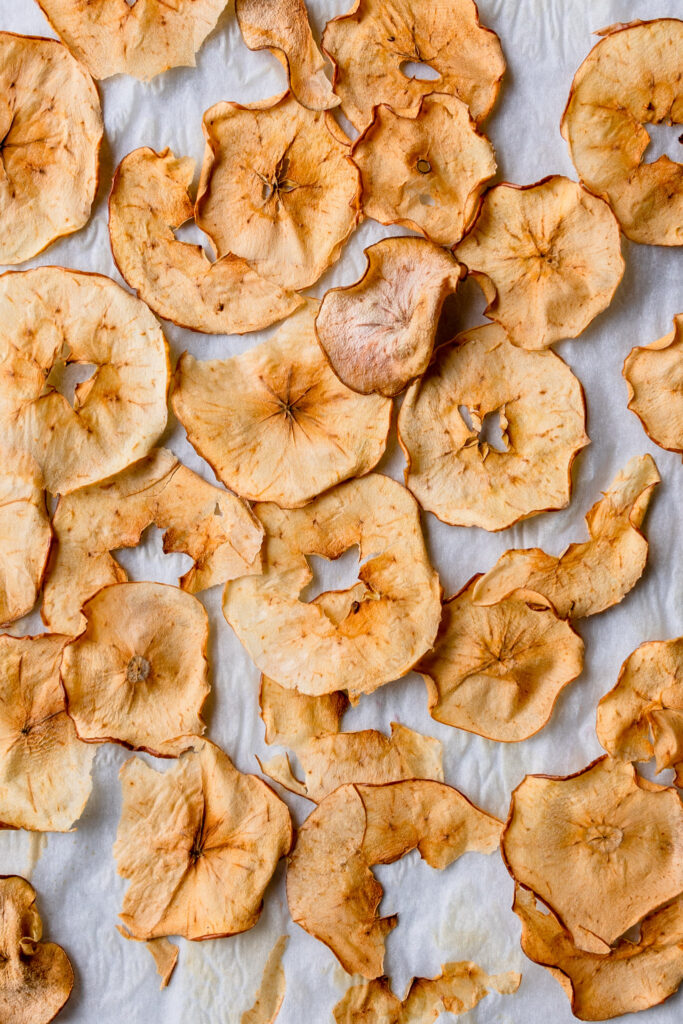
Chips are the last healthy food on earth. Even so, since the world is trying to eat healthier there are many fruit chip options on the shelves. However, they are also very expensive too. Good news, did you know you could make your own fruit chips at home without a dehydrator?
While there are a variety of fruit choices on the list, our favourite way to make our own fruit chips is by using apples and pears. This is the easiest way to get started!
5 Easy steps to making fruit chips
Preheat the oven to 275 degrees.
Prepare 3 baking sheets with parchment paper.
Using a mandolin, slice the apples and pears ¼ inch thick. Line each sheet with apples and pears.
Bake for 1½ hours, then turn over and bake for another hour or until golden brown and crispy.
Sprinkle with cinnamon and enjoy!
Tips on making tasty fruits chip
Use unblemished, slightly underripe fruit to make these chips. They can be stored in airtight containers between layers of parchment paper for up to three days.
The secret to making these fruit chips is to make very thin and uniform slices. We used a mandoline to do this and if you have it on we highly suggest you use it. However, a knife is good enough if you do not have one.
The timing may be different depending on the thickness of your slices. The first time we made these I sliced them thicker and it took 2 hours. Just check them every once in a while to make sure they don’t burn.
Nutritional Benefits
A serving of organic dried apples or pears provides nearly 20 per cent of the daily value for dietary fibre. Apples are a good source of both soluble and insoluble fibre. Soluble fibre helps control blood sugar levels and may lower LDL “bad” cholesterol levels, while insoluble fibre promotes a healthy digestive system.
My family really liked these oven-baked pear chips and they were so easy we’ve made them a few times this week. We hope you give them a try and enjoy them as much as we did.
While I am still stuck in Singapore, one of the fun for me is to scroll through my Instagram feed of people traveling. This time I came across this minimalist and retro place, I immediately want to know where it is. It is named a hotel but yet looks like an airport. After much research, I found out where is it, and now it is in my bucket lits.
We’ll meet you at the airport” – not the most exciting (or popular) phrase you’ve heard, until now. When JFK airport announced it was restoring and transforming the historic TWA terminal into an onsite Mid Century Modern boutique hotel. The rooms are sleek and dapper, combining the best of Mid Century Modern design with today’s amenities like the soundproof windows because of airplanes. And finally, the newest and possibly most exciting part of the hotel is The Pool Bar: an outdoor infinity pool surrounded by a large observation deck and bar.
Ever since our visit to Lucali BYGB for a birthday celebration, we were surprised with a Rice Krispie treats as a birthday cake. We are amazed with it as it is crispy and not overly sweet compared to those we have before. Years back we gave it a try and is a total failure, with this successful example we decided to give it a challenge again.
After a few try we got the “perfect” recipe for the Rice Krispie treats. The ratio of cereal to marshmallow makes or breaks a rice krispie treat– literally! For extra gooey and buttery rice krispie treats, use this recipe. Adding a little extra butter and marshmallow, plus a splash of vanilla extract and a pinch of salt makes all the difference.
5 ingredients is all you need
You only need 5 simple ingredients for these no-bake squares.
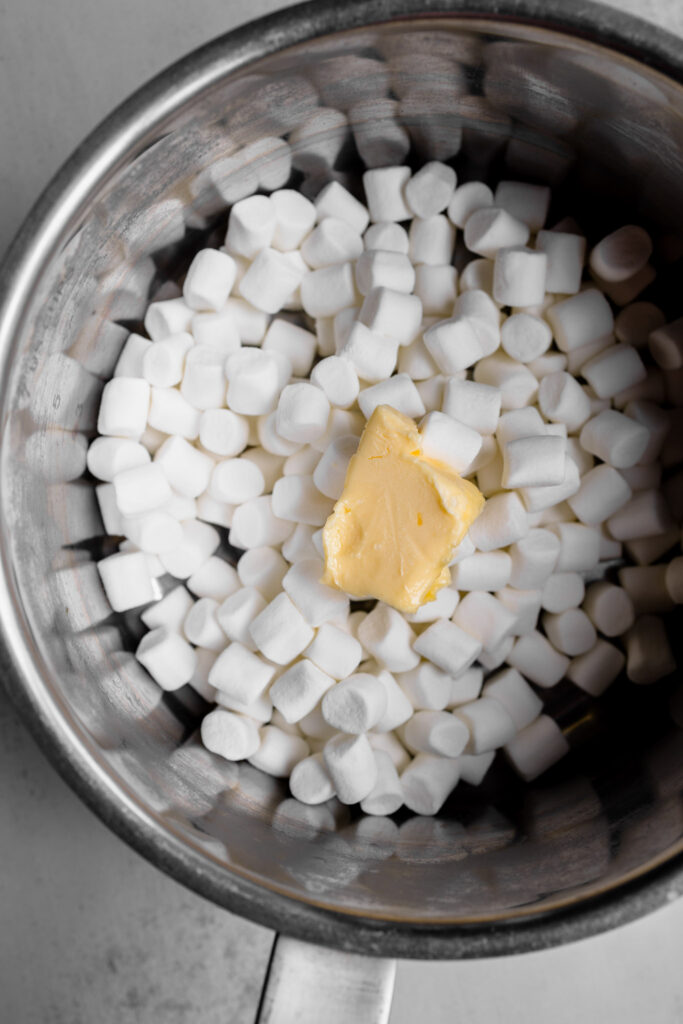
Butter: Like all good desserts, the base of great rice krispie treats is butter! You will need 4 tbsp of butter.
Marshmallows: These krispie treats are extra marshmallow-y without falling apart. You need 4 cups of mini marshmallows.
Vanilla Extract: This is an easy addition that turns a good rice krispie treat into a great rice krispie treat. You only need 1 teaspoon, but what a difference it makes!
Salt: Salt is another little addition I add to my rice krispie treats. Like vanilla extract, salt is a super convenient ingredient and you don’t need much of it. Just a pinch adds a depth of flavor otherwise absent from crispy rice treats.
Rice Krispies Cereal: What’s a crispy treat without rice krispies cereal? We uses 2 boxes for this recipe. The best!
How do we make it?
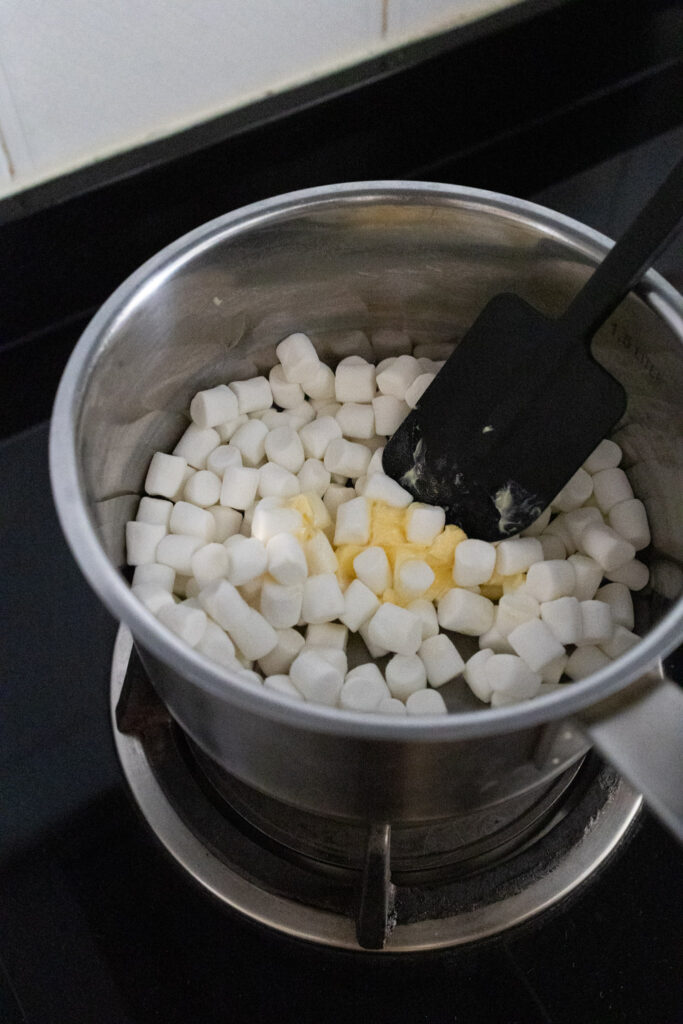
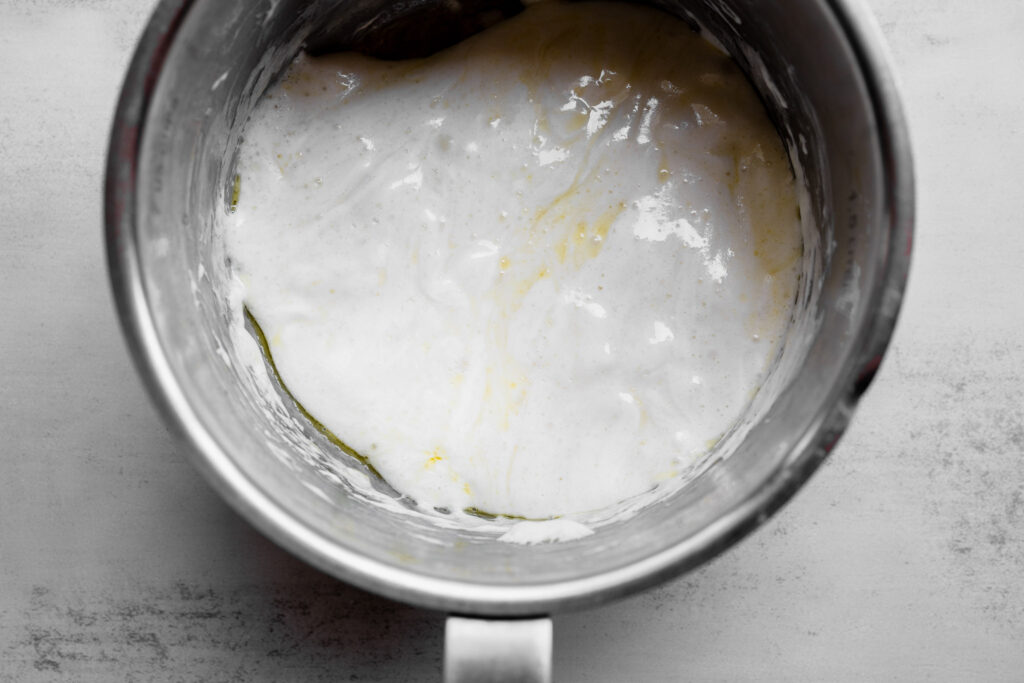
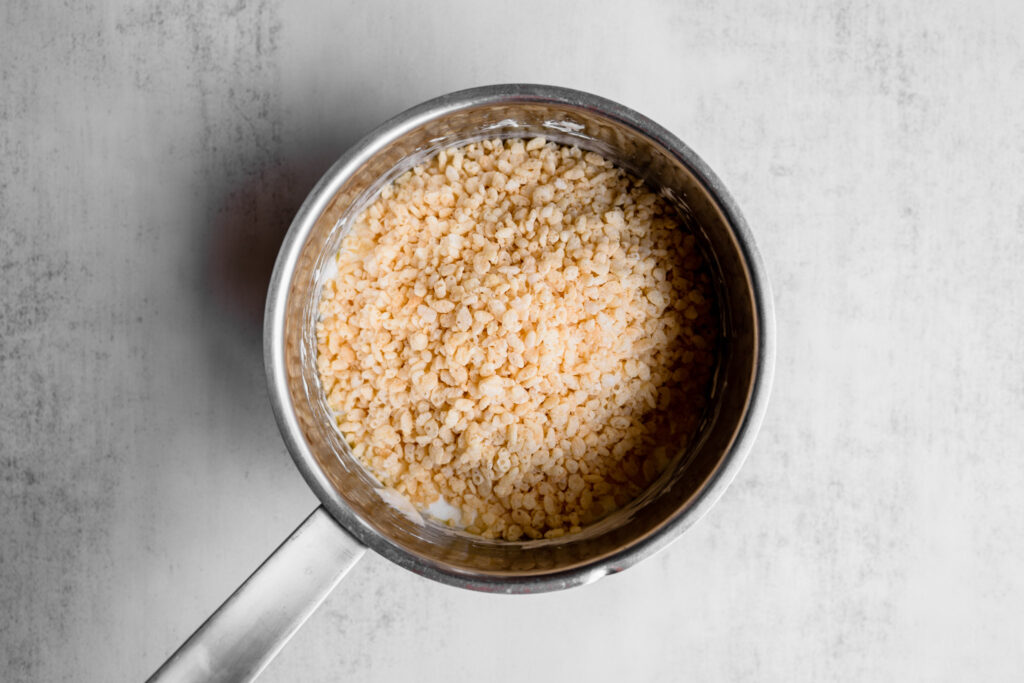
Melt the butter and marshmallows in a big pot on the stove, then remove from heat and gently stir in the remaining ingredients.
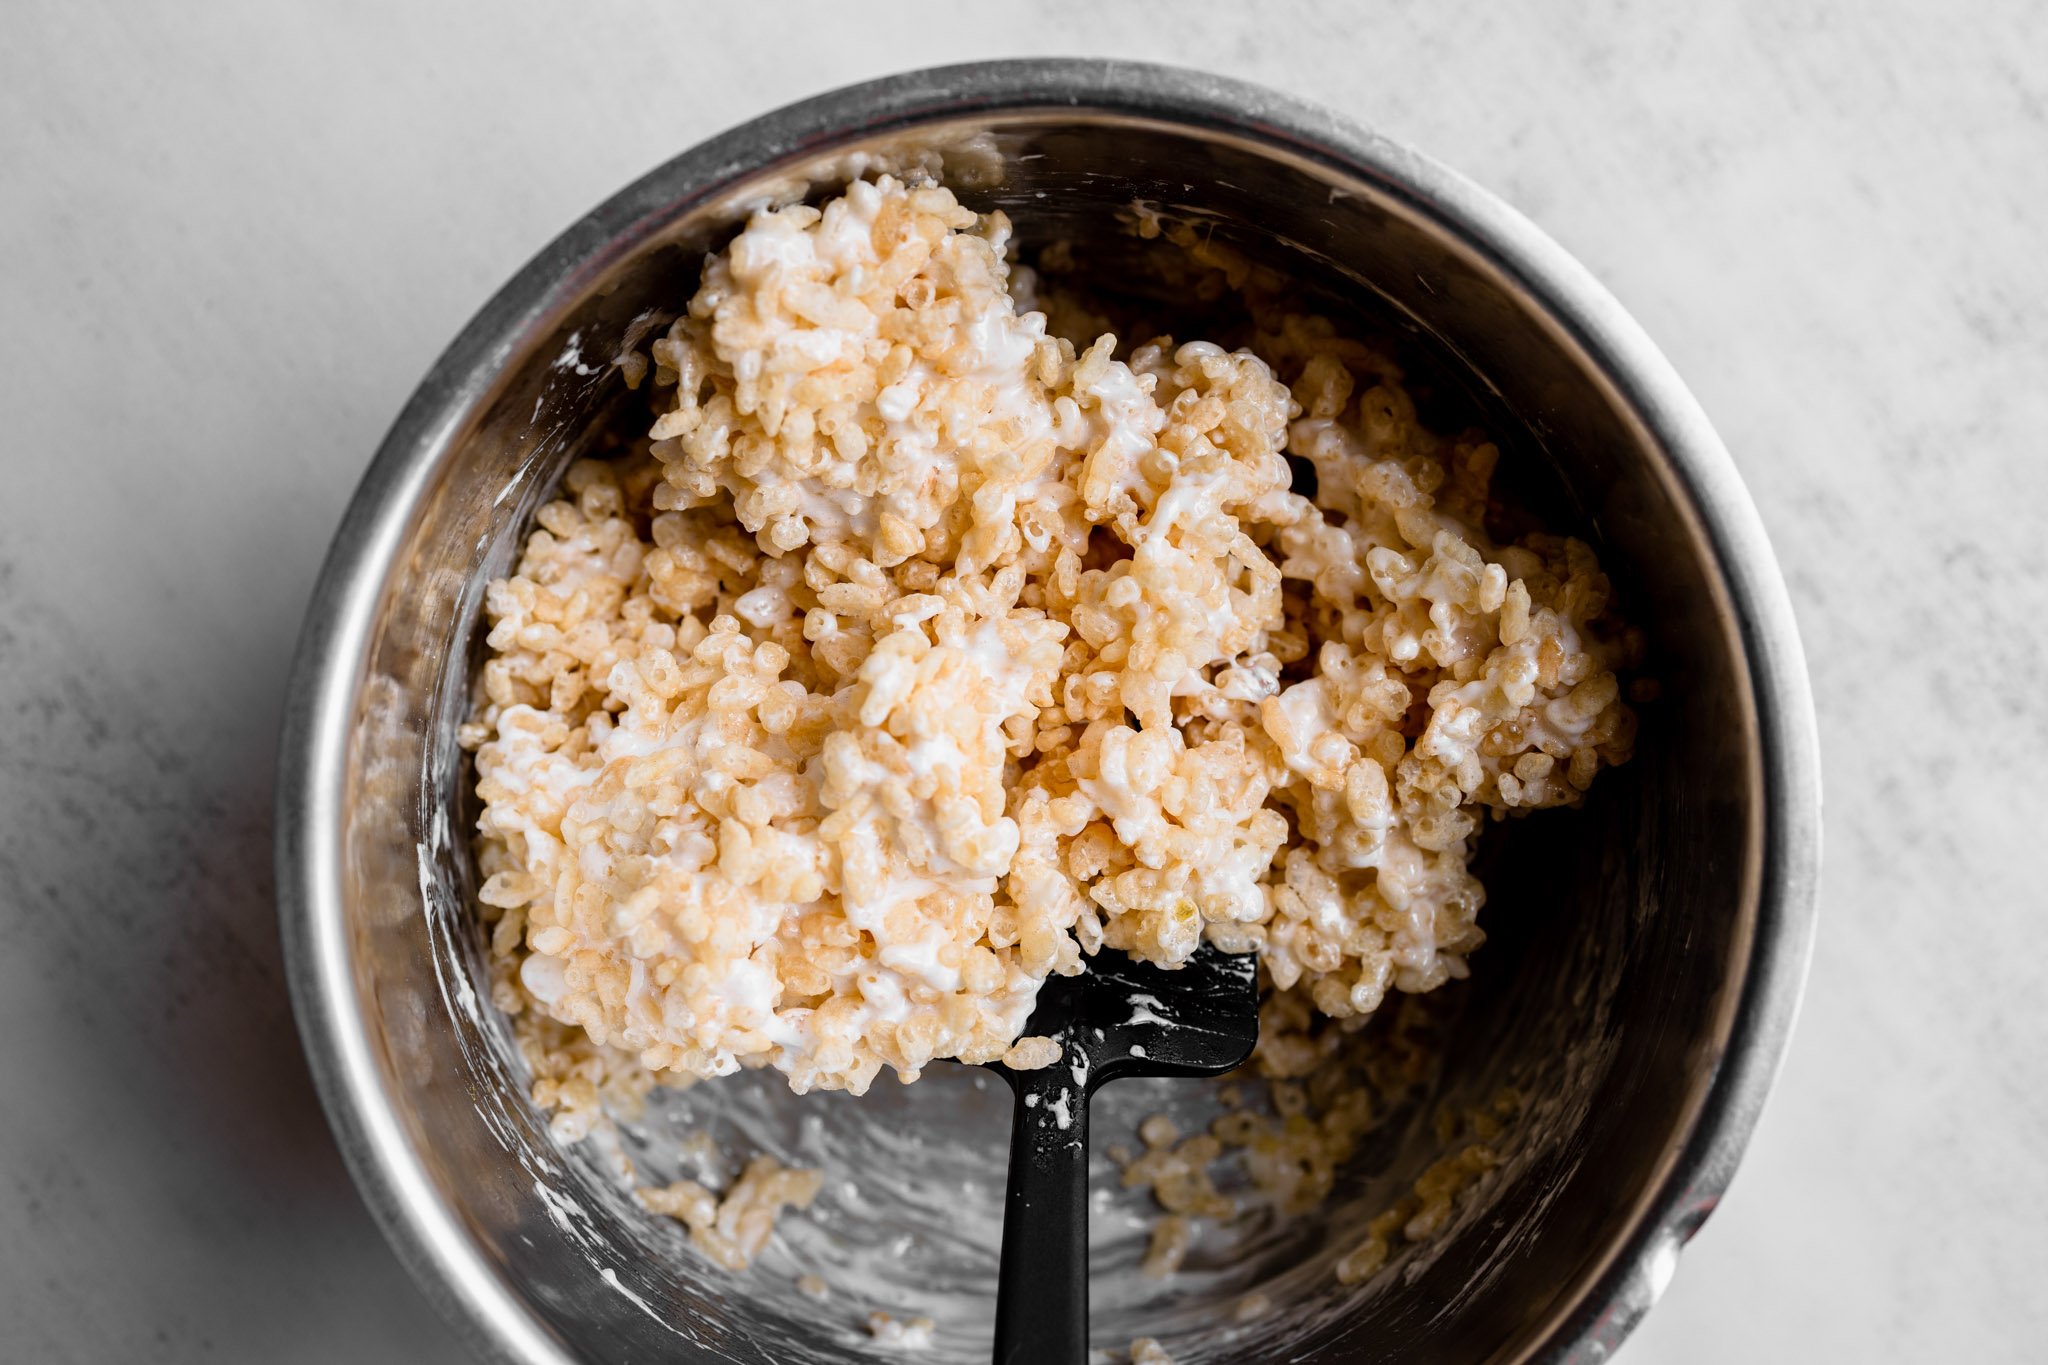
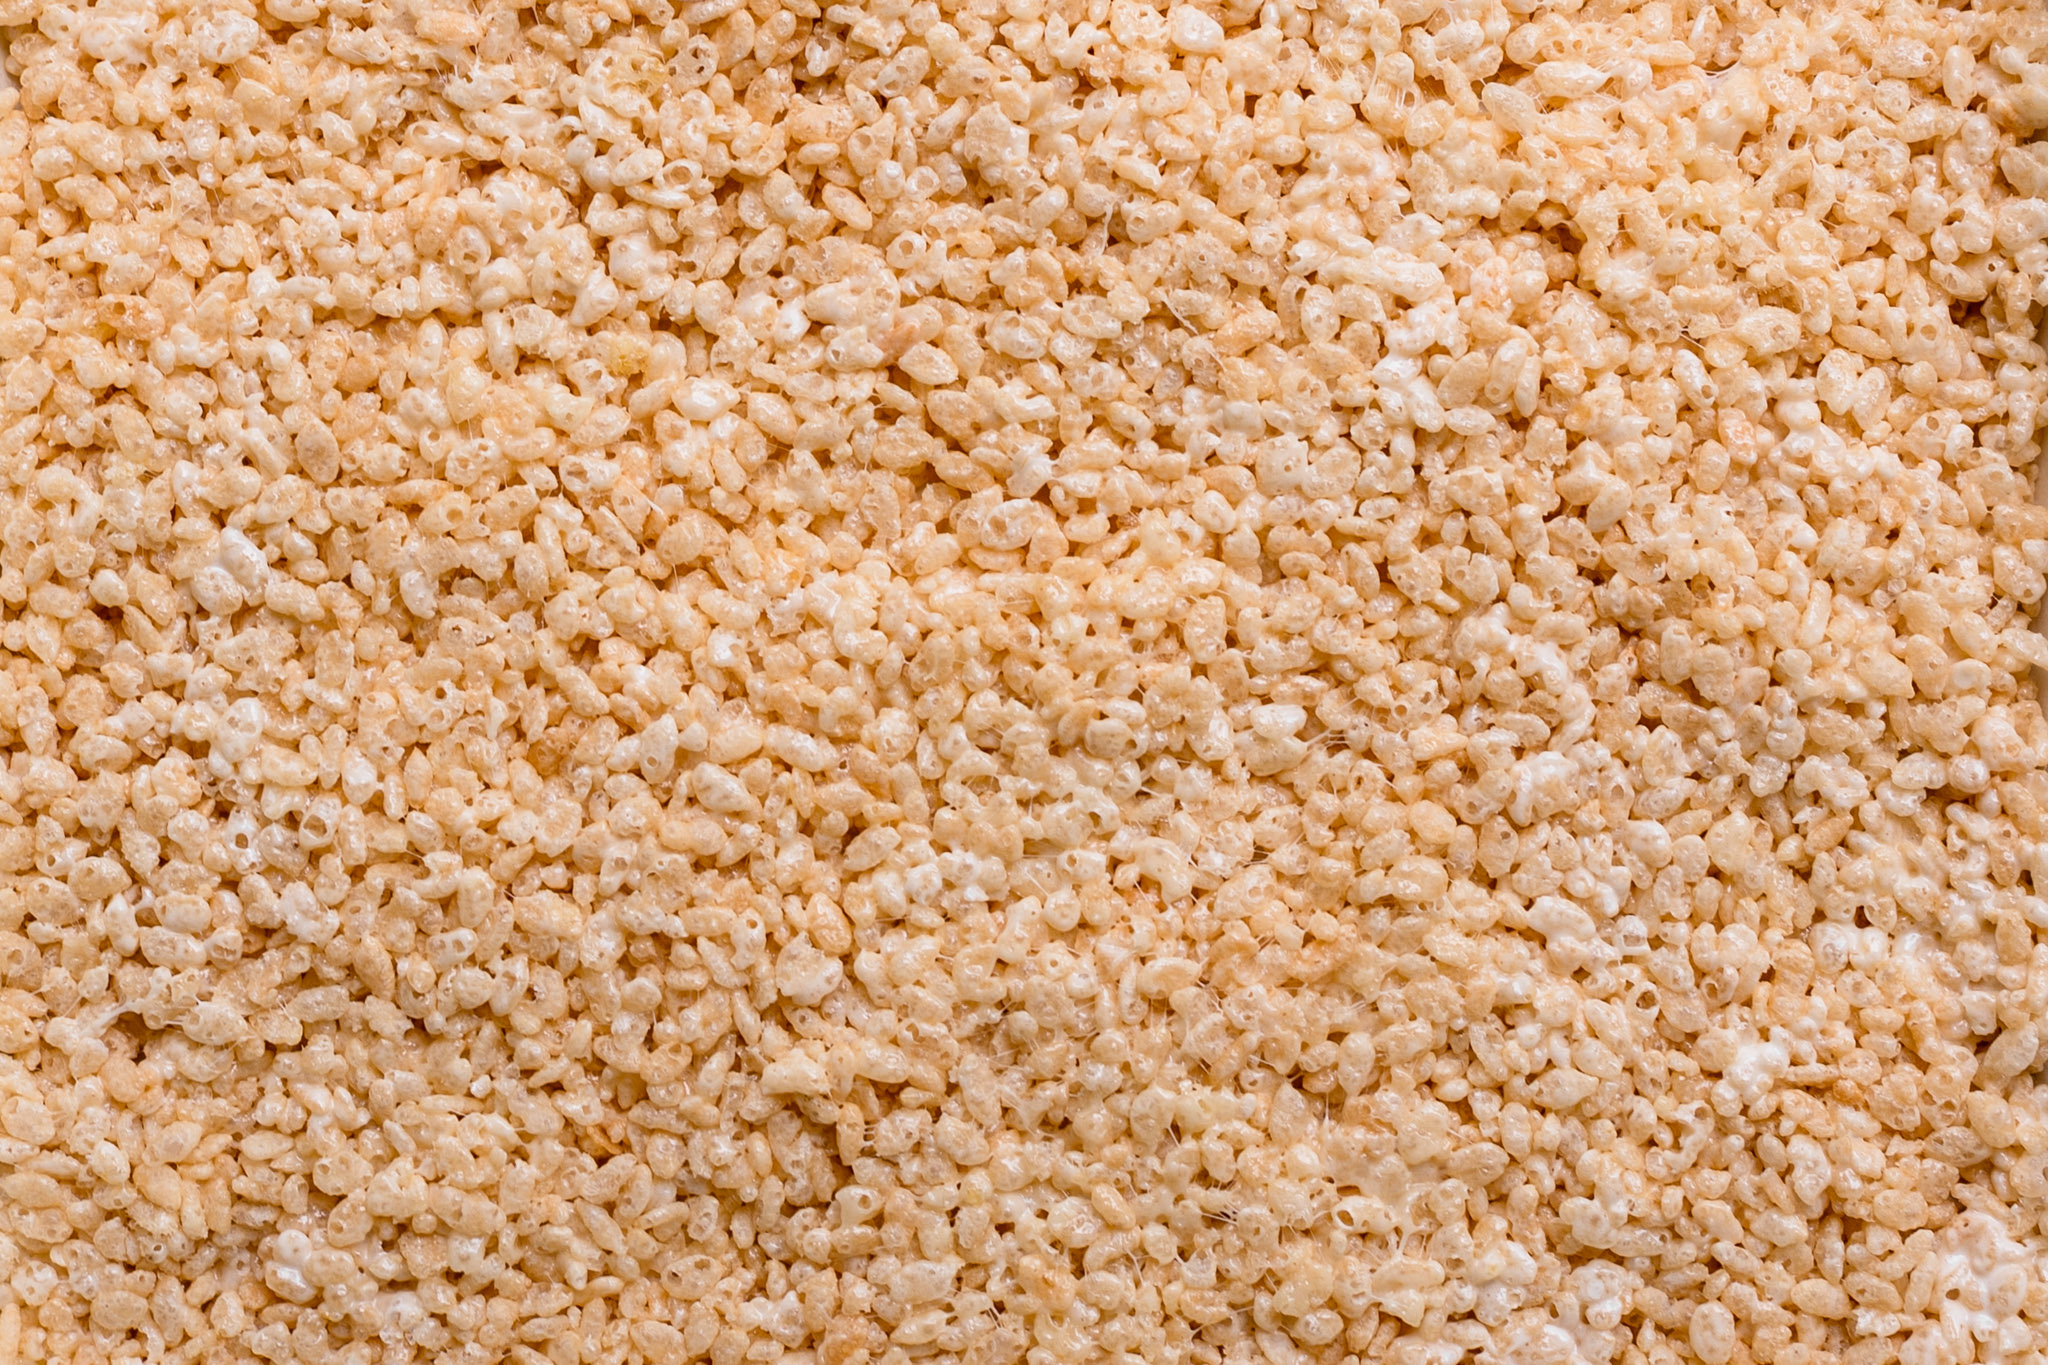
Quickly add in your krispie rice into the marshmallow mixture and mix it well. Transfer mixture to prepared pan. Using a rubber spatula (greasing it lightly helps), gently spread mixture to fit the pan. Lightly grease the back of a flat spatula and very gently press the mixture down into the pan. Do not pack it down with force, just lightly press down so it’s secure in the pan.
While everyone stops here and allow treats to set for at least 1 hour at room temperature and up to 1 day. Cover tightly if leaving out for more than a few hours. We added rainbow rice on top of the treats to spice it up a little. Do it as soon as you pack the Krispie rice treats as you will want them to stick well.
The new way to make a birthday cake
Does this remind you of the Confetti Birthday cake? We added rainbow rice on top of the treats to spice it up a little. Do it as soon as you pack the Krispie rice treats as you will want them to stick well. After it is all cool down, cut it into smaller block and top it with a candle and now you will have the unqiue birthday “cake” !
Rice Krispie Treats are eaten very quickly by our family but here are some guidelines for storing them. They will last 2-3 days at room temperature in an air-tight container before they start to get stale. You can extend that timeline a few days if you store them in the refrigerator and then take them out about 30 minutes before you eat them.
two 10 ounce bags (11 heaping cups) mini marshmallows
1/2 teaspoon pure vanilla extract
pinch salt
9 cups (270g) crispy rice cereal
Methods
Line a 9×13 inch baking pan with parchment paper. Lightly grease the parchment. I always use a very light mist of nonstick spray. Set aside.
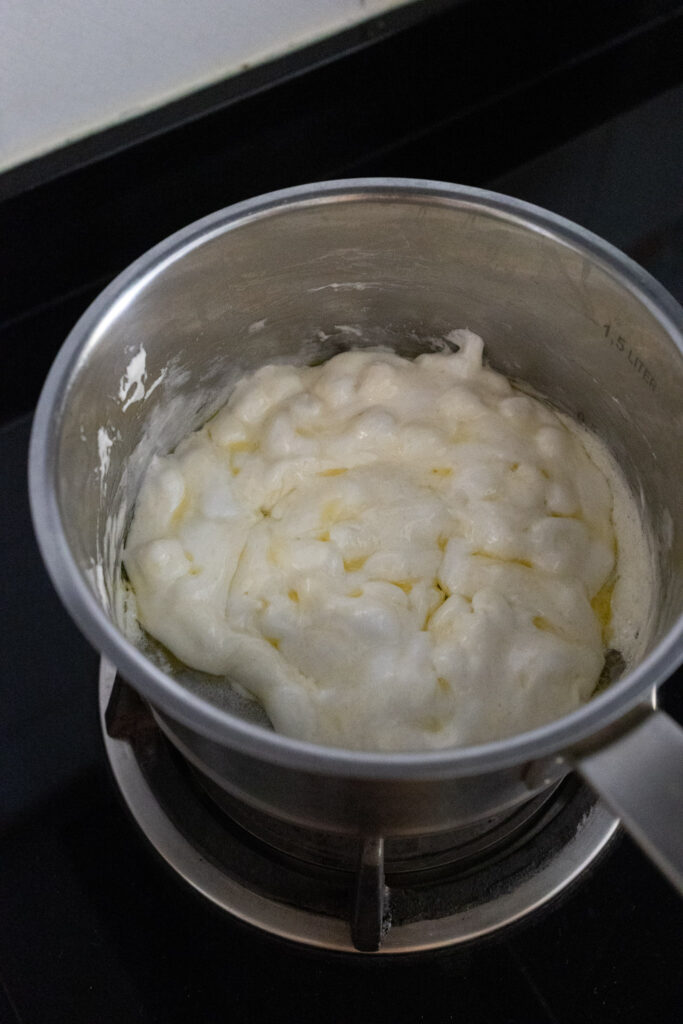
Melt the butter over medium heat in a very large pot. Once melted, add the marshmallows. Stir the mixture until the marshmallows are completely melted.
Remove from heat, then immediately stir in the vanilla extract and salt. Finally, fold in the cereal. Make sure each piece of cereal is coated with the marshmallow mixture.
Transfer mixture to prepared pan. Using a rubber spatula (greasing it lightly helps), gently spread mixture to fit the pan. Lightly grease the back of a flat spatula and very gently press the mixture down into the pan. Do not pack it down with force, just lightly press down so it’s secure in the pan.
Allow treats to set for at least 1 hour at room temperature and up to 1 day. Cover tightly if leaving out for more than a few hours.
Lift the rice krispie treats as a whole out of the pan using the parchment paper. Cut into squares.
Cover and store leftover treats at room temperature for up to 3 days. To store, place in layers between sheets of parchment or wax paper.
Talking about where hidden gems where “birds don’t lay eggs”, Chū and Co. may rank somewhere on the list.
Nestled within the private residential estate of Serangoon Garden, Chū and Co. is a dual-concept space featuring its bakery café arm (Chu Bakery) in the daytime and gelato lab (Chulato) at night.
It is located at Lichfield road, one of the small roads leading into the usual bustling area of Serangoon Garden circus. We love its space for the laidback vibes – like what we usually experience from overseas outskirts.
There aren’t any blaring signs signalling the cafe’s existence, just an industrial chic exterior littered with luscious plants and lovely garden furniture. There isn’t your usual normal seating available, open up the camping chair and table provided.
There are various bakery and an all day menu for us to choose from, and we ordered the Porkie Sammie ($15), Honey Ohili Salami ($6) and the two bakery that cost $5 to $7 each. Every one the bakery is a good one portion, and we feel so filling after the meal.
Processed with VSCO with al3 preset
For those we have a little sweet tooth, don’t give their gelato a miss. Complete with a variety of unique gelato offerings, Chulato is best known for the Sake Milk, Smoked Whisky, Strawberry Pistachio, Mandarin Basil and EVOO (Extra Virgin Olive Oil) ice cream flavours.
Chu & Co just oozes rustic vibes and slightly throwsback to the atmosphere at Kampong Lorong Buangkok, the last Kampong in Singapore.
Truly a rare find nowadays, in the modernised concrete jungle that is Singapore.
Skinny tiles are a modern trend for home decor – bathrooms, kitchens, and other spaces, they are perfect for mid-century modern, contemporary, and minimalist spaces. We’ve already shared some ideas to clad your kitchen backsplash with skinny tiles and now it’s time to take a look at bathrooms. Skinny tiles in bathrooms can be used anywhere – in the sink, bathtub, and shower zones, on the walls and floors, and can be paired with other types of tiles, too.
Here we pick out examples of our two favorite color combinations, pink and green. I always get compliments when I match pink and green on what I wear and I found it good on the tiles too. What do you think?
In my humble opinion, curry is one of the greatest dishes this world has ever seen – with varieties so wildly different you could eat a new one every day and never sample them all. This vegan coconut “curry” is one to add to the ‘must eat’ list.
A lot of recipes get tried and tested for this website, and many get discarded or fall by the wayside in favour of something bigger, bolder, or generally more exciting. Taste alone isn’t always enough to guarantee a spot on the site (although it really helps) – a recipe needs to stand out in other ways.
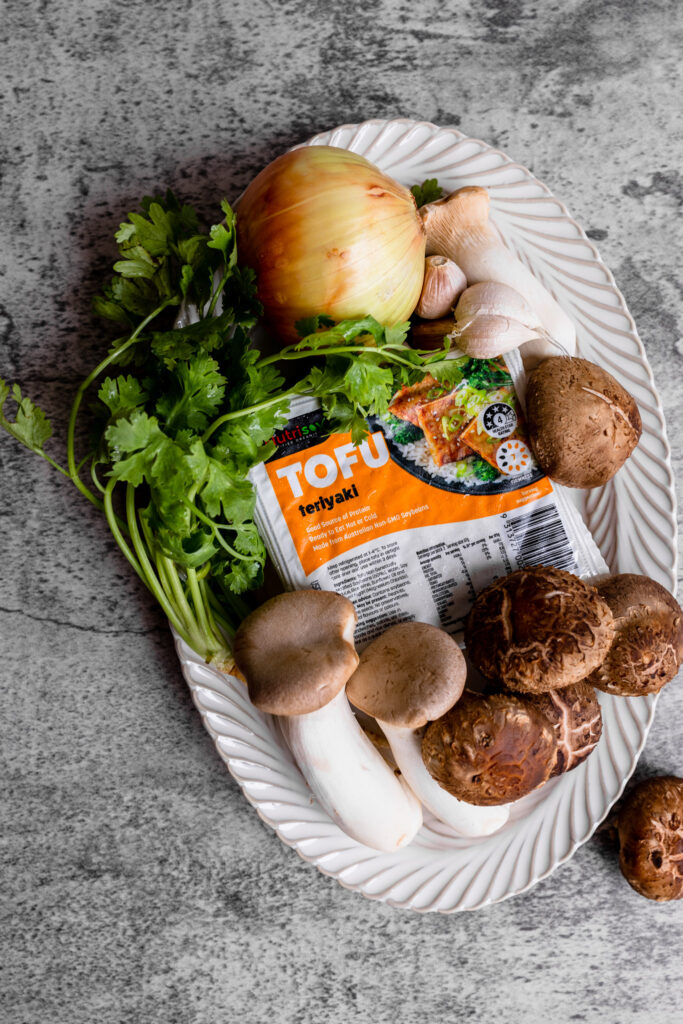
A key feature of Asian cuisine for thousands of years, tofu is so much more than just a 21st-century health fad. While it quite rightly takes its place in the pantheon of “fit foods” – bean curd remains the only animal-friendly protein source that contains nine essential amino acids. Soybean curd is a wonderfully versatile ingredient.
What makes this vegan coconut “curry” so special?
This recipe came as a surprise as it isn’t what we planned to make. The joy of this recipe is its simplicity. So rarely have we had to do so little cooking to get such a great result. After a little prepping at the beginning, the ingredients hit the frying pan – and that’s it! They’ll fry along happily while the sauce pretty much cooks itself. It doesn’t get any easier when it comes to effort vs quality ratio.
This recipe isn’t a traditional curry as only curry powder is added for a little spice. Therefore it is more like a creamy coconut sauce with a little mild taste of curry.
How to make this Tofu with Creamy Coconut Sauce?
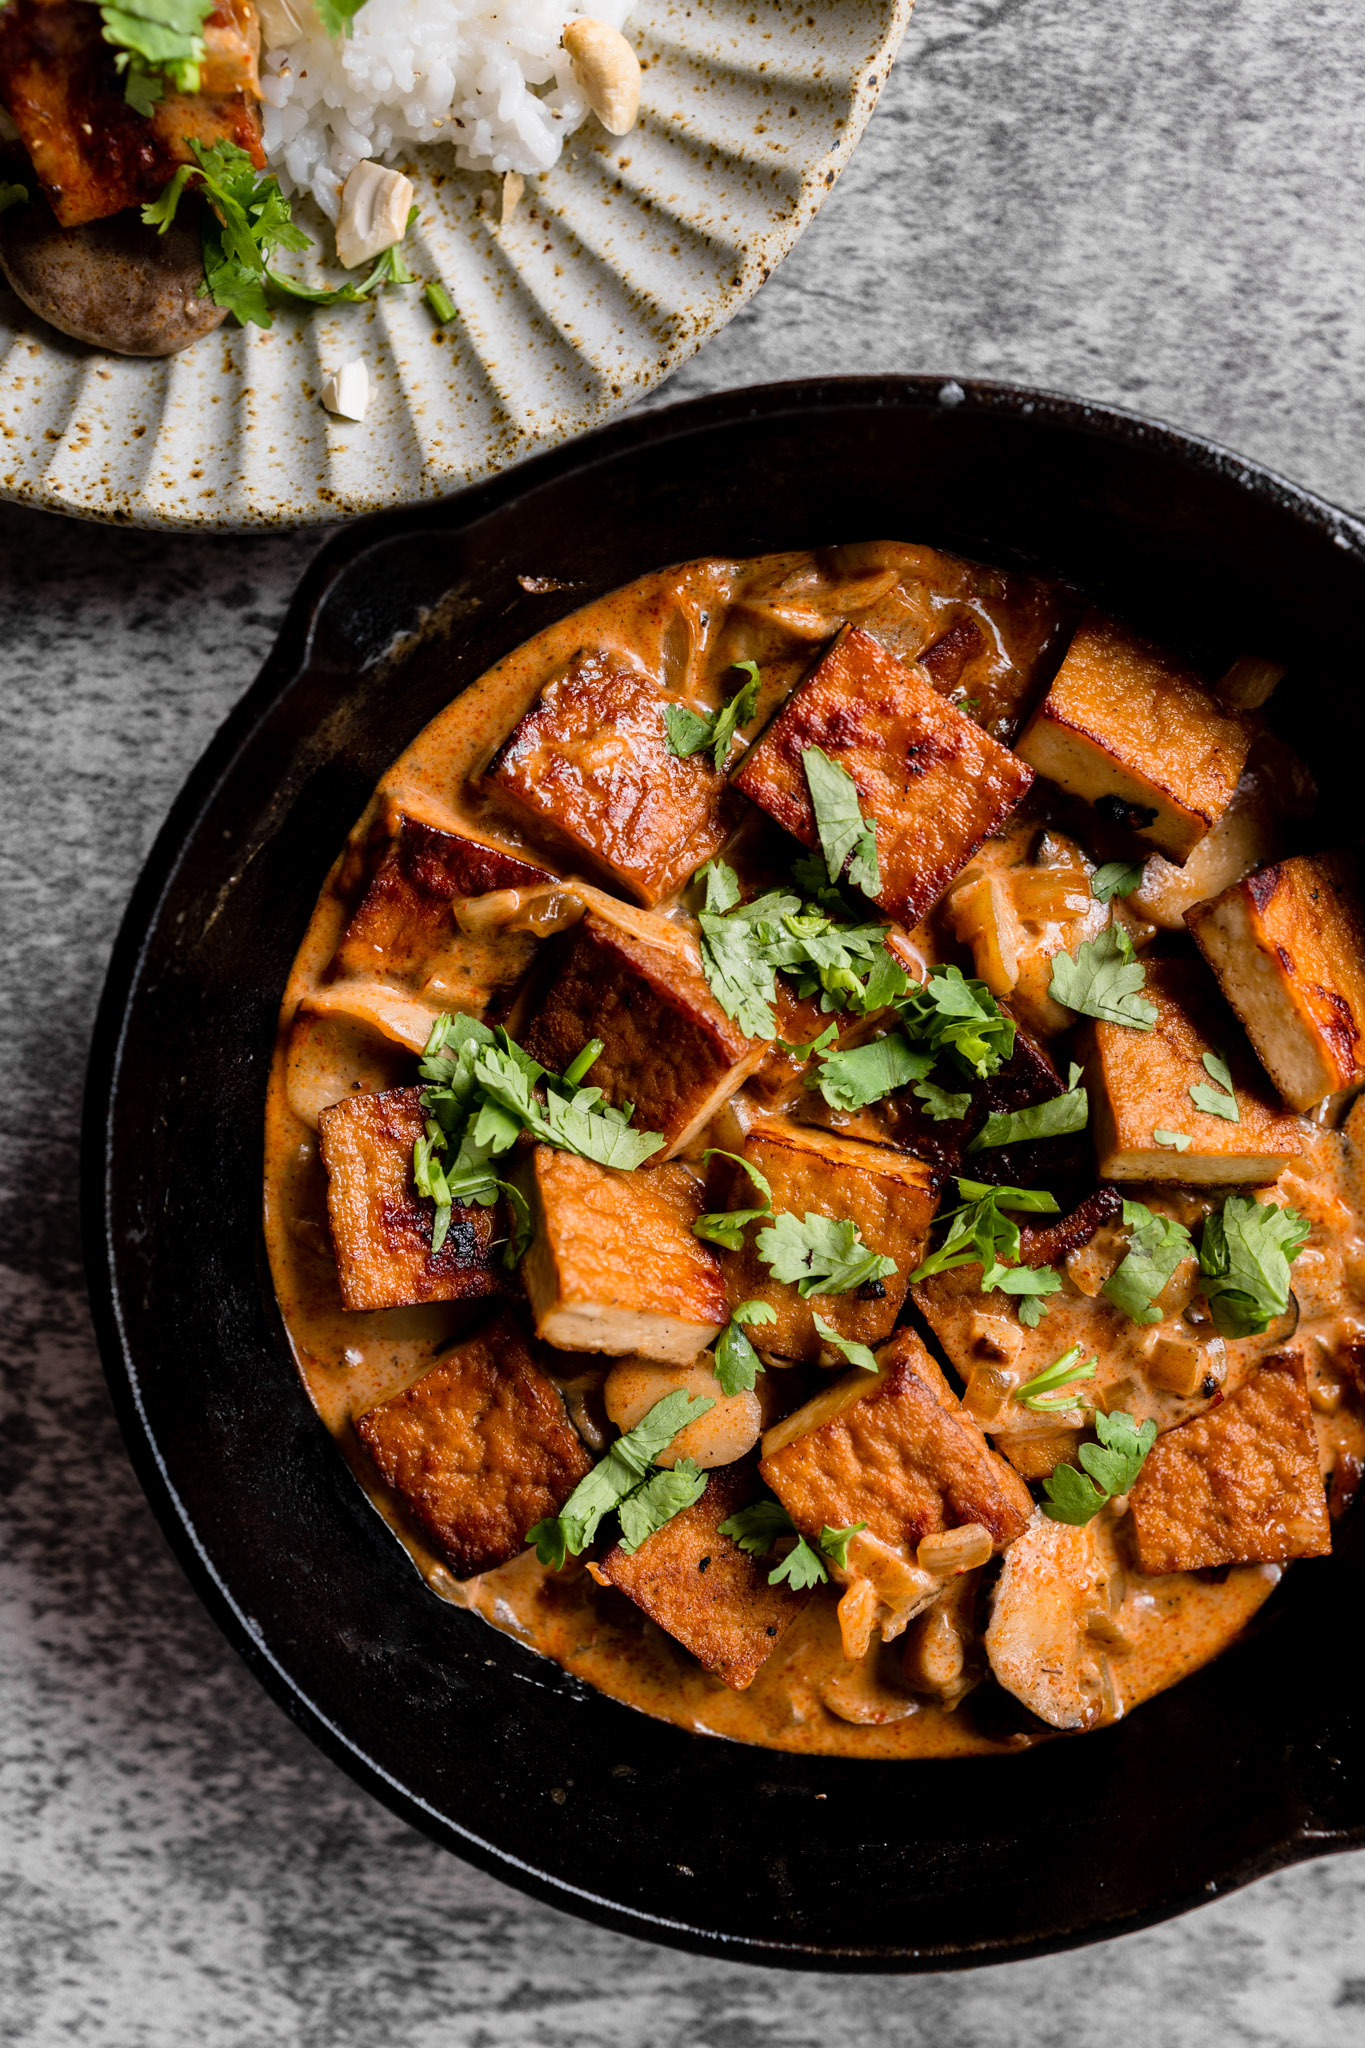
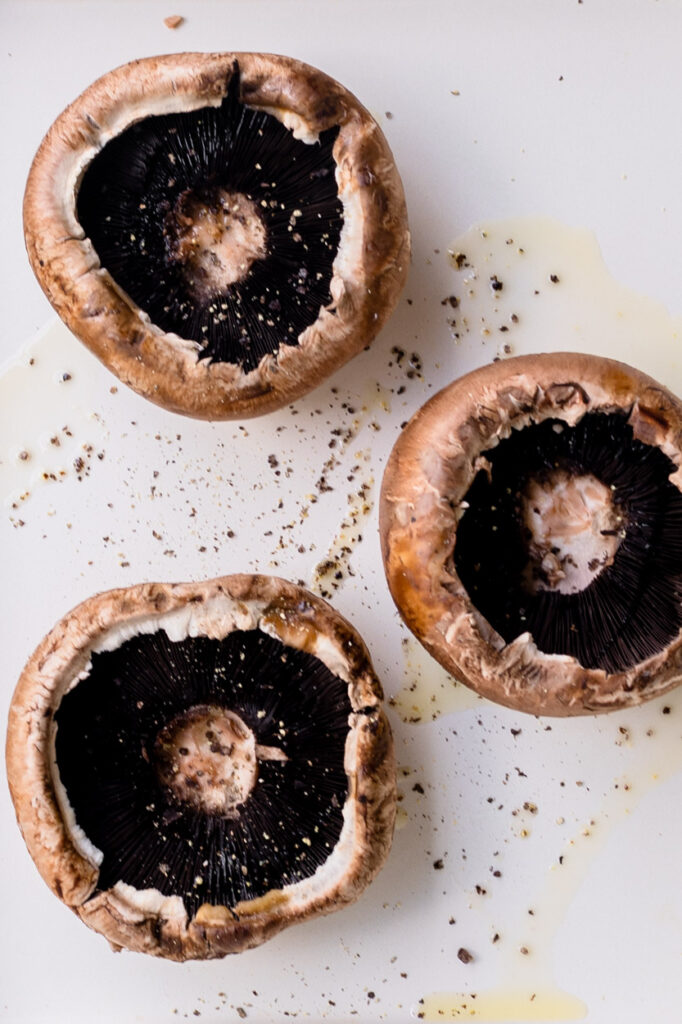
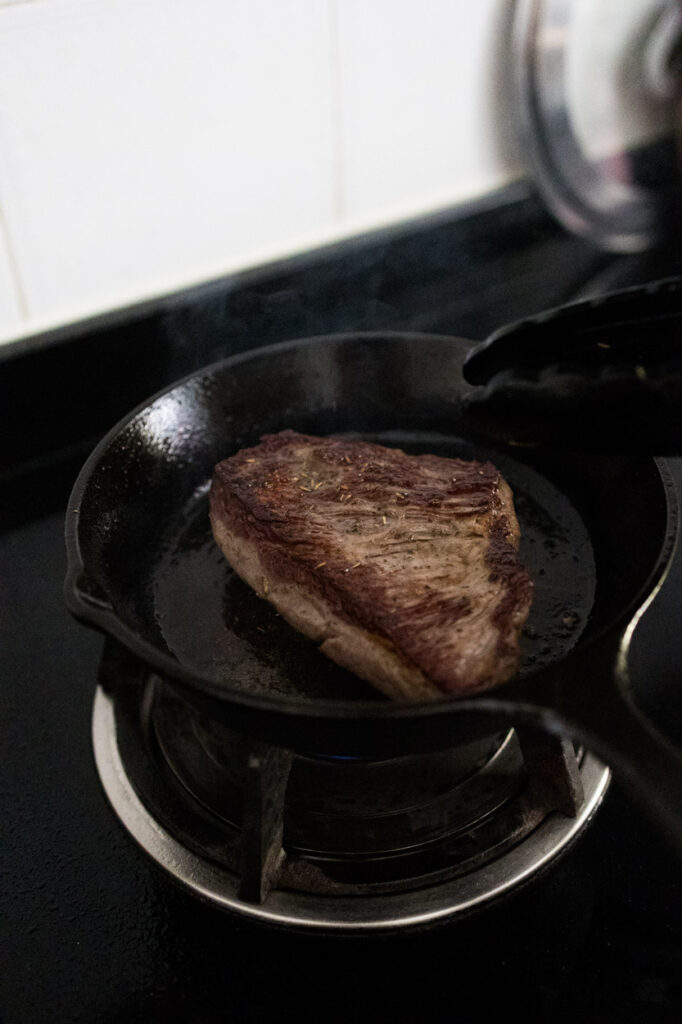
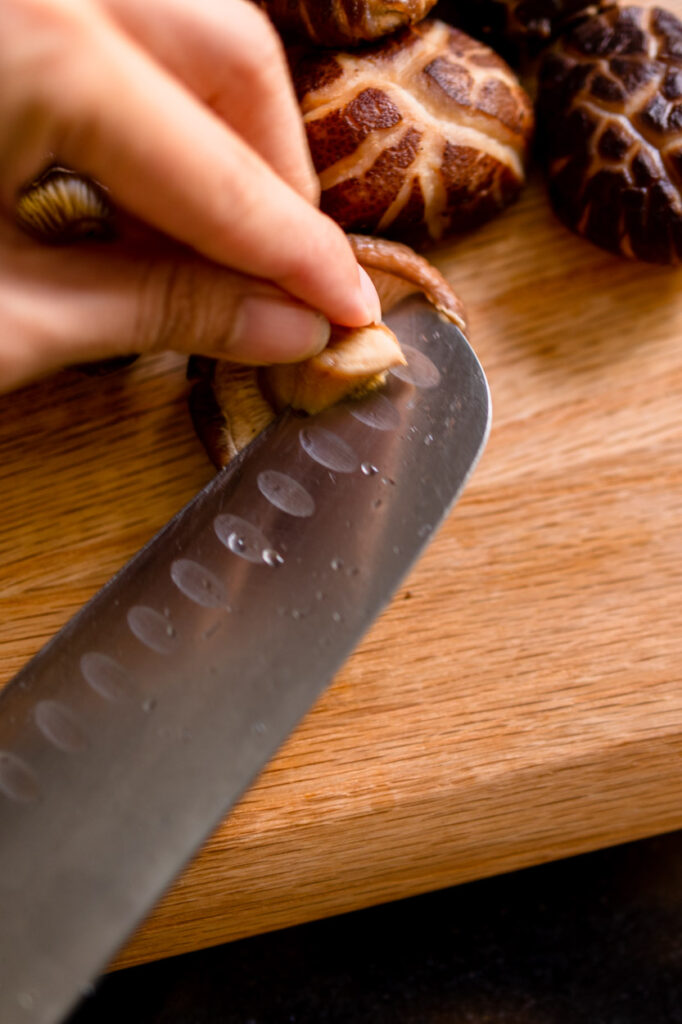
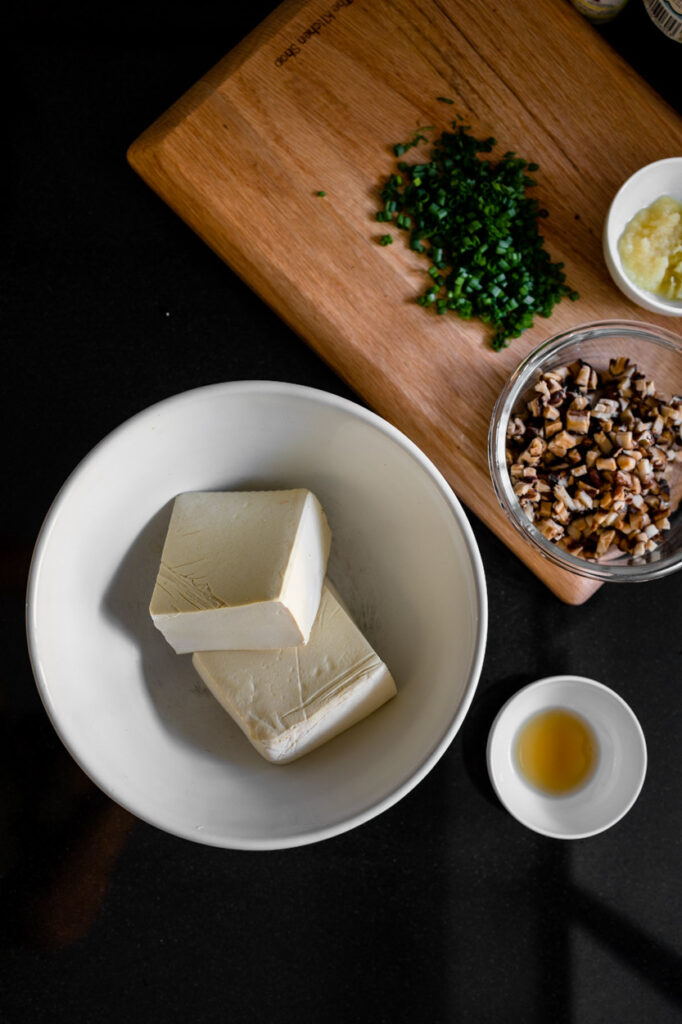
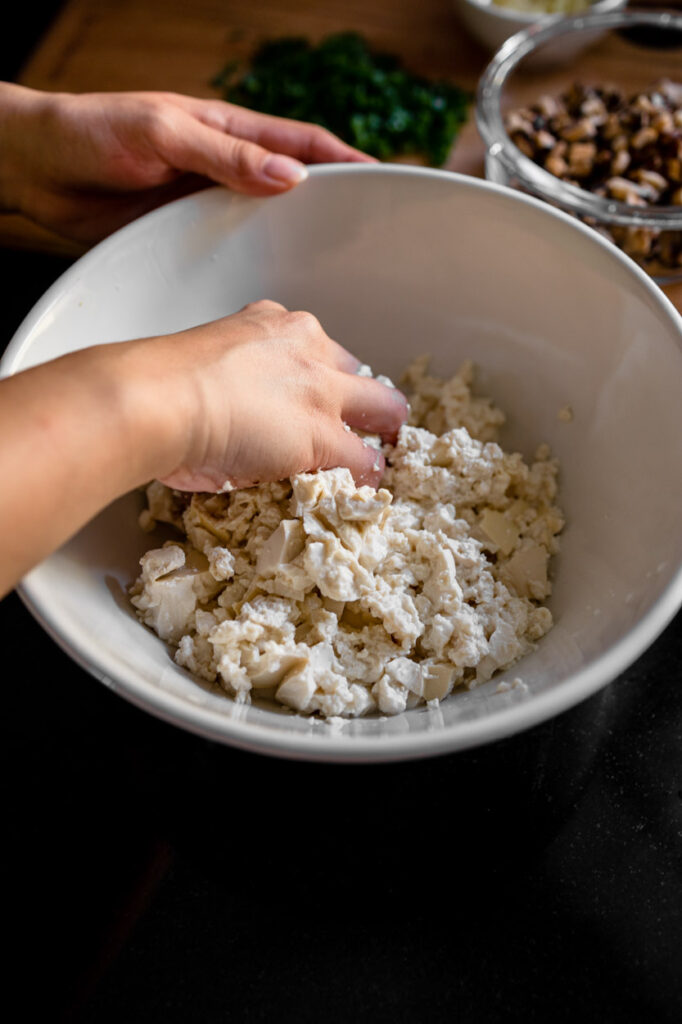
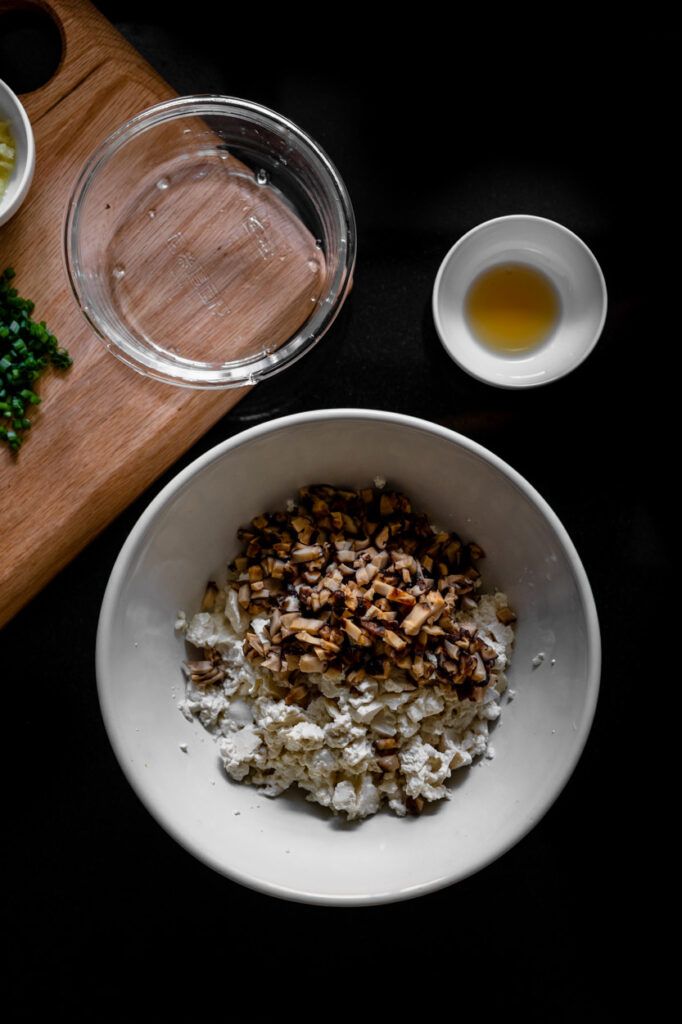
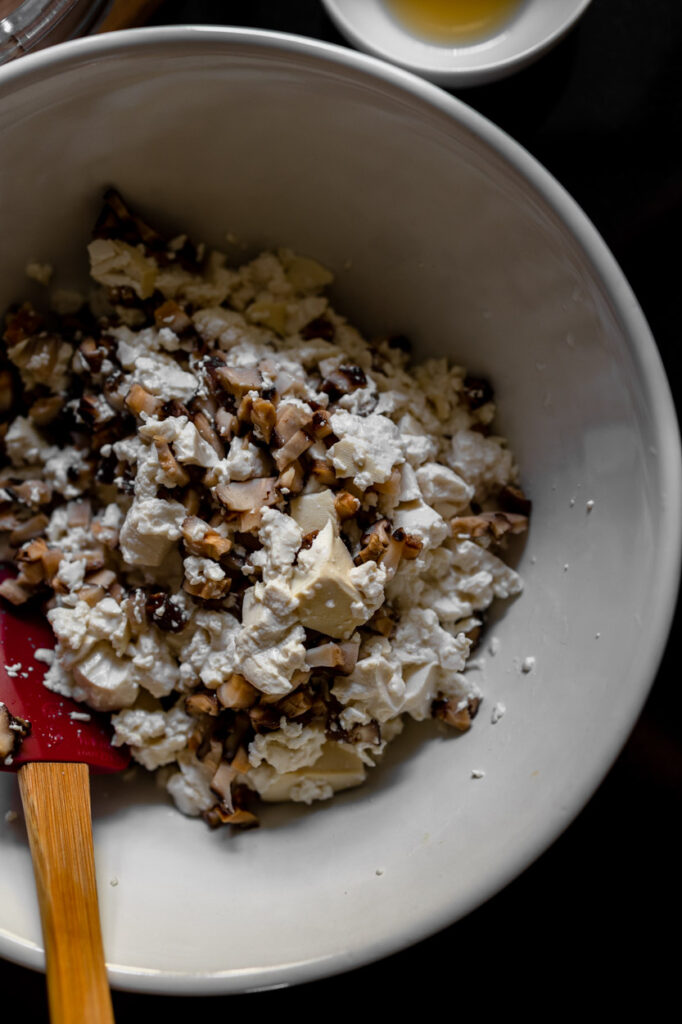
These are those recipes that we like as they only required a pot and this time our trusty cast iron is been used. Start by pan-frying the bean curd in your oiled pan till golden brown then set it aside for later use.
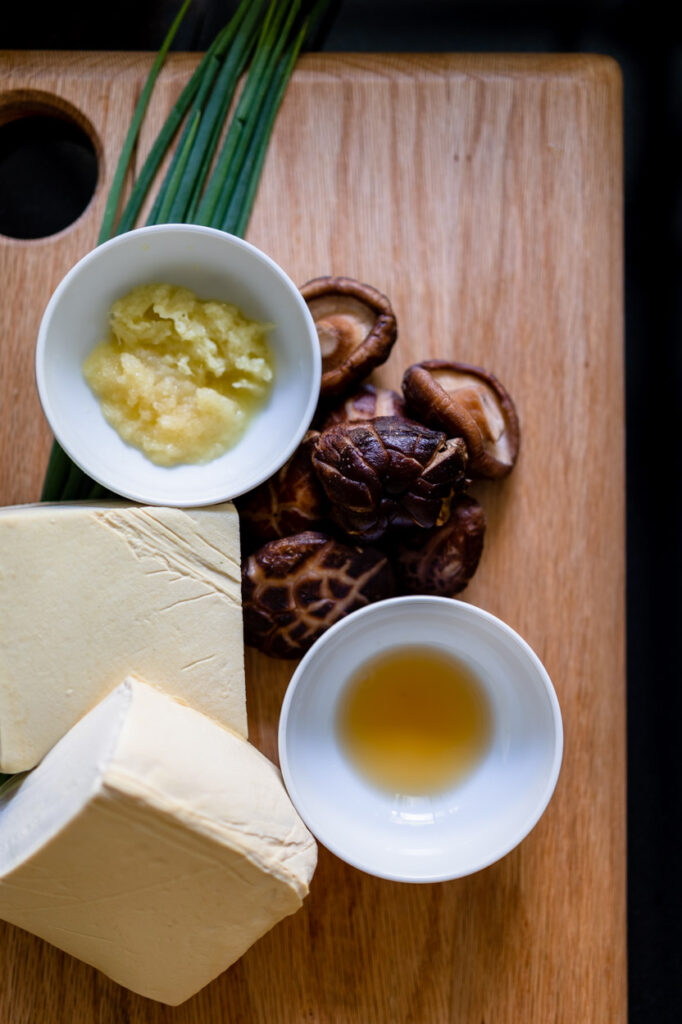
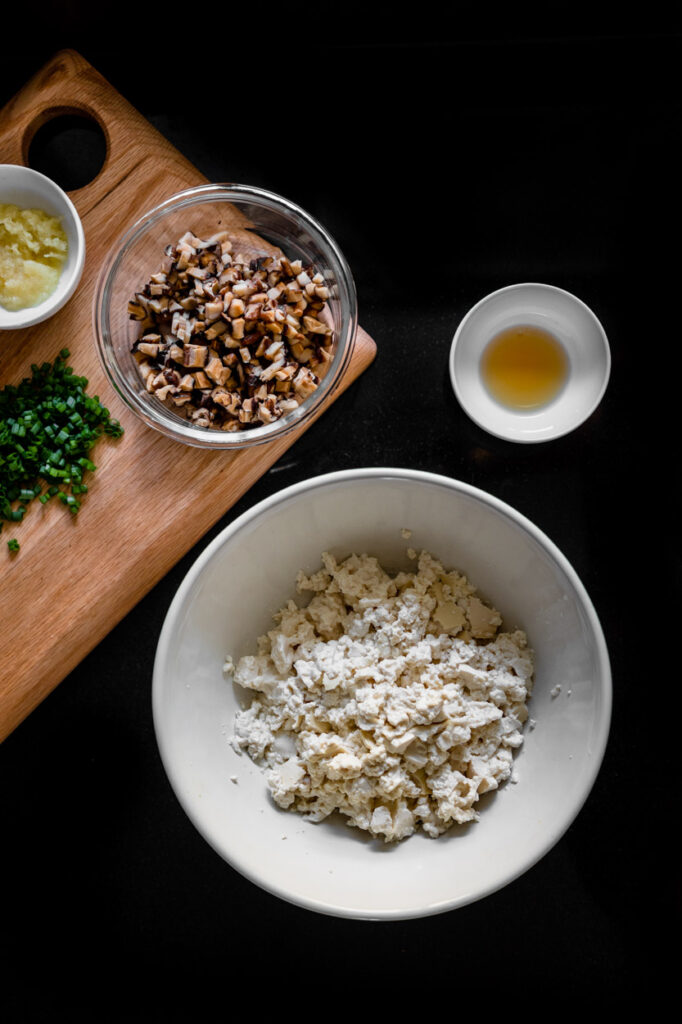
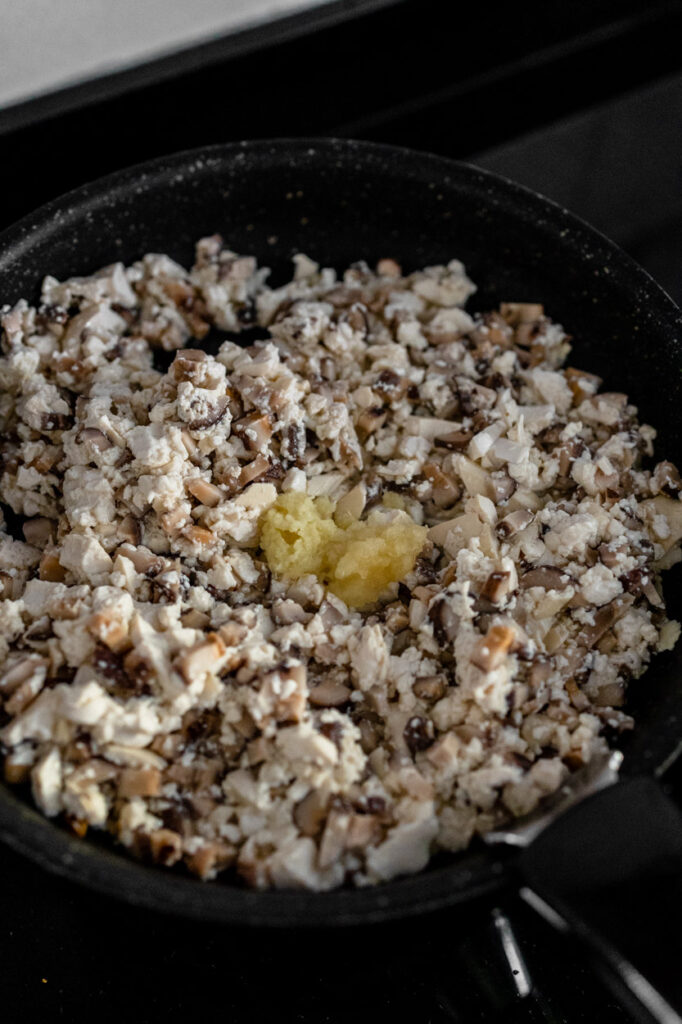
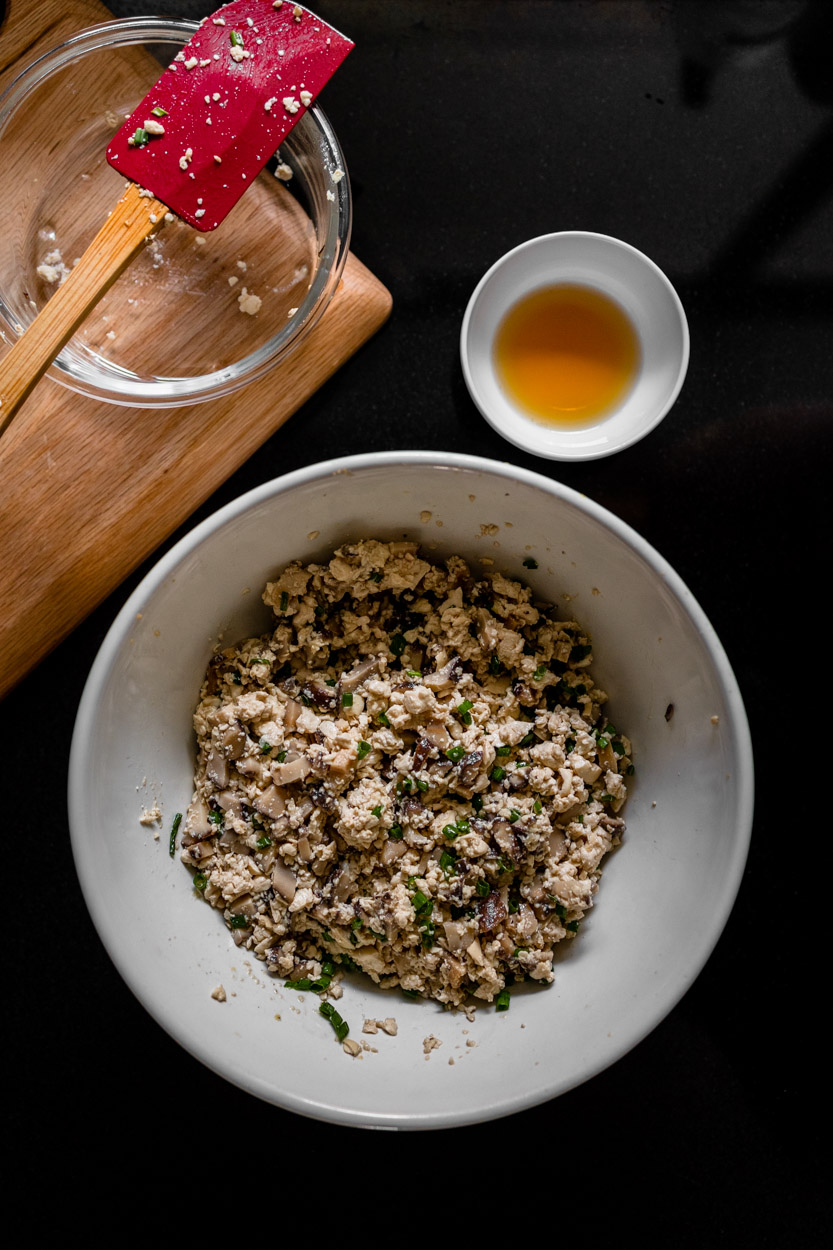
To make the mushroom sauce, sauté onions and garlic until the onions start to caramelize. Browning the onions will add extra flavour and natural sweetness to the sauce. Then, add the mushrooms and sauté until cooked, about 5 minutes. Once mushrooms are cooked, deglaze the skillet with soy sauce to add umami. Finally, for richness and creaminess, pour in full-fat coconut cream. I chose to dilute the coconut milk with water, otherwise, I found the coconut to be overpowering. Sprinkle with a generous pinch of ground black pepper and some chopped cilantro, and it’s ready to serve!
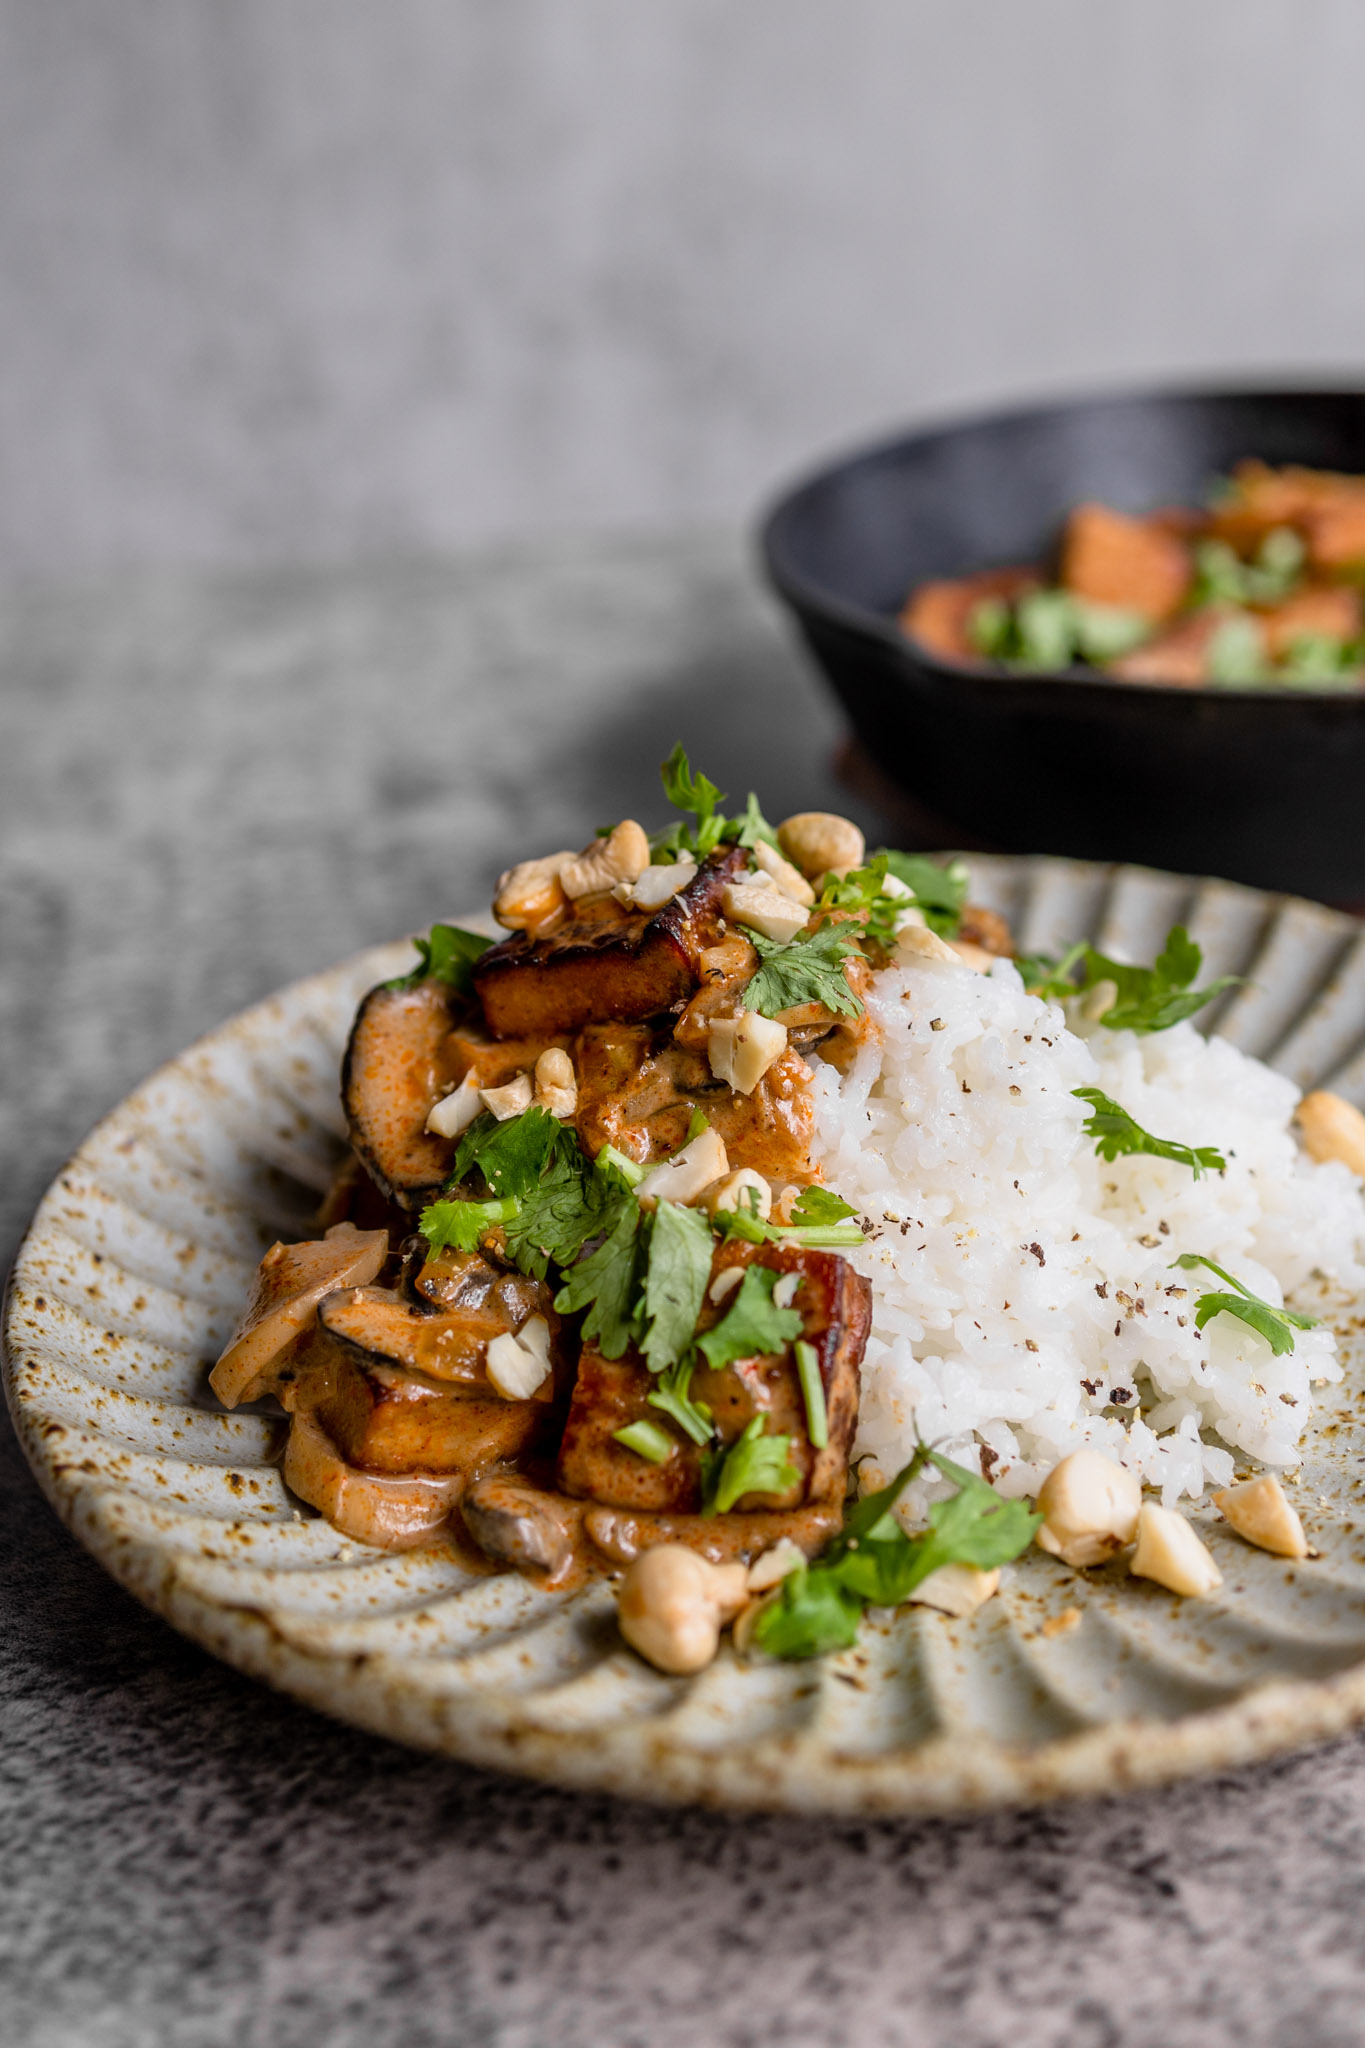
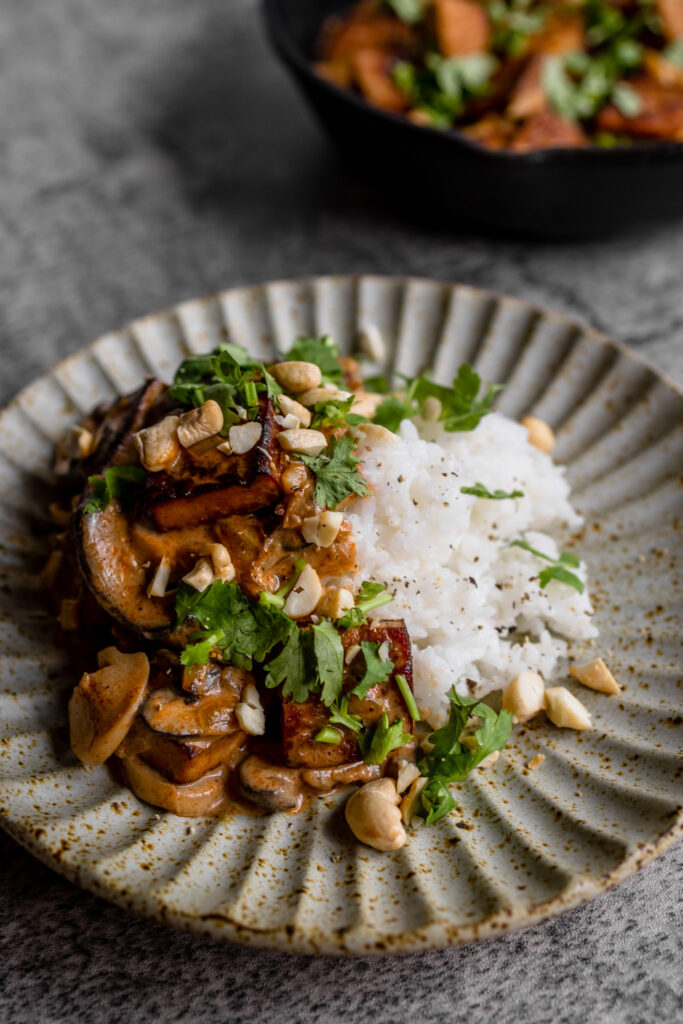
The nutty flavour of tofu goes so well with the umami-packed mushroom sauce. Serve this tempeh over a bed of rice, or with noodles for a filling and cosy dinner! Let us know if you like this recipe in the comment box below.
Heat your oiled pan, add in the tofu and pan-fry all the sides till golden brown. Remove it and set it aside for later use.
Heat the tablespoon of oil in a large non-stick skillet over medium heat. Once hot, add the onion and garlic and fry until golden brown. Next, add the sliced mushrooms and cook for 5-7 minutes, or until mushrooms are cooked and start to brown.
Deglaze the skillet with the soy sauce. Add the curry powder, maple syrup, ground black pepper, salt, coconut milk, and water. Stir to combine and cook for another 5 minutes. If you want to thicken the sauce, add the diluted cornstarch.
Add the sautéed tofu to the skillet and cook for another 5 minutes. Serve on top of rice or noodles and top with chopped coriander!
It won’t be hard to visualise a typical visit to the famous ArtScience Museum – just think projector art and IG-worthy installations. But that’s not the only place in Singapore where you can find immersive art. We are lucky enough to find some time for the exhibition before it comes to an end. Let’s dive into the world of Nam June Paik: The Future Is Now.
If you haven’t heard of Nam June Paik, here’s a quick introduction. The South Korean artist can be considered the OG founder of video art, creating many works over a span of 50 years before his passing in 2006.
More than that, we also find a wide variety of artworks that bring to life Paik’s take on technology and culture including plenty of works based on the old-school telly.
The exhibition also explores Paik’s collaborations with fellow avant-gardists such as Fluxus founder George Maciunas, artist Joseph Beuys, and musicians John Cage and David Bowie. One of the exhibition’s 11 sections is devoted entirely to Paik’s 30-year collaboration with cellist Charlotte Moorman, who performed in different stages of undress.
Throughout the whole exhibition, we get to learn how Nam June Paik grows in his arts. We are also surprised by how people express idealogy as a form of expression arts/performance than what we do now.
Here, we also find exhibits that would make you reach for your camera. 180 installations are spread out over multiple zones, with the most eye-catching being the Sistine Chapel. The star of the show features overlapping digital projections flashed across the walls of the museum, casting shadows as you pass.
While the exhibition for Nam June Paik has already ended, feel free to head down National Gallery for a walk. There are many more permeant exhibitions being held there, not to mention having a walk.
Now National Gallery was once a former supreme court and city hall in the 30s to 00s. The structure of the building is one of the best ‘old’ architecture in Singapore (at least for me).
National Gallery Singapore Address: 1 St Andrew’s Road Operating Hours: 10 am – 7 pm
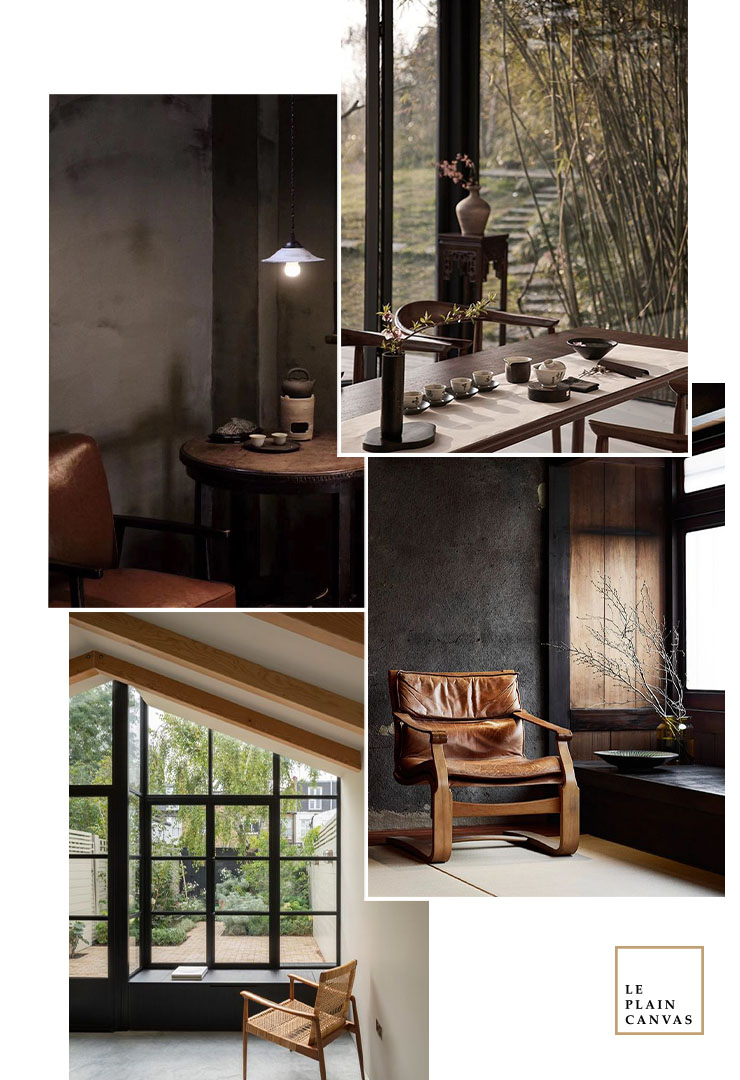
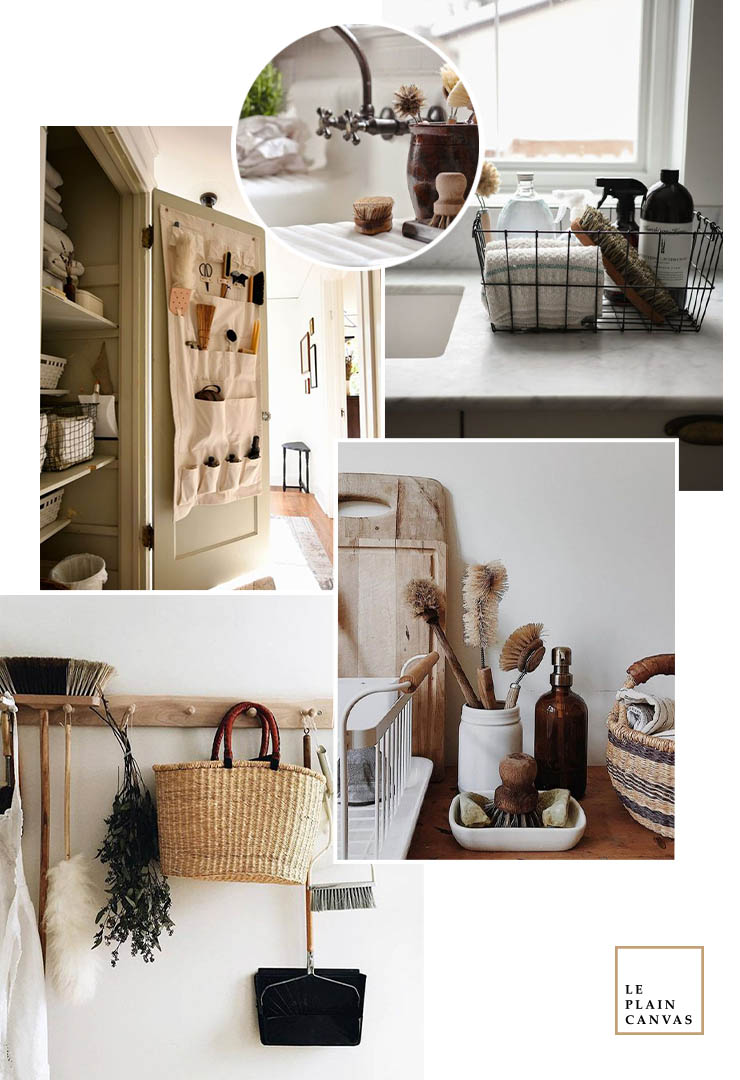
See, it is a simple corner of the home. You may own the same one. For each tea lover, you deserved a tea room. When searching for a good corner to set up a tea corner or just to seat down for a cup of tea, we are looking for corners with natural light.
A tea corner includes much more than coffee. It should also include the necessary components to make the perfect cup of joe. Including pitchers, sugars and sweeteners, brewers, milk and creamers, stirrers, spoons, and more. All of these tools can quickly become a disorganized mess if left unattended—which makes it that much harder for your employees to find what they need and get back to work.
Also, a stylish, clean, and the organized station is a reflection of your overall workspace, making it a good long-term design investment for your office.
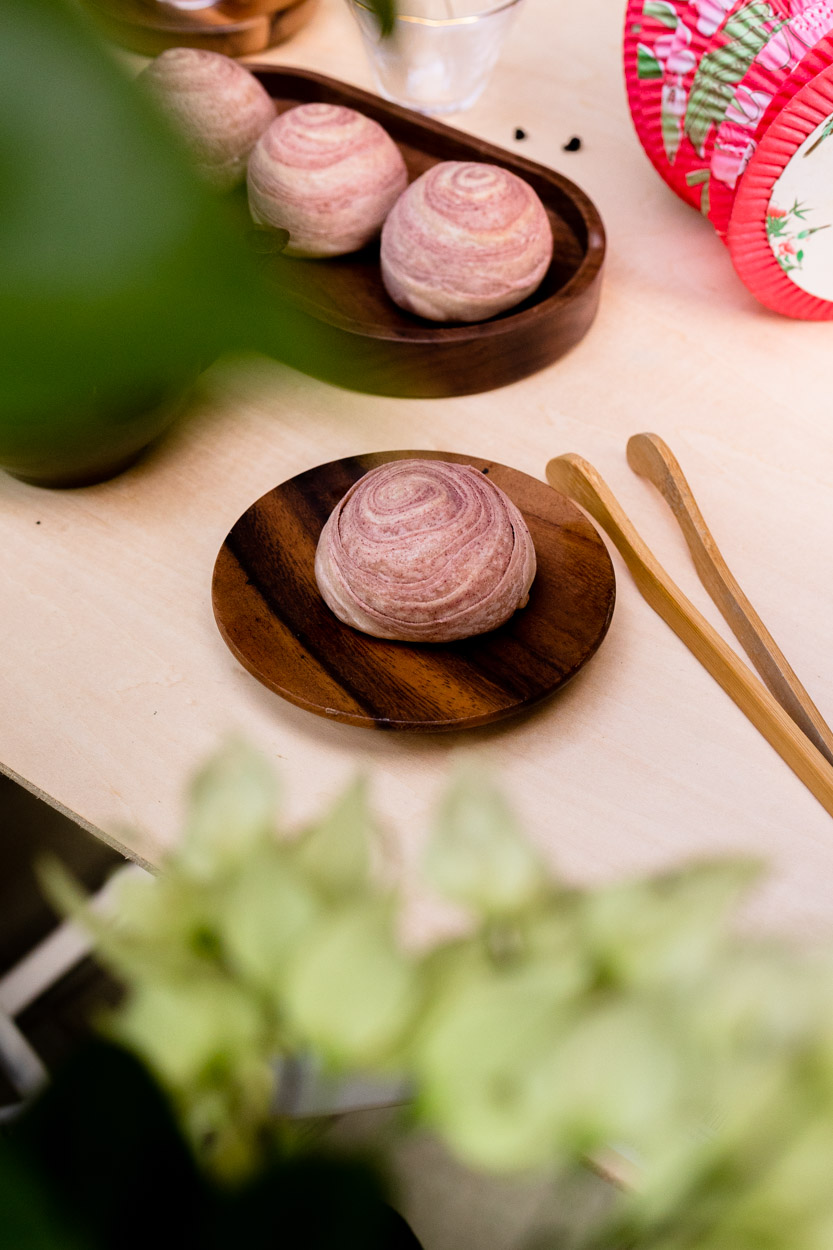
For a long time, we have followed this lifestyle’s YouTuber – Belinda Chen. We simply love how she embraces her every day, spending time cooking food while we order takeaway. She has this reel on Instagram about making an Azuki An Toast that looks really easy to make, as well as tasty and mouthwatering.
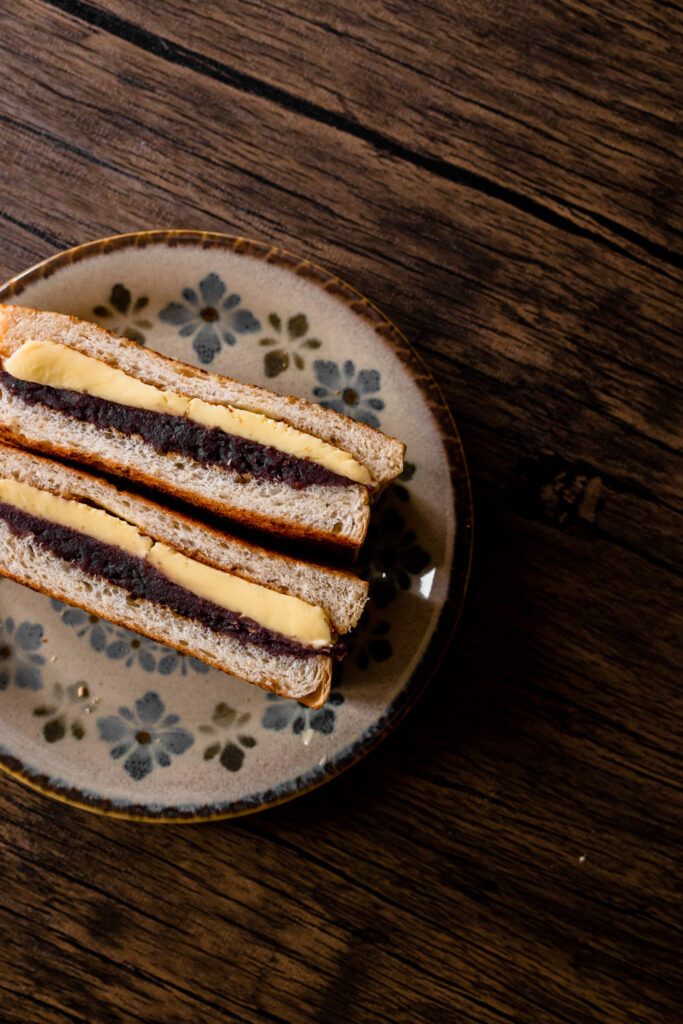
This Azuki An Toast consists of crispy toast, savoury butter and sweet homemade azuki red bean paste. This snack is inspired by the Japanese Ogura Toast (小倉トースト), which you can get with toasted bread topped with red bean paste, butter, and fresh whipped cream.
What do you need for Azuki An Toast?
This simple dish is comprised of 3 ingredients (bread, Anko and butter).
Bread: There are many kinds of bread, which in this case we use a thicker white bread. It’s thick, fluffy, and slightly sweet white bread, also often called milk bread in the West. When you toast the bread, the crisp top makes it perfect for spreading toppings, while the inside remains moist, fluffy, and soft. It’s literally heaven in bread form.
Anko: Anko is sweet azuki (red bean) paste. You can use Anko that is creamy and smooth or one that is a little more chunky depending on your preference. We use our homemade version for this recipe but you could also get one from the store.
Butter: Use good quality salted butter, it does make a difference.
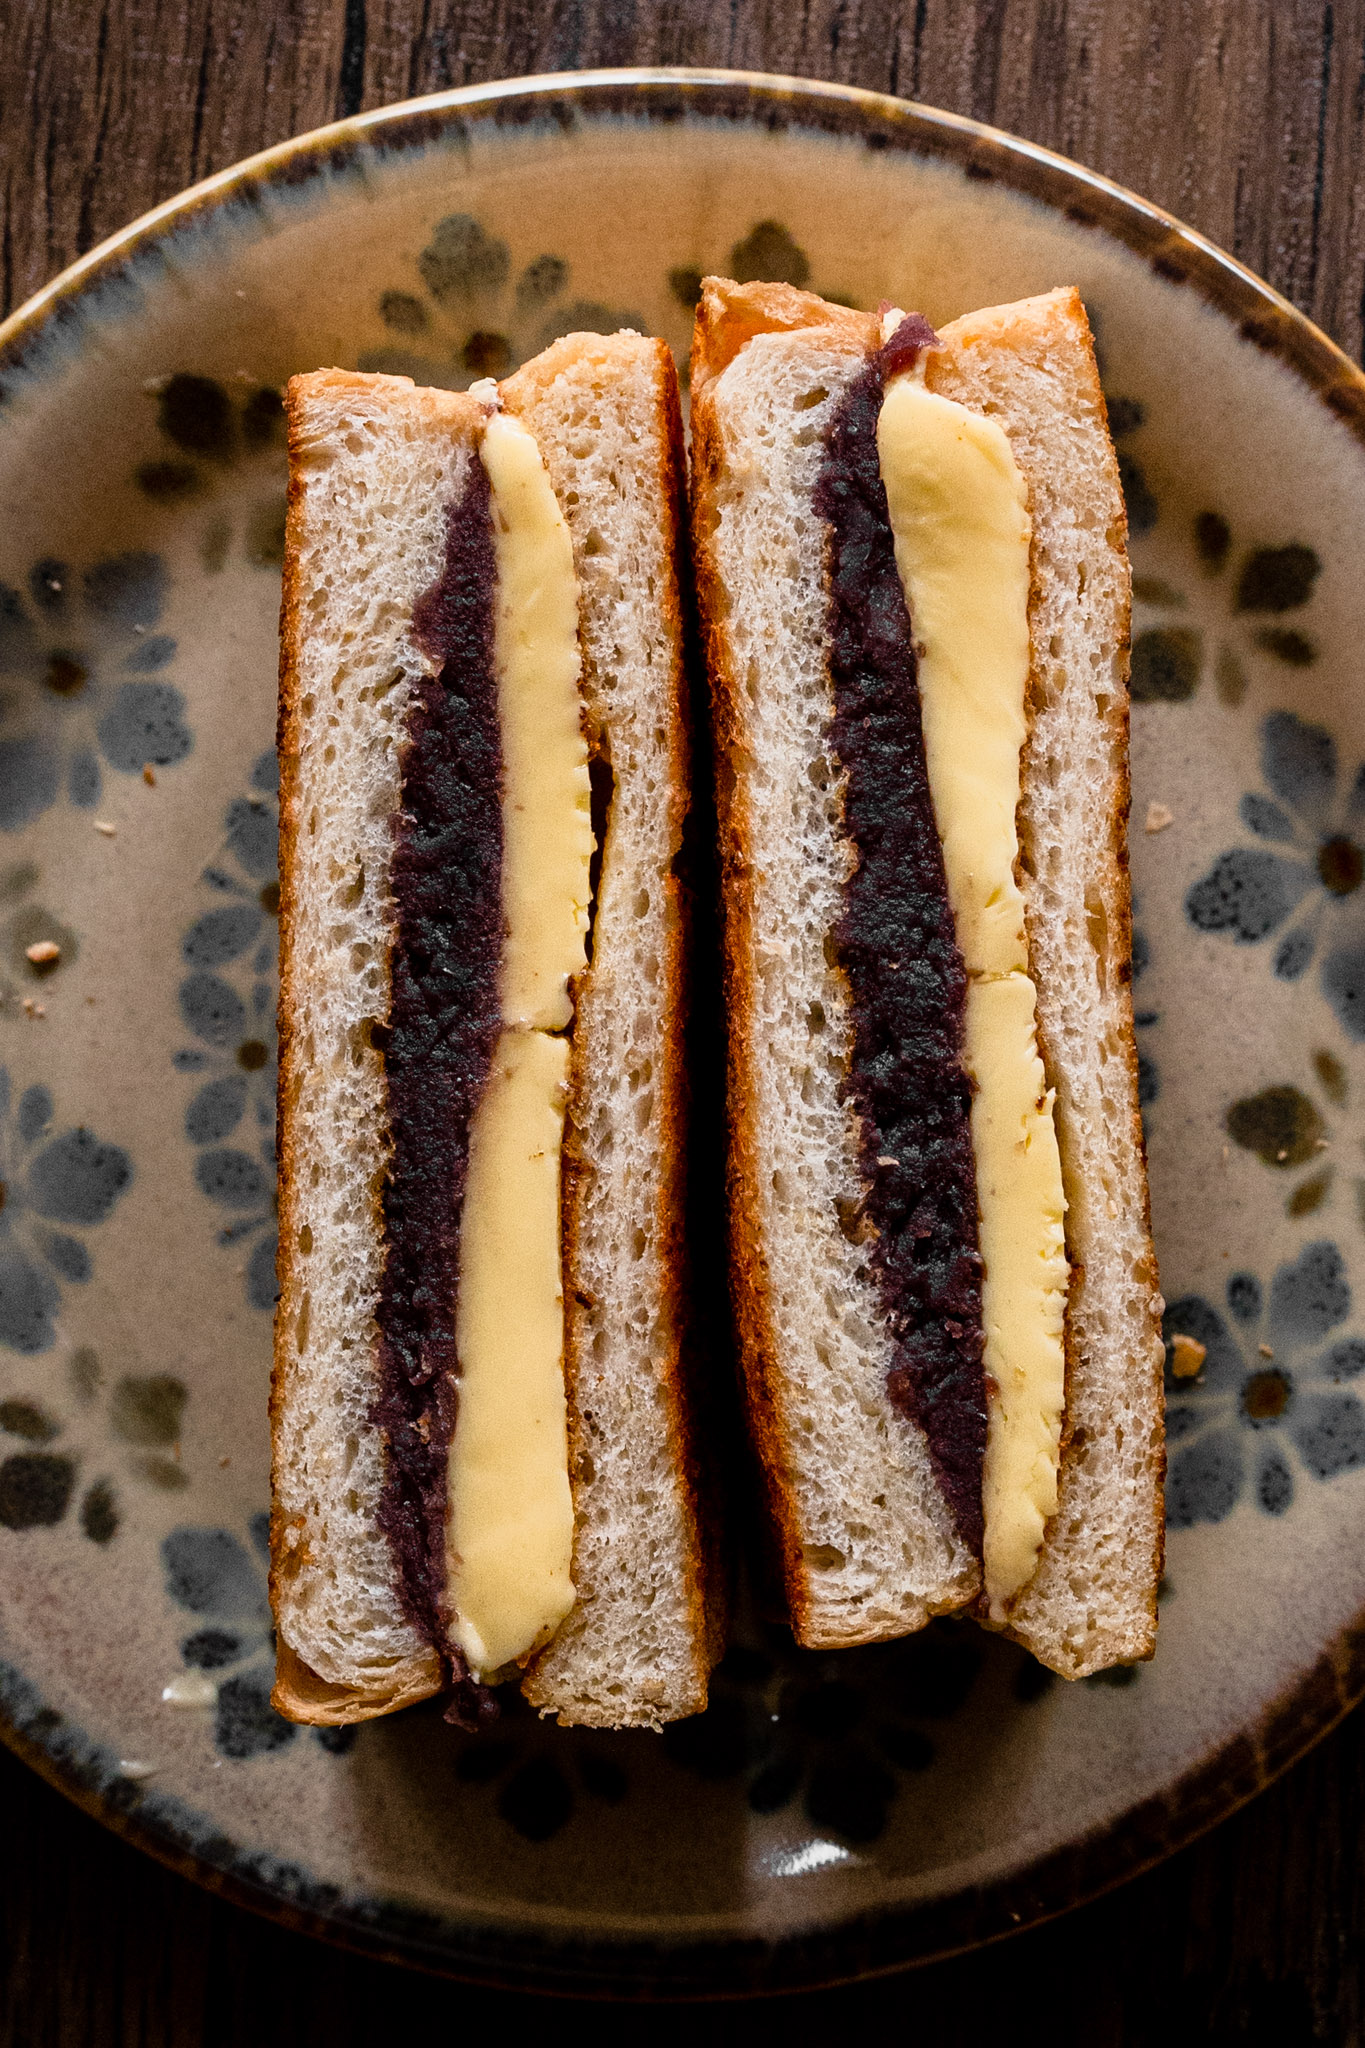
There are mainly two types of red bean paste in Chinese cuisine – mashed and smooth. The key difference is whether it contains the bean husk or not.
Type of Red Bean Paste
There are mainly two types of red bean paste – mashed and smooth. The key difference is whether it contains the bean husk or not.
The mashed red bean paste is the most common for home cooking and is the one I include in the recipe below. You only need to boil the azuki beans with sugar until very soft, then smash them to the texture you prefer. The finished paste will have a consistent thick texture that is easy to shape and contains some whole and broken beans.
The smooth red bean paste is a bit of a hassle to make and normally can just be purchased from a Chinese or Japanese market. For the smooth paste, the azuki beans are boiled and mashed without adding sugar. The mashed beans are diluted into a slurry and then strained to remove the husk. To make the texture of bean paste smooth and gooey, a substantial amount of sugar and lard (or vegetable oil) will be blended into the paste. This is the reason you find that supermarket red bean paste has a better mouthfeel than the homemade kind.
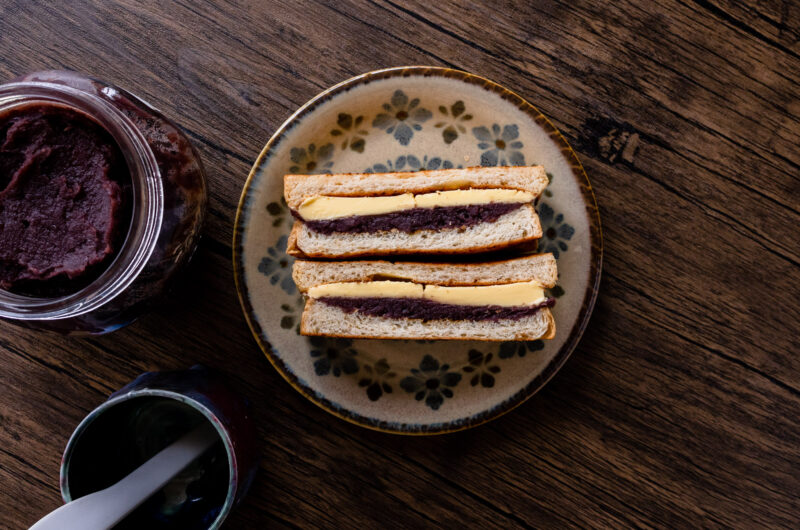
The result is a slightly sweet, flavorful breakfast. It’s not too heavy and there are tons of health benefits associated with azuki, like fibre to improve digestion and high mineral content.
Toast the bread to your preference. Spread the Anko onto one side of the toast, while on the other lay your butter slice. Enjoy immediately, we like to half it.
“I once was lost, but now I’m found”. A modern-day market for unique fashion, The Editor’s Market has opened their flagship outlet at Orchard Road within Ngee Ann City.
In the corner of the flagship store of The Editors Market in Ngee Ann City, lies Cafe FOUND, a minimalistic and aesthetically-pleasing cafe. When we first entered, the wide variety of bakes and desserts on display caught my attention. Serving warm pastries, cakes, and more, Cafe FOUND has something for everyone.
Furniture pieces are in various shades of black and white, to showcase the simple yet refined outlook. The raw concrete feel is complete with the use of metals here, from the mini coffee tables to the legs of the chairs and the trays used to display the assortment of pastries at the counter.
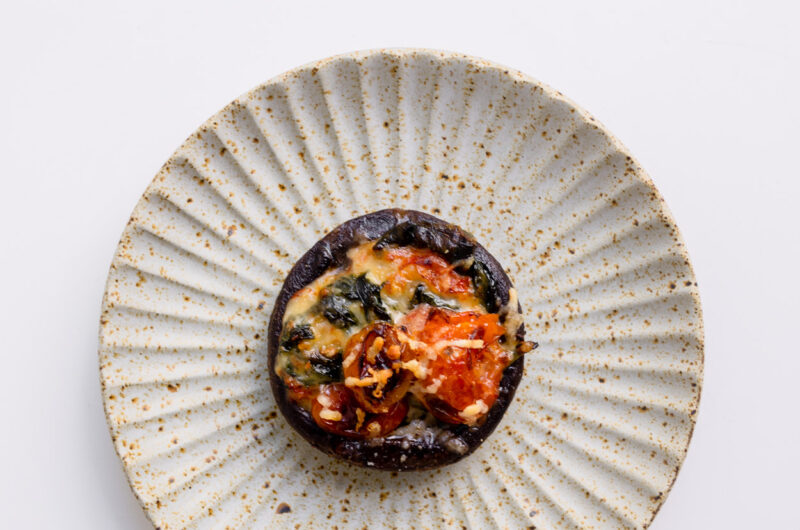
A good mix of savoury and sweet pastries are all displayed on the counter, sourced from various cafes on a weekly rotational basis. We got a Perne Shroom ($6.50), a flaky croissant with mushrooms. While we are disappointed that the shroom chip as topping has already softened and feels chewy, we love the flavour of the croissant.
There is also a wide range of drinks available in this store, we ordered the Matcha Latte ($6.00) and a Filtered coffee ($7.50) from Nomad. While it is not the best we had but overall it is a place to stop by after all the shopping.
Cafe FOUND Address: 391 Orchard Rd, #B1-16 to 24 Takashimaya S.C., Ngee Ann City, Singapore 238872 Operating Hours:10a m–9:30 pm (Daily)
Overall, we like that their menu and coffee selection change regularly so that there are new items to look forward to every once in a while. Cafe FOUND is definitely a great place to kick back and relax with some pastries and cakes if you are in the area.
Came across this Pinterest of a stunning lounge chair in a beige and bean look-alike shape. These sofa/chairs that look curated and timeless straightaway got into my to-get list. It is a versatile piece where it suits all styles of personalities.
As the chair is natural adding different elements around the chair will transform it into another style. Such as adding an Iittala vase with spring vibes and colorful flowers gives a soft vibe to the room, while green plants give a sleek vibe. The sofa/chairs have the texture of a cozy rug which is one of the reasons why I fell in love with it. Moreover, furniture with rounded forms and textured finishes add to the effortless feel and inviting atmosphere.
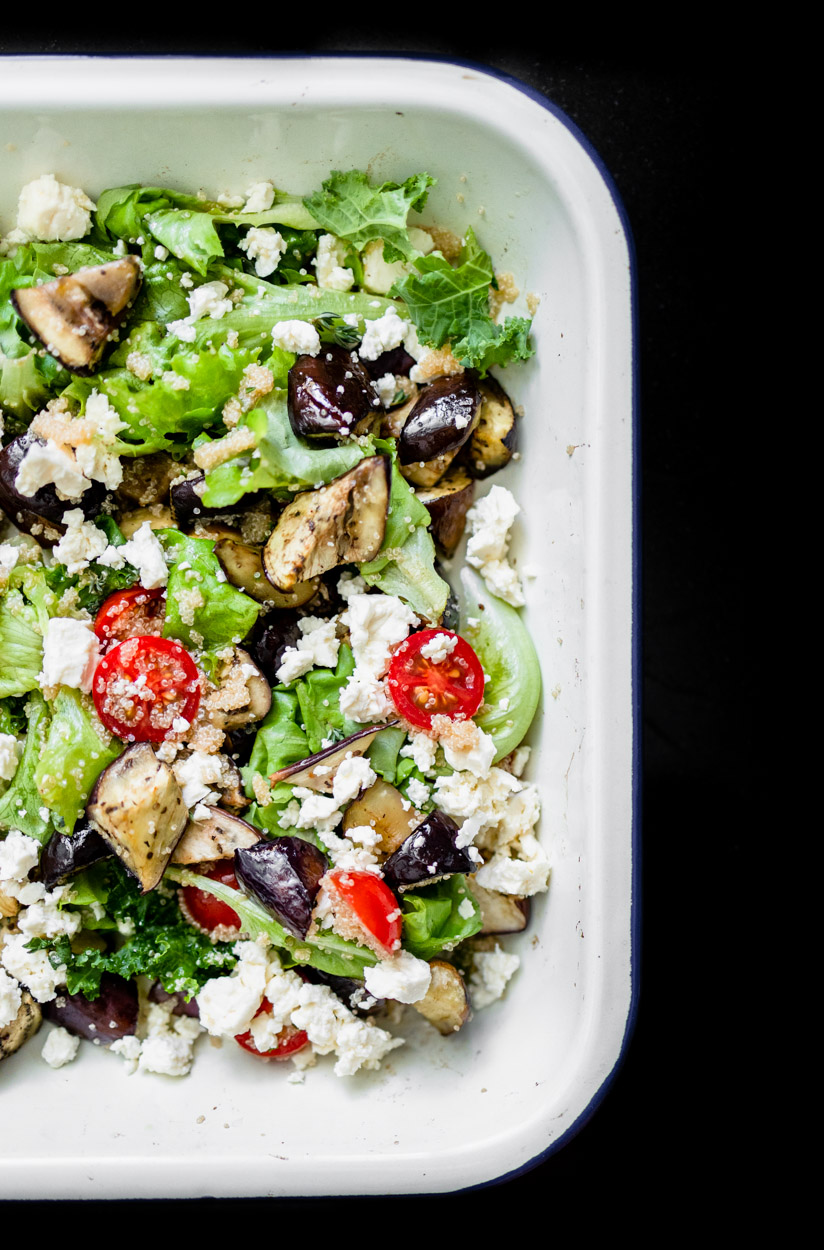
Have you spotted flowers like sakura blooming around your area? We do and this means we are entering our favourite season of the year – spring. During the spring we like to have salad especially involving fruits.
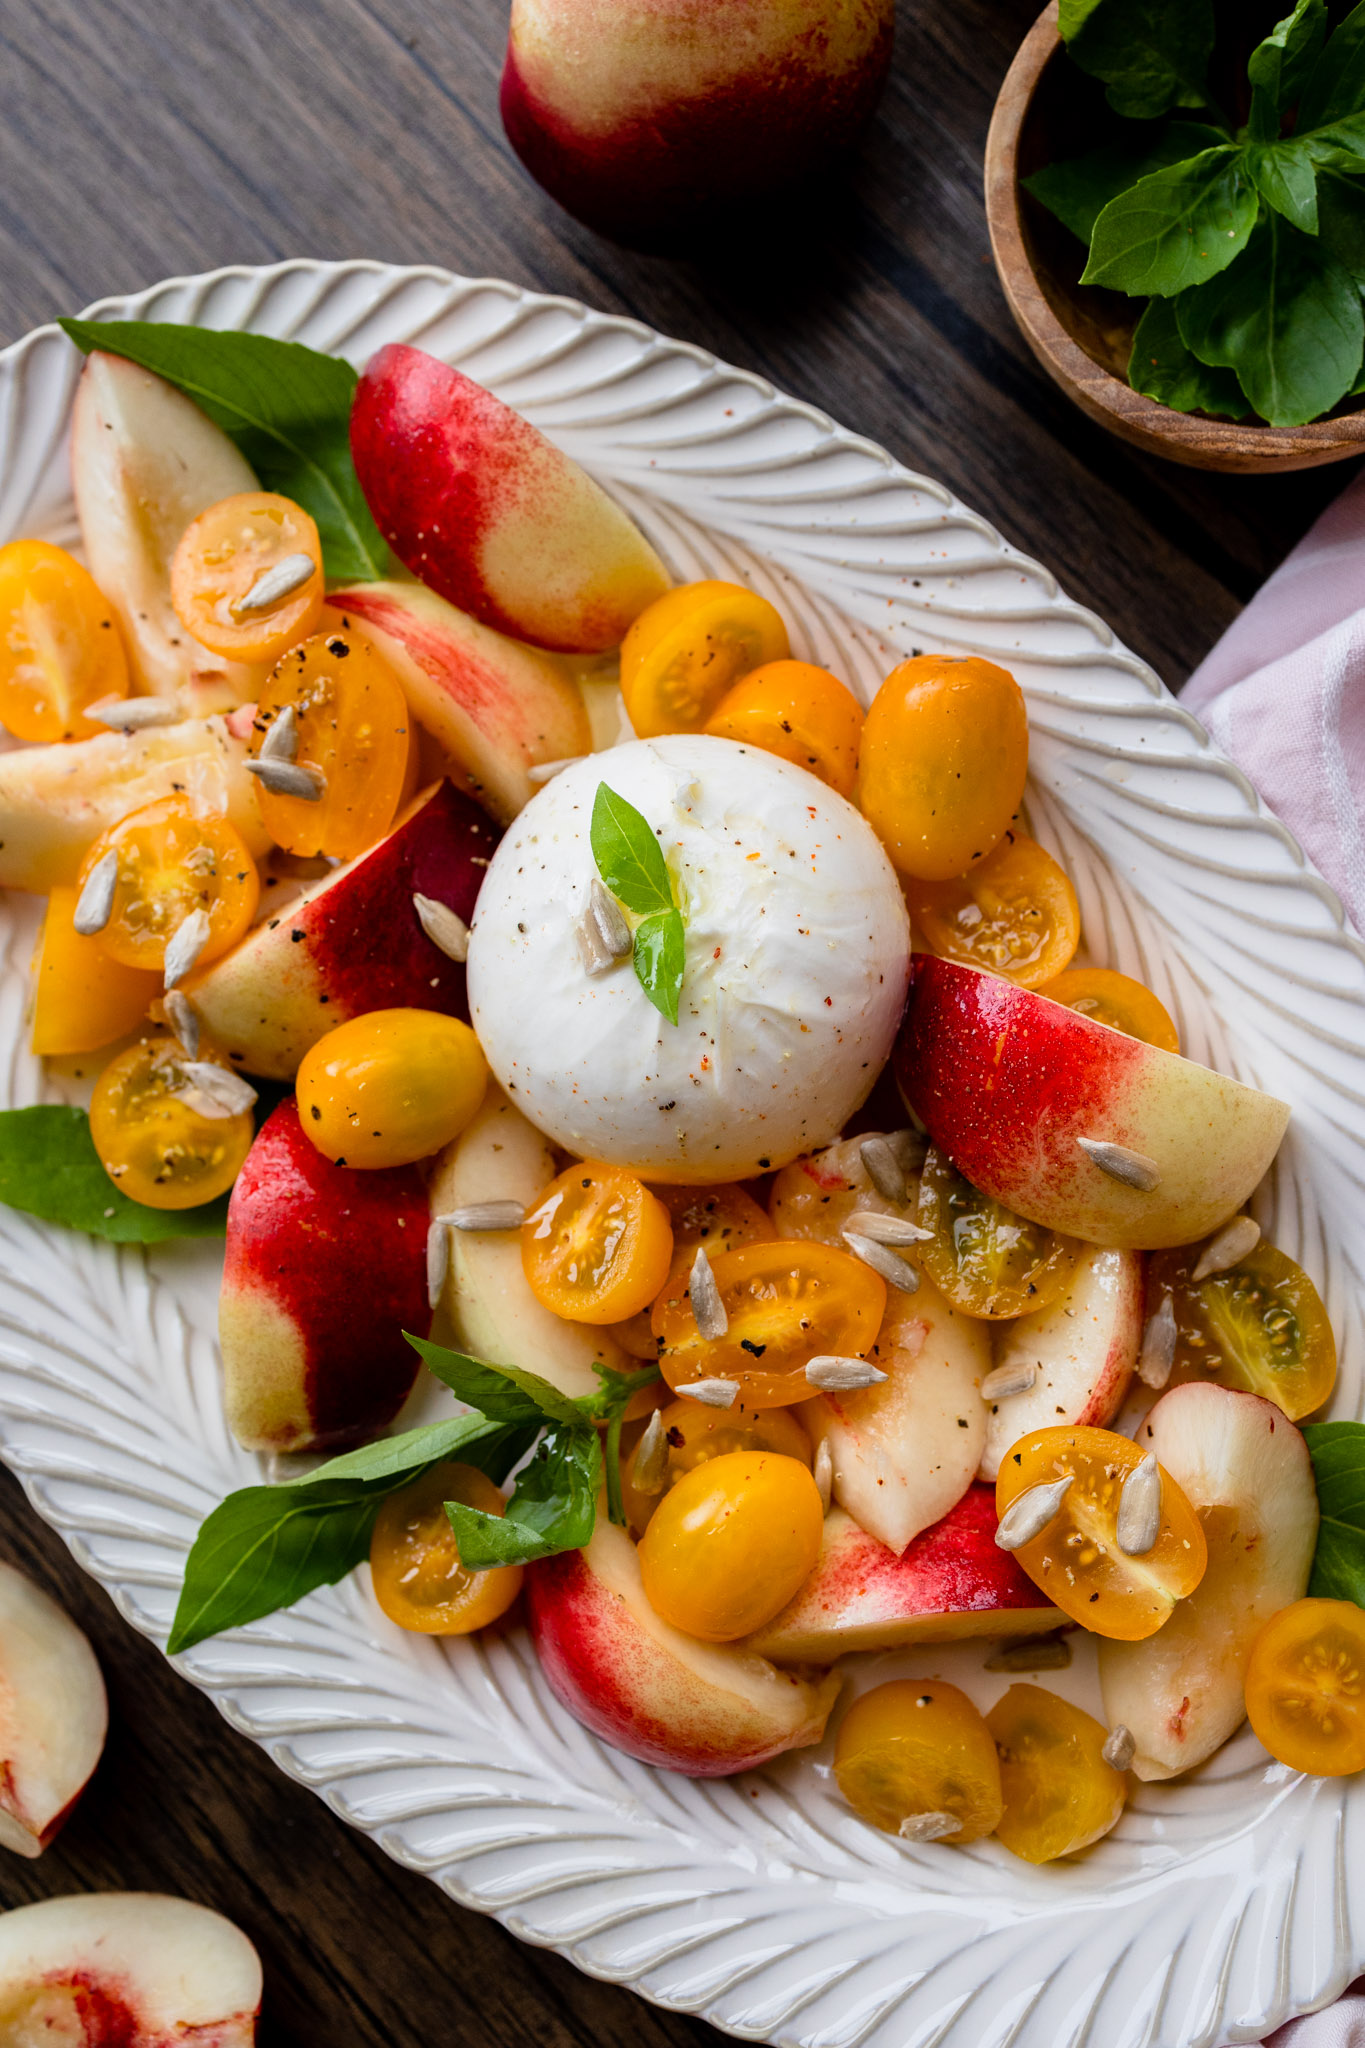
Burrata with Peach and Cherry Tomatoes Salad is bursting at the seams with fresh peach, creamy burrata, and juicy tomatoes. Although it looks like it can be served as the fanciest restaurant, it actually takes only 15 minutes to prepare. Whip it up for your next gathering and watch your guests’ eyes widen!
What is burrata?
If you’ve never used burrata cheese before, get ready to become addicted. It’s a form of mozzarella cheese that comes in a semi-soft ball. Upon slicing into a piece of burrata, rich cream and curds ooze out. It’s ridiculously flavorful and such a refreshing alternative to classic mozzarella!
How to Make the Salad?
Making this tomato peach burrata salad is so simple, you can hardly even call it a recipe. Below, find a quick hitter overview of the process before you dive in.
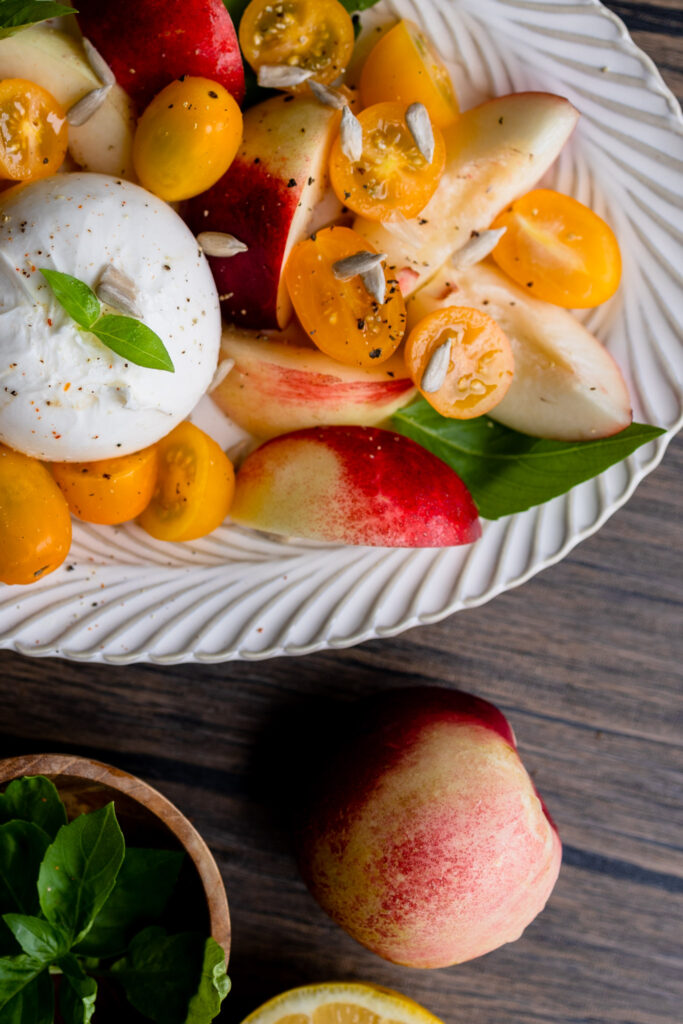
Slice the Peaches and Tomatoes: Using a sharp knife, slice the peaches into wedge or thin slices and place them on a flat serving plate. Next, slice the cherry tomatoes in half and sprinkle them on top of the peaches.
Cut the Burrata (optional): Slice the burrata and sprinkle it on top. For us, we place the whole burrata in the middle.
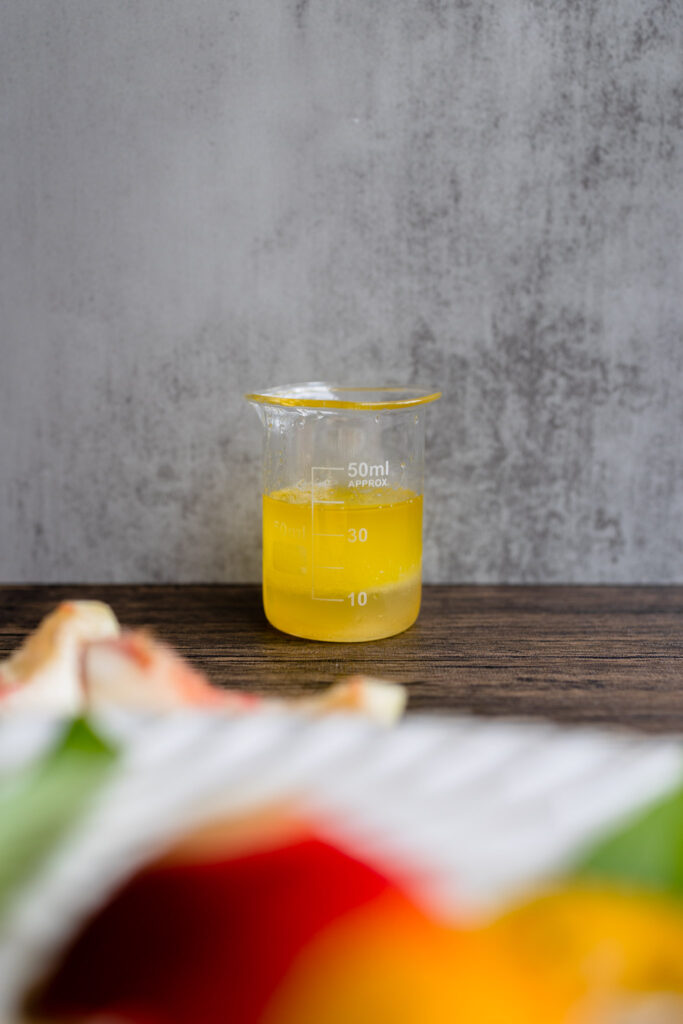
Season and Serve: Season the salad with salt, oil, and lemon juice and sprinkle whole basil leaves on top. Serve immediately and enjoy!
Tips for making the salad
Below, find a handful of pro tips to help you make the best peach burrata salad.
Don’t toss the salad. Burrata salad is best served on a flat plate with a drizzling of balsamic and oil. Refrain from tossing it so you don’t break apart the delicate cheese and fruit.
Serve it right away. Only make this salad right before you plan to serve it. If it sits too long, it will wilt and turn soggy.
Swap in your favourite stone fruit. This salad is super versatile and can be made with virtually any stone fruit. Select your favourite and you can’t go wrong! Apricots, nectarines, and plums all work great.
Use high-quality olive oil and balsamic. The flavour of this salad really depends on each ingredient being the freshest and most high-quality. Avoid olive oil and balsamic blends and opt for pure stuff. It will make all the difference!
Season with freshly cracked pepper. If you like a bit of heat, finish the salad with a few cracks of pepper.
We’ve always made this salad several times over the course of this spring/summer and plan on doing so a few more times before the peach and tomato season is over. We beg you to do the same. It’s just too good and too easy!
10 to 15 grape and cherry tomatoes, sliced in half
2 peaches, pitted
8 ouches of fresh burrata cheese
6 leaves of fresh basil
Lemon juice
Olive oil, for drizzling
Salt and pepper, to taste
Methods
Slice peaches and tomatoes. Arrange on plate. Drizzle with olive oil then with balsamic glaze. Place burrata in the centre. Season with salt and pepper. Chop fresh basil and garnish.
We can’t believe that it hit “the” 6th year since the day we decided to start this blog – where it has been an outlet for us to share our love for food, art, and lifestyle. It documents how we spend time during our free time cooking, travelling and creating beautiful things. We celebrate our anniversary with a cake, ever since we were two. However, this year we gave a little change and headed for a staycation, treating it as a reward for ourselves. (click here for the fifth, fourth, third, andsecond-anniversary posts)
We visited quite a few 5-stars hotels in Singapore and many offer good quality service and food, such as Capitol Kempinski Hotel, Mandarin Oriental, Fullerton Hotel, Pan Pacific Hotel and more. Many of these come with a well-renovated room, huge pools and amazing breakfast. Yet there are times it feels too commercial and we don’t feel relaxed at all. With many great reviews given, we gave this award-winning 3-stars hotel Lloyd Inn a try. With four words to explain our experience – we will be back!
Entering mini Bali
With just 34 rooms (spread across 8 room categories), Lloyd’s Inn is a relatively small establishment, one that’s actually only two storeys tall. As such, one can easily miss the entrance to the hotel – we certainly did. We gave a call and requested early check-in and our room is ready for us at 1 pm. We were worried if we will enjoy this place as it is small and ‘plain’. But appoint reaching the Lloyd’s Inn lobby, made an impactful first impression. Various fauna can be seen throughout the lobby, while the hotel’s distinctive monochrome aesthetic lends it an air of sophistication.
The Room and Amenities We are issued to Room 3 which is located on the second floor of the building. Once we open the door we were surprised by how big the room is. The tall ceiling indeed gives a roominess feel and makes it less stuffy compare to many of the regular height rooms.
All the bathrooms at Lloyd’s Inn Singapore feature an open-air element, whether that be an outdoor shower, bathtub, or if you’re lucky both. Awake in the morning and shower outdoors to the peaceful sound of birds tweeting before heading out into bustling Singapore. As we opt for the Big Sky room for the ultimate bathroom where the pièce de résistance is the large outdoor bathtub we are able to relax underneath the sun or stars!
Taking a break with popular Pita Bistro – Miznon
Lloyd Inn is an accessible place, wherein minutes of walking away you can reach the town area. However, lazy bums like us decided to take away from this popular pita bistro – Miznon, which is near the place we stay instead before checking in. We ordered a pita for each of us Fish and Chip Pita and the Chicken Liver Pita.
The Fish and Chip Pita ($21) was unlike what we imagined. Instead of fried fish, we are served with seared fresh barramundi along with fried potato. The fish is tender, along with the white wine vinegar it tastes fresh and juicy.
We wanted to give this a try once we saw the menu – Chicken Liver Pita ($18). Instead of strips of the leathery liver that we’re so used to having offended my bak chor mee, Miznon sears the whole of the organ, and deftly. Each piece was springy, with just the right whispers of the metallic bitterness that makes liver, well, liver. The tahini helped to enhance the butteriness of the offal, but halfway through the pita, even the salsa topping couldn’t save the jelakness that set in.
It is on the slightly pricy side, but the taste is amazing. We can’t wait to visit the store itself and try more of its food.
Miznon Address: 6 Stanley St, #01-01, Singapore 068725 Operating Hours: 11 am – 10 pm
When architecture meets the nature
Away from the monochrome rooms, there are several areas to relax at Lloyd’s Inn, including a rooftop terrace and a tranquil mini outdoor pool located outside the front of the hotel amongst the lush vegetation. Take a dip in the sparkling blue waters away from the frantic Singapore traffic and forget where you are entire. With day beds, sun loungers and funky looking swing chairs.
Walking around the building where the raw finishes of the walls and floors run throughout the inn and into the rooms, its monochromatic backdrop juxtaposes a touch of nature. In these moments you could understand their tagline, “Nature and architecture merge to form timeless, understated space.”
The question that you may ask
How do we book this hotel? Using our very last $100 SingapoRediscovery voucher, we book our package through Klook. You might be wondering why don’t you have the ‘Big Sky Room’ option like we do? Do not panic!! We book the ‘Business Room’ on Klook and email them for an upgrade which cost an additional $58~ through email. However, do give them an email and check for availability before confirming your Klook’s booking. You can also book through their website.
Does the package come with breakfast? As Lloyd’s Inn does not come with a restaurant, breakfast is served at the Killiney outlet of Artisan Boulangerie Co. (ABC), a cafe specializing in pastries as well as coffee. The breakfast voucher entitles the guest to a hot drink such as coffee or tea plus one pastry.
Are there pests? Pests is be a persistent issue at this hotel – we found ants and huge caterpillars crawling around. We guess that’s unavoidable given the outdoor nature, but if you’re someone who’s easily irked by pests this is worth noting.
In recent years we have expanded our blog from cooking, illustrating to travelling to places. We would like to invite your folks to join us together in this learning journey. We learn, and also exchange knowledge, tips and with each other. We anticipate you joining us in the exciting year ahead! Thank you!
Italian architect Antonino Cardillo used roughly textured plaster to create lumpy brown surfaces across the upper walls and ceilings of this apartment in Rome. Using the geometric ratio of the golden section, Antonino Cardillo designed House of Dust with a horizontal division that separates living spaces and furniture from the coarse plaster walls and ceilings above.
The rough plaster surfaces are missing from these spaces, where instead walls and ceilings are coloured in a pale shade of pink. There are also concrete washbasins and a cylindrical shower concealed behind a ghostly white curtain.
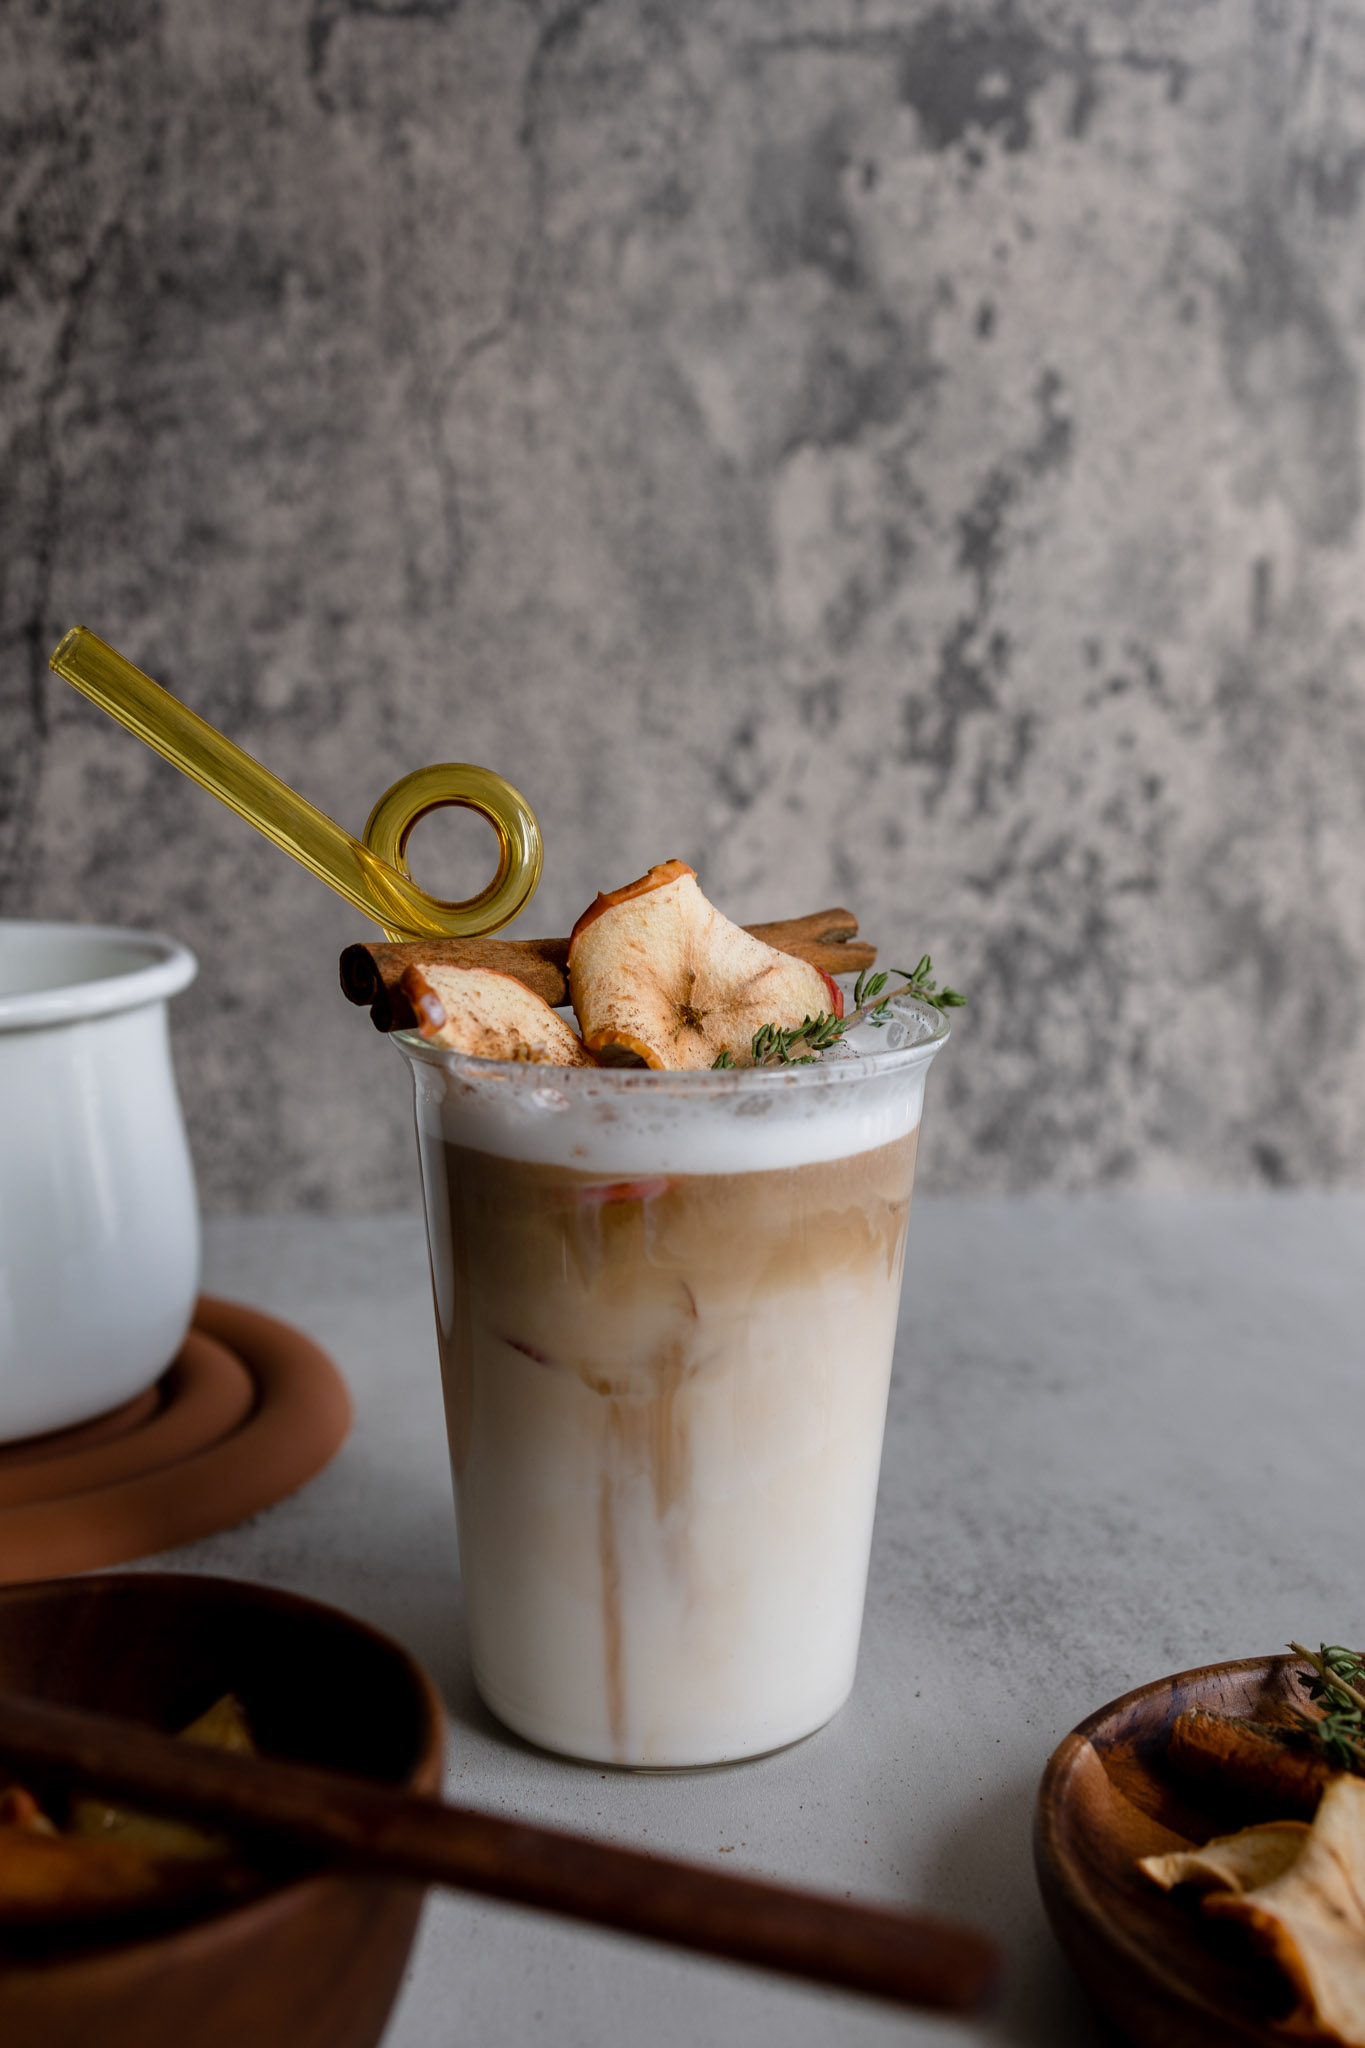
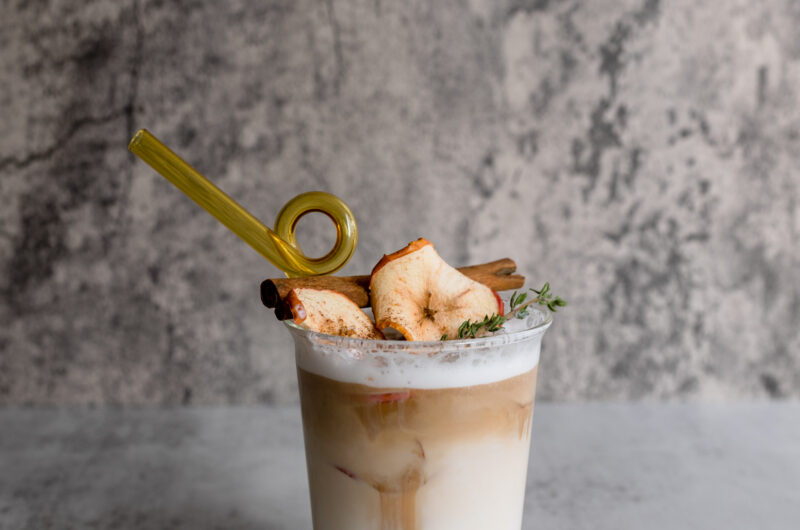
While Angela loves her hand drip, I prefer something sweet for my daily dose of coffee. Thus here we have Apple Cinnamon Latte – this creamy, slightly spicy apple spice latte is the perfect comforting drink to sip on. Easy enough to make for your morning coffee or an afternoon pick me up! This is an easy recipe that features healthy ingredients, so you’re doing something good for yourself.
How do I make a Latte?
First of all, what is a latte? A latte refers to a coffee drink made with espresso, steamed milk and foam. So how are we going to do that at home?
For this particular recipe, we used our espresso machine – Essenza Mini that we have. It is sleek and light for a small kitchen like us and easy to operate. We uses our favourite blend from Starbucks.
Add in the apple syrup, if it’s coming out of the fridge where it’s being stored, we would recommend heating it slightly with the milk or cream you will be using. This just helps to keep your coffee hot for drinking.
If you want foam, you can try the pump frother we share with the Masala Chai Tea Latte recipe, while many recipie frothing with warm milk, however we find that frothing with cold milk works easier (it feel like beating cream).
Prepare the Apple Syrup ahead
While you can purchase the apple syrup in store, we prefer making them at home, as we can control the sweetness in it. This syrup is how we’re going to get flavour into our coffee. The flavour, when added to the coffee is mellow, not overpowering, and it definitely carries a hint of spice and apple. It’s perfectly balanced.
In a mason jar add in sliced apple, cinnamon stick and brown sugar. Layer the apple and sugar making sure it is combined well. Leave it in the fridge for 2 days or overnight. You will see the apple soften and release liquid making it into a syrup.
Easy dehydrated Apple using an Oven
To spice up the drink, we added homemade dehydrated apple on the drink for a crunch. We always thought that we need a dehydrated machine in order for us to dehydrate our fruits at home but we are wrong. Using low heat you can do so using an oven too, although more time is needed.
Preheat the oven to 185 degrees Fahrenheit. Core the apples and slice them into either rings or traditional slices. Keep the slices pretty thin. The more thin the slice, the crispier your dehydrated apples will be. Blot the apple slices or rings with a kitchen towel. Pack them nicely on the baking tray and dehydrate apples in the oven for between 1.5 hours. Let the apple chips cool completely. Place them in a sealed container. The apples will store at room temperature for weeks or in the refrigerator for months.
I can’t tell you enough about cinnamon. Cinnamon is an awesome spice to use and it goes great with something like apples in the morning or in a mixture of fruit or in your oatmeal or even in your cereal.
Emeril Lagasse
Benefits of Apple
Apples are not just crunchy, sweet and satisfying. You’ve may hear it a zillion times: “An apple a day keeps the doctor away.” Turns out there’s more truth to that than you might think. Studies show apples have powerful health benefits, particularly when it comes to fighting chronic diseases that kill millions of people each year.
Protects your heart
Boosts brain health
May help you lose weight, but have it moderately
Lowers your risk of type 2 diabetes
Fights cancer
Prepare the apple syrup ahead and all you need is 10 minutes to make this drink. Give this recipe a try and don’t forget to tag us on Instagram as @leplaincanvas and use the #byplaincanvas hashtag. I love seeing your takes on my recipes!
In a mason jar add in sliced apple, cinnamon stick and brown sugar. Layer the apple and sugar making sure it is combined well. Leave it in the fridge for 2 days or overnight. You will see the apple soften and release liquid making it into a syrup.
Pour the 2 tablespoons of apple spice syrup, warm milk and frothed milk in your cup, the ratio to it is 1:4:2. Lastly, pour your espresso over slowly to create the layers. Decorate the latte with dried apple, cinnamon stick and cinnamon powder. Mix well before you enjoy.
Designers Eduard Eremchuk and Katy Pititskaya have created a cafe in Voronezh, Russia, that embodies “the essence of a doughnut” through delicious-looking, purple velvety walls and squidgy seeming furniture. Cafe Krujok, named after a round doughnut, is located in the centre of the city of Voronezh in southwest Russia and specialises in breakfasts and coffee.
Cafe Krujok is divided into two spaces. Near the entrance, the walls and furniture are a creamy colour and some of the chairs and tables are sculpted to look as though they have been squidged and moulded like clay before being sealed with a glossy finish. In the second space, the designers explored the visuals of a doughnut’s glaze. Walls are covered in plump panels upholstered with berry coloured purple velvet that appears soft to the touch.
There are so many interesting places in the world. We hope that the world will come to peace someday, and we are free to connect with everyone.
It’s no secret how much we Singaporean love our kueh, whether it’s the snaking queues during festivities or the countless versions of kueh-flavoured cakes and desserts. Though there’s a fair share of incredibly intricate creations, you’ll also find plenty of simple kueh recipes to try yourself as you whip up these sweet and savoury treats from home.
The word ‘kueh‘, loosely meaning ‘cake’, similar to the western cake dessert you see on the counter. We have all kinds of kueh, from steamed, fried, baked, to yeasted and more. This time we gather our top 8 favourite kueh that we like making at home.
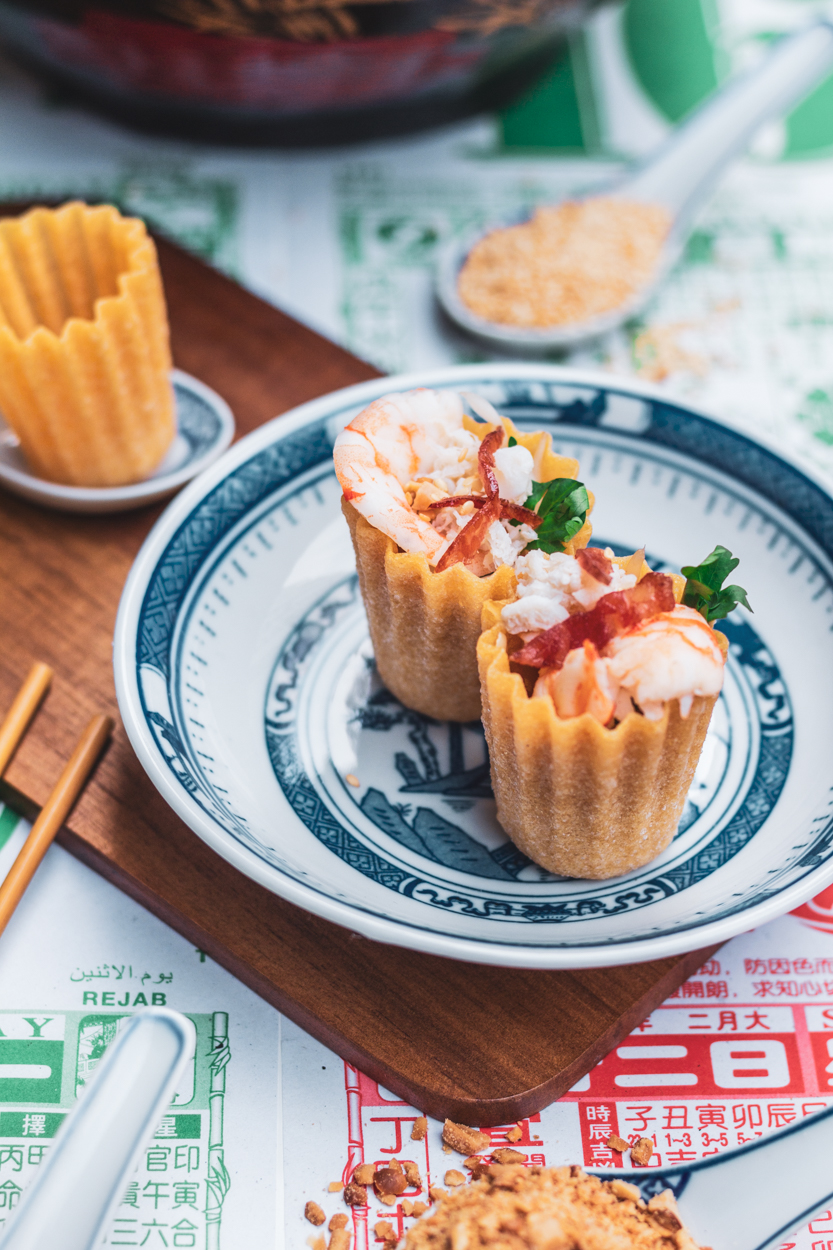
First up on our list is one of our favourites, not to mention it can be baked easily at home. Hong Kong Egg Tart is one of our favourite pastries of all time! During our childhood, we kept on craving it every week. We kept on pestering our mom to get some for us, especially those from Tai Chong Kok which is just a street away from where we stay. It got sold out in 30 minutes once they are out of the oven. All you need to prepare the base and custard, it can be simply prepared and made as a snack in an hour.
We were always beyond thrilled when we popped this cute pie tee inside my mouth. It’s been so long! The memory of us as a kid eating this just flashed right in front of me! So good and satisfying!
Kueh Pie Tee doesn’t take much skill if you follow the steps here – that is, use ready-made Kueh Pie Tee cups. Now that you have the shells and the filling, it’s time to put them together. Please do not assemble ahead of time as the filling will make the pie tee shells turn soggy. Only prepare as many as you want to serve and serve immediately. Top the pie tee shells with turnip filling. A few strips of the omelette strips and sprinkle some prawn on top and then garnish with 1-2 cilantro leaves.
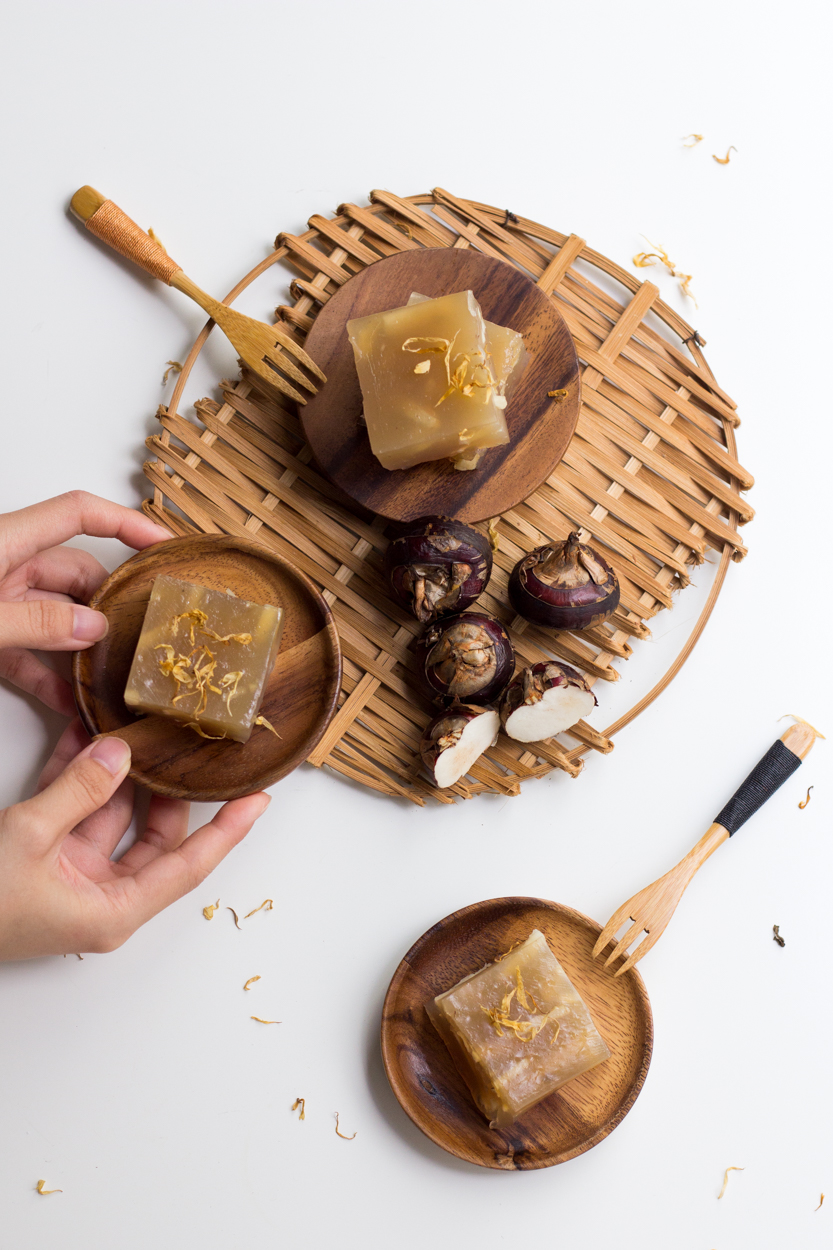
Have you ever encountered Chinese water chestnut cake in dim sum halls? They look yellow and transparent and present a sweet taste. This Chinese Water Chestnut Cake is unique in its taste. It’s subtle. It’s not a jelly though it has the translucent characteristics of jelly when hot. And it’s not a cake at all either. Its texture is harder than jelly and it’s not too sweet and there is the wonderful crunchy fresh sweetness of the water chestnut bits.
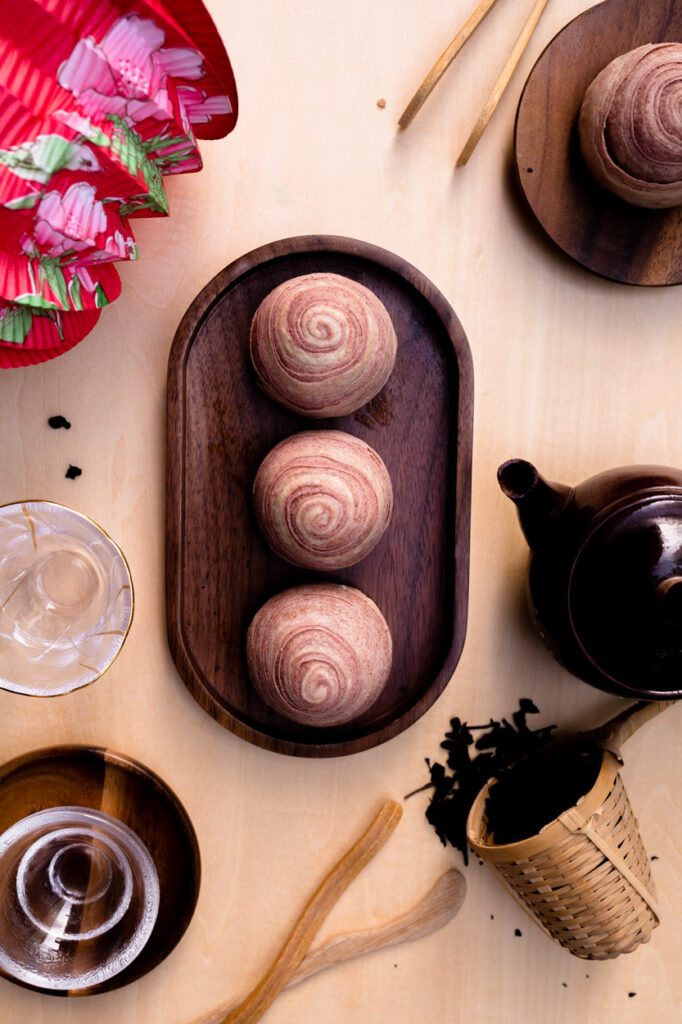
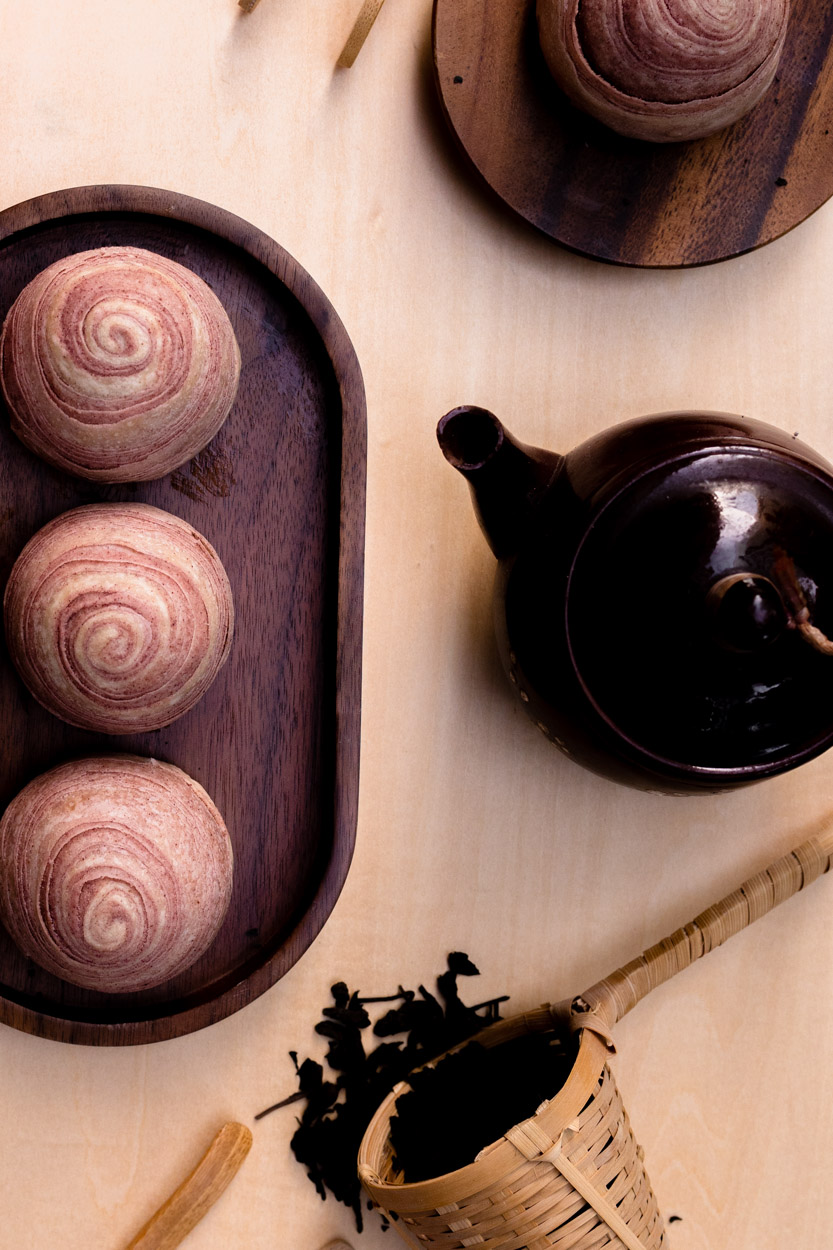
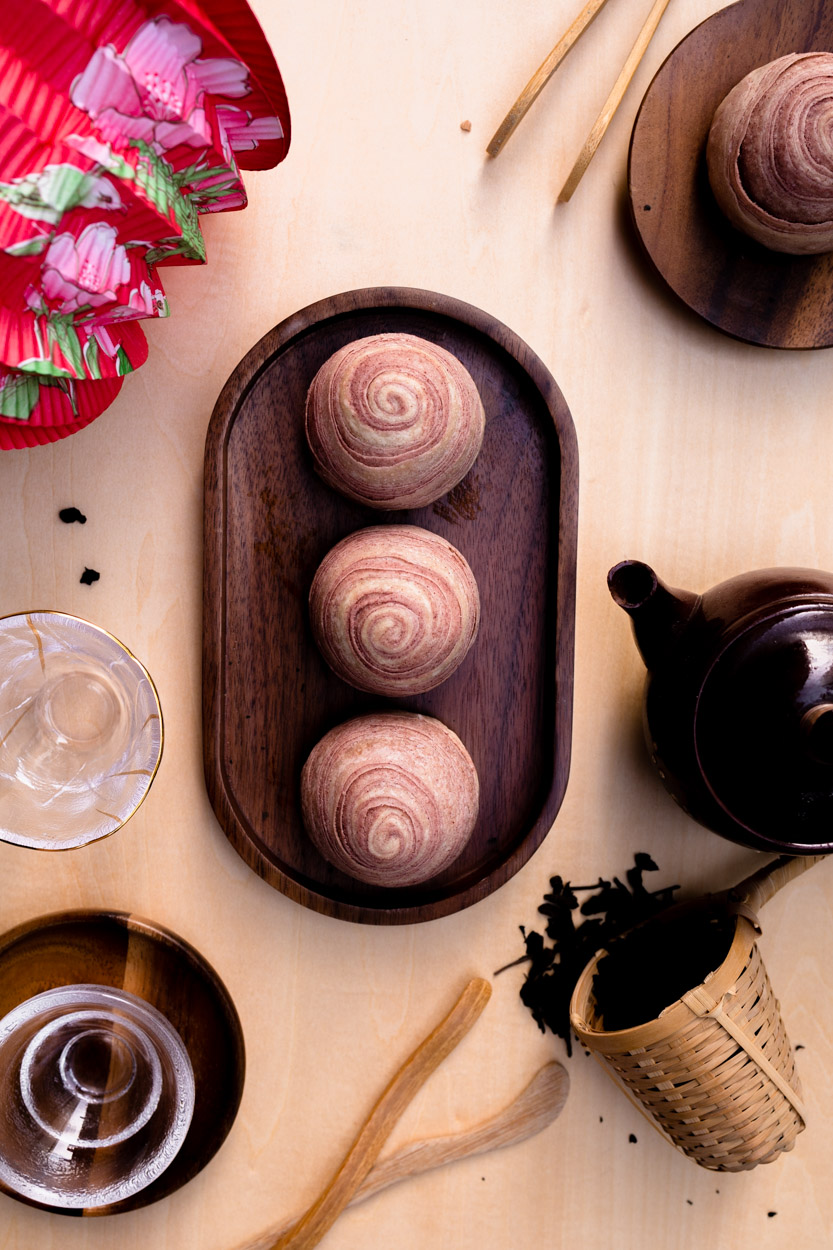
While it required more time compared to many of the other kueh, from the peeling and chopping of the water chestnut. We can reassure you that the rest of the steps are simple after you get a hang of it.Teochew Red Bean Spiral Thousand Layer Mooncake- Pastry-style mooncakes are filled with sweetened red bean paste and made with coconut oil instead of lard and colored with natural juice from blue pea flowers. Ultra flaky crust you will absolutely love!
Teochew Taro Thousand Layer Mooncake – Pastry-style mooncakes are filled with sweetened taro paste and made with lard and coloured with sweet potato powder. Ultra flaky crust you will absolutely love! While who say we only can have for mooncake during the mid-autumn festival? Now that you can easily make it at home you can enjoy it anytime you like.
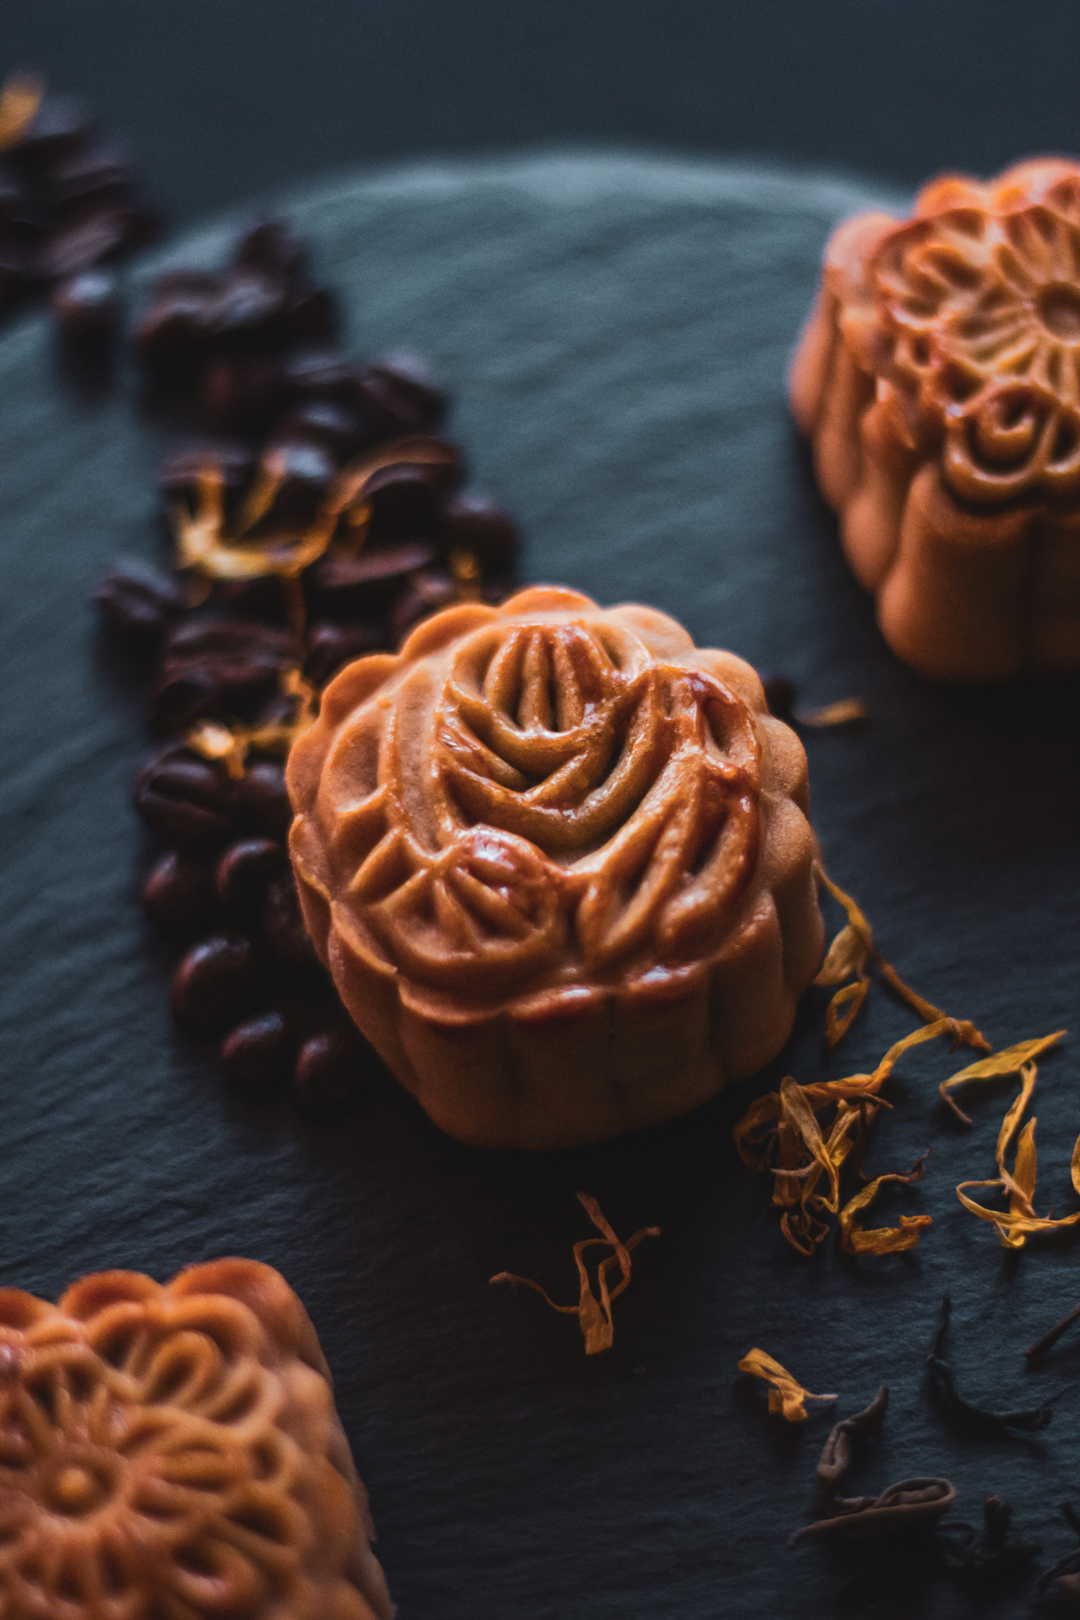
Likewise, the traditional mooncake is up on our kueh list. It is so classic that we couldn’t give it a miss. However, conventionally it is made from red bean or lotus seed paste is surrounded by a thin crust and may contain salted duck eggs yolks. But we decide to make a change, infuse coffee into the mooncake. Are you excited to try out this Coffee Lotus Mooncake? Click to find out how you can do so.
Leaf-wrapped kueh is one of the most tricky kueh to be made as the kueh is hidden in the leaf, you wouldn’t know if the kueh was done only until you unwrapped it. Prepare yourself when you want to give this a try, when we first started making it we are intimate we the steps required to make one dumpling. But Sticky Rice Dumplings can come in sweet or savoury, unlike the savoury ones, the plain or sweet one is rather easy to achieve for a beginner like us.
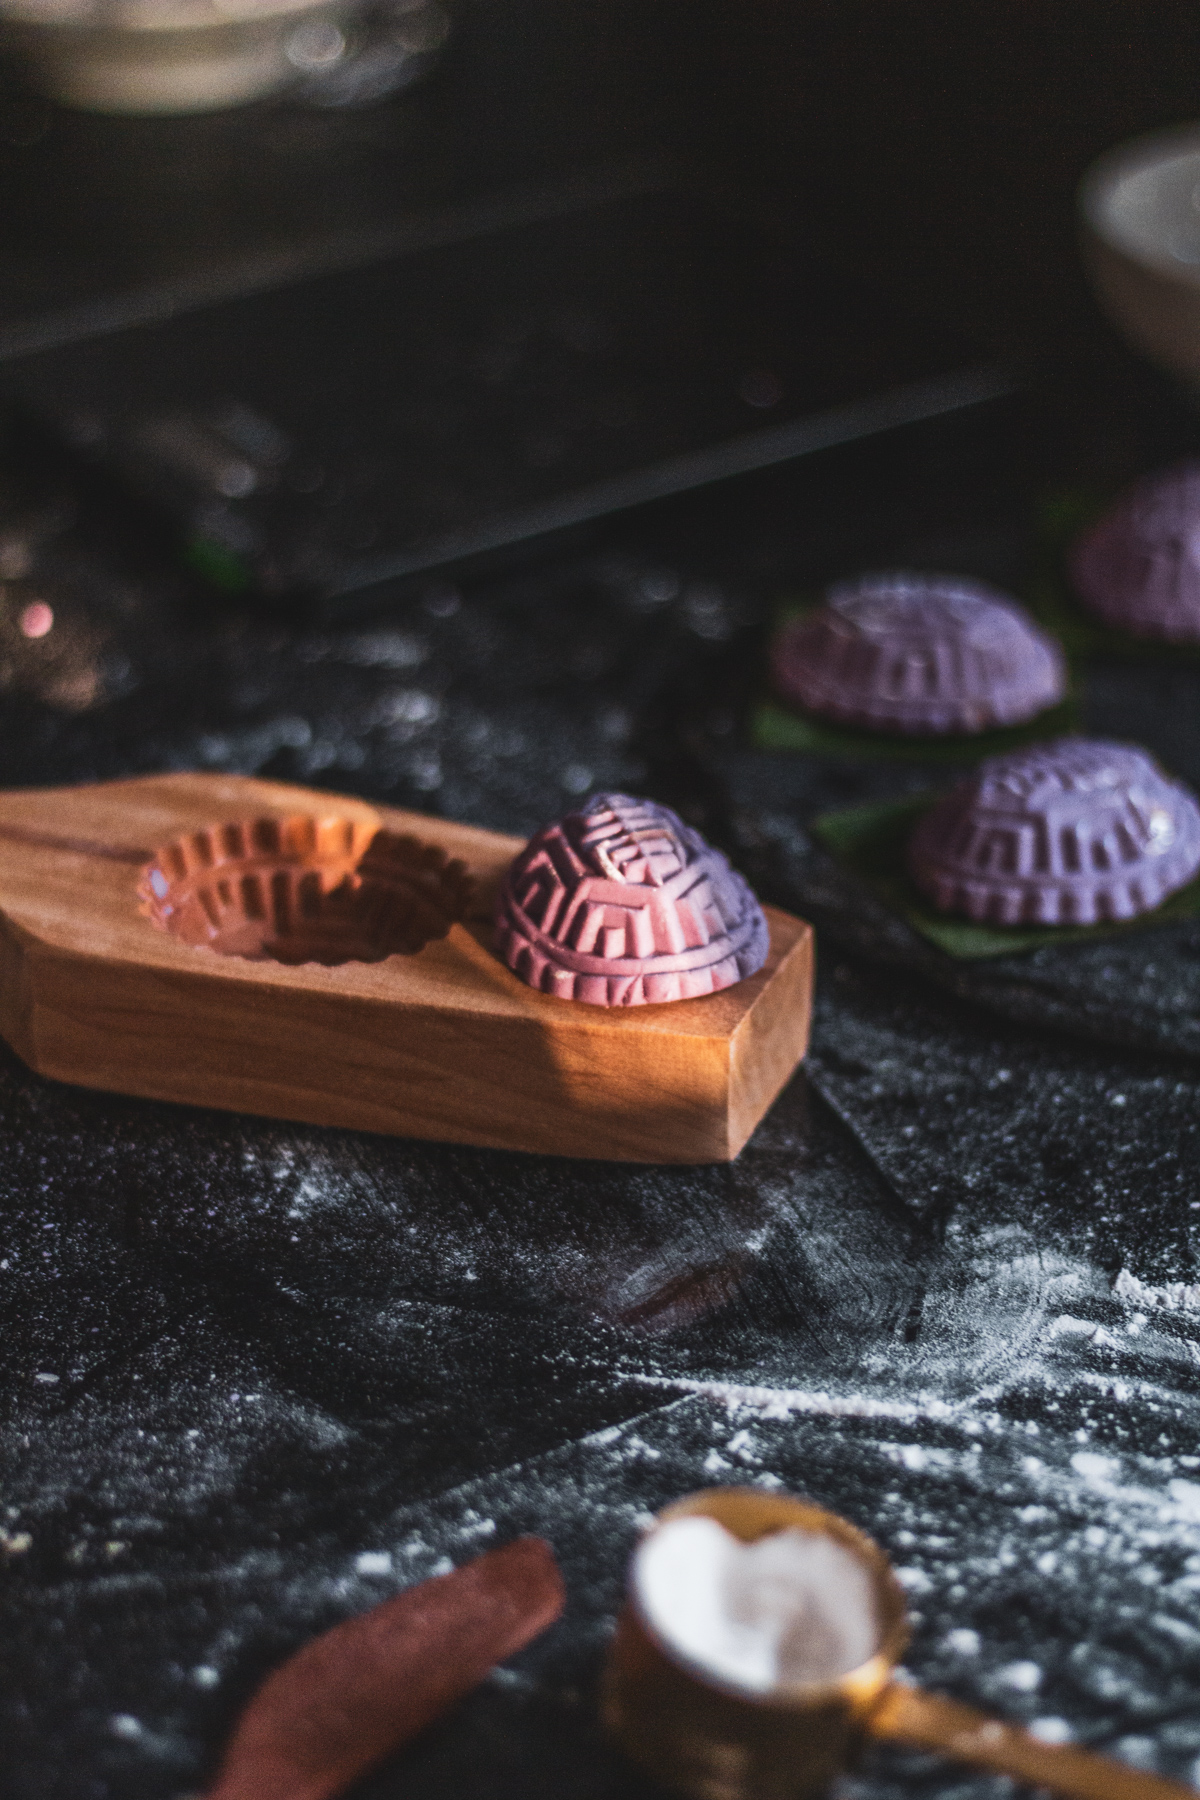
Ang Ku Kueh is a tortoise shaped glutinous rice snack that is famous in Singapore and other Asian countries. It is filled with freshly made mung bean paste and placed on a piece of the banana leaf before steaming. There’re various types of filling for ang ku kueh. The most popular ones are mung bean paste and ground peanuts. The skin, made with glutinous rice flour, should be thin and softly chewy.
Almost 80% of the kueh mentioned have a sweet based, but savoury cakes play a huge part in our diets which we hope that more people get to know more about them. And Turnip Cake comes to our mind right away. Making Lo Bak Ko is fairly easy hence it contains many prep works, so if you are doing it alone it considers a 4 stars tough level. So we highly recommend you make it in a huge group when everyone is involved it makes things simple and time-saving. Making turnip cake is equivalent to Korean making kimchi.
We hope that you like our Top 8 kueh that can be made at home. Give this recipe a try and don’t forget to tag us on Instagram as @leplaincanvas and use the #byplaincanvas hashtag. I love seeing your takes on my recipes!
We appreciate you following our series of photo journals each week. Before that, the past two weeks have been a roller-coaster for me and Joe. But, officially we are recovered from Covid. Nonetheless, the coughing and irritating throat haven’t fully recovered till now. I wasn’t as lucky as many friends, my condition wasn’t as mild as I anticipated. There was pleuritic pain in my chest.
In the last week of February, we decide to go for a drive and decide to go to Changi Beach and explore the newly open Changi Bay Park Connector.
Apart from Sentosa and East Coast beaches, I would describe Changi Beach as one of Singapore’s most magical beaches. A few years ago we visited the beach and today we’re delighted to see the area being transformed into such a beautiful space. Those interested in finding a bar, cafe, or restaurant along the Changi Beach can choose from Little Island Brewing Co, Kibar Japanese Grill + Bistro, and High Tide Bistro and Bar, among others.
Stella Seaside Lounge
Stepping into Stella Seaside Lounge made me feel like we were transported to Bali. There it was: Unobstructed views of the stunning sea, swaying coconut trees, dim light bulbs streamed atop the outdoor tables, and above all, the undeniably mouth-watering smell of grilled meats.
Stella Seaside Lounge overlooks the coast and serves burgers, grills, and cocktails. It is located in the NSRCC Sea Sports Centre. It is normally full a week ahead, and honestly, we didn’t receive a booking and decided to try our luck as walk-ins. Our group went to the restaurant around the late afternoon and we were able to sit outside until dusk.
During the weekend the beach is filled with groups of family, it is good to place to spend a relaxing afternoon. When we thought about beaches in Singapore Sentosa and East Coast Park is what came into my mind first. However, Changi Beach is known to be one of the ancient beaches of Singapore, making Changi Beach history even more interesting. Head over during the weekday instead if you want some quiet moment as in the weekend it is filled with children running around.
Fun Fact: Changi Beach is a beach with historical importance too as during the era of the Japanese Occupation of Singapore. Changi Beach was amid killing grounds that was used by the Japanese Imperial Army.
Changi Bay Park Connector
Because Changi Bay is located near the coastline, you see much less of the concrete jungle that Singapore is famous for. And at the right moment, when the sunset, sea breeze, and gently-manicured greenery come together, it almost looks like the famed Jeju Island that appears in every other K-drama.
We didn’t get to finish walking the whole route as it has a spanning 3.6km-long, Changi Bay PCN connects Changi Beach Park to the East Coastal Park Connector Network. It is great if you stay in the east and you can ride your bicycle here in the morning.
Changi Bay Park Connector Address: 2a Changi Ferry Rd
Changi lies at the eastern extreme of Singapore’s main island, it is somewhere very inaccessible for us who stay in the south. Thus it is a great place to explore when we have a vehicle to travel. While we think that every part of Singapore is the same but no.
Taking example the vibe we see at the east and west are really different, where the east gave a chilling vibe the west is more “exciting”. Not to mention for us who are always in the busy CBD area, heading towards the east is like a gateway from a busy day.
In that knowledge, it’s hard to deny that pink makes a fully fitting choice for our bathrooms where we want nothing more than a bit of peace–and to find a love of ourselves no matter how rough we might look at the start and end of each day! Of course, pink bathrooms don’t always come in intimate soothing pastel shades; hot pink sure will get morning motors revving too. Whether you want soft and serene or hot and hyper, here is our pick.
Using pink as floor tile to the wall: The balance of color flipped around, with green paintwork spanning the upper wall space and ceiling, and pink tile flooding the lower walls and floor.
Pink works well with white: Bump up the oomph in a basic white bathroom. A bathroom of standard white tiles makes a fine jumping-off point for hyper statement pieces, such as a pink heated towel rail, pink vanity unit and matching mirror, and a standout pink shower curtain. This particular design lets the pink pieces shine brighter by keeping all bathroom fixtures white on white.
Industrial Look: Go a cut above with concrete. You’ve purchased every single pink thing in the bathroom line, but now what? Putting pink elements in a raw grey concrete room instantly translates all items into on-point industrial chic.
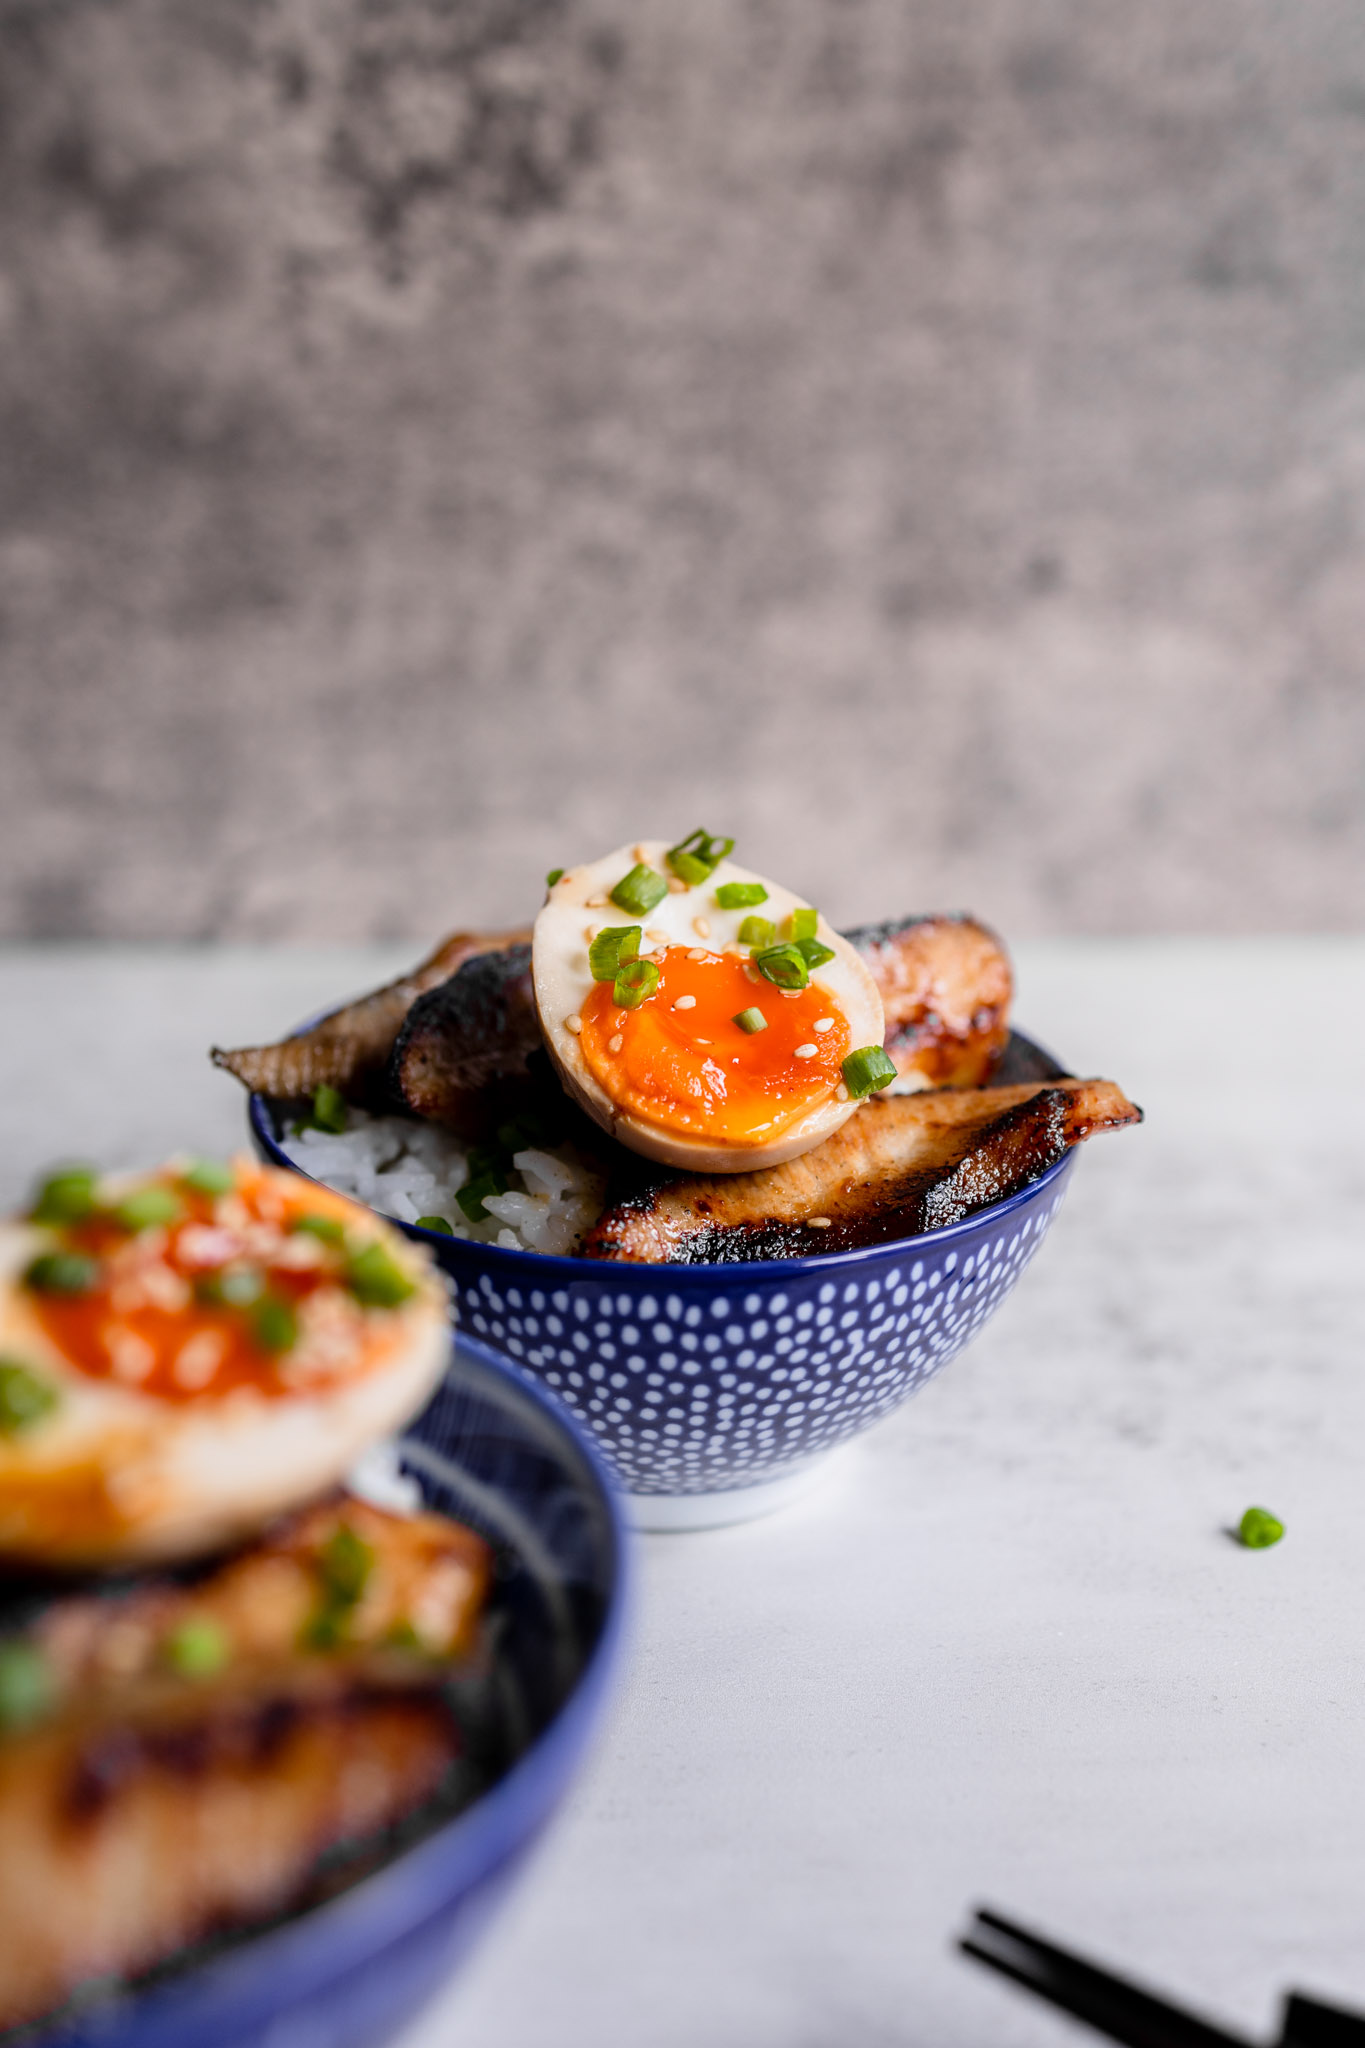
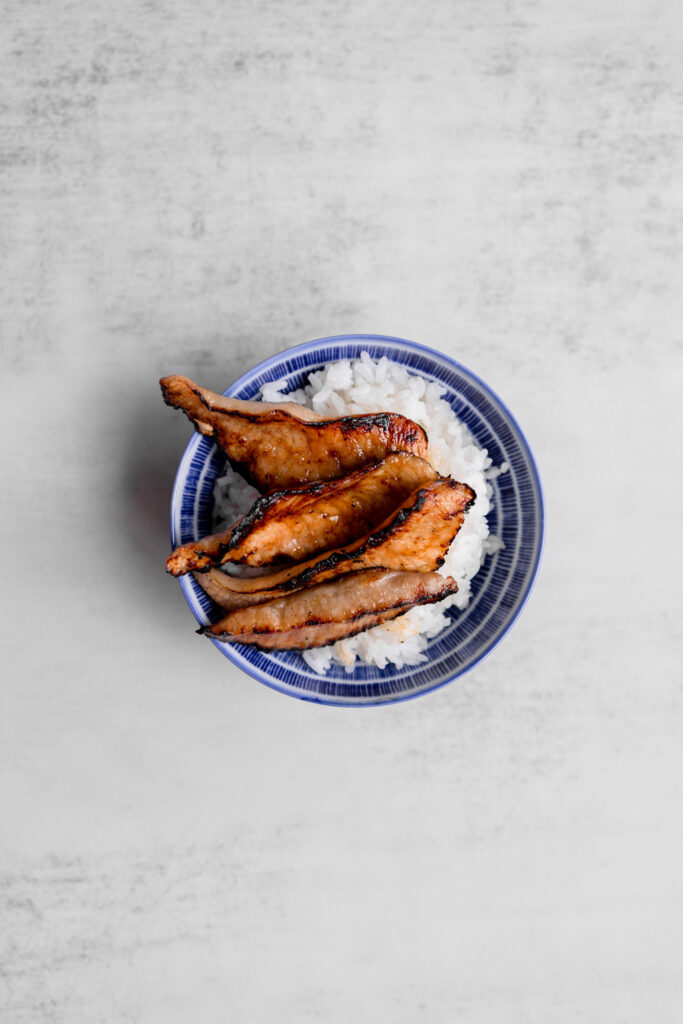
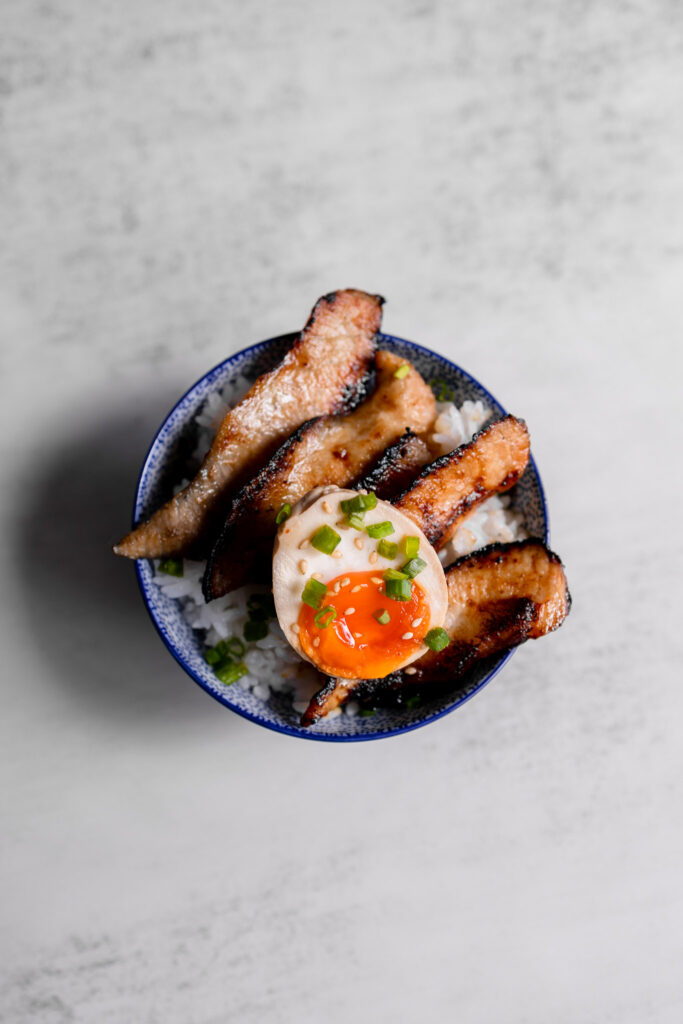
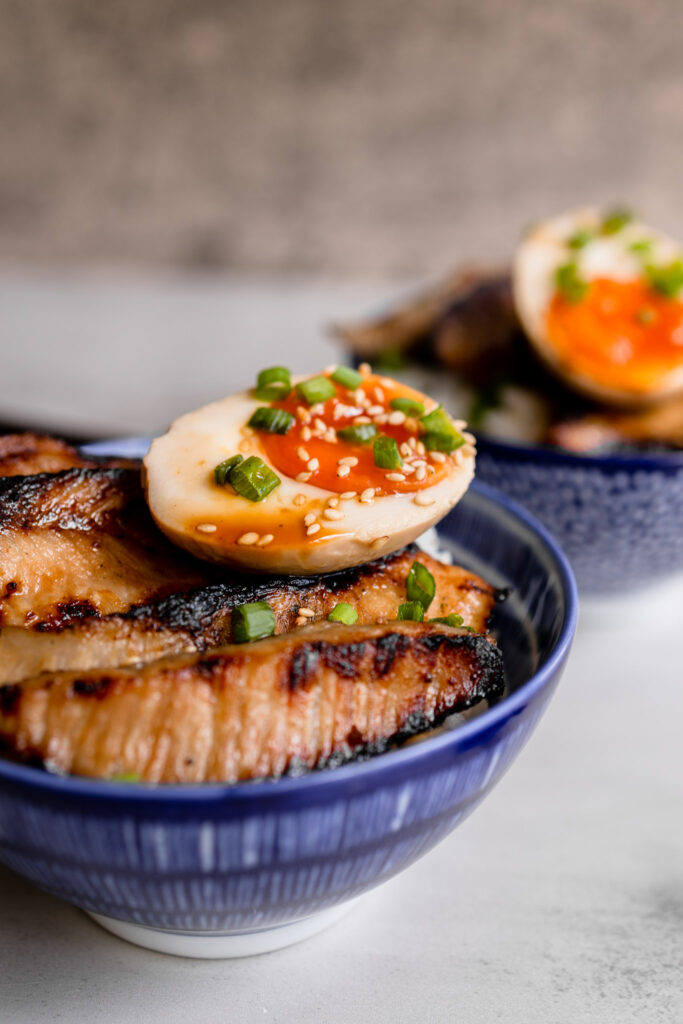
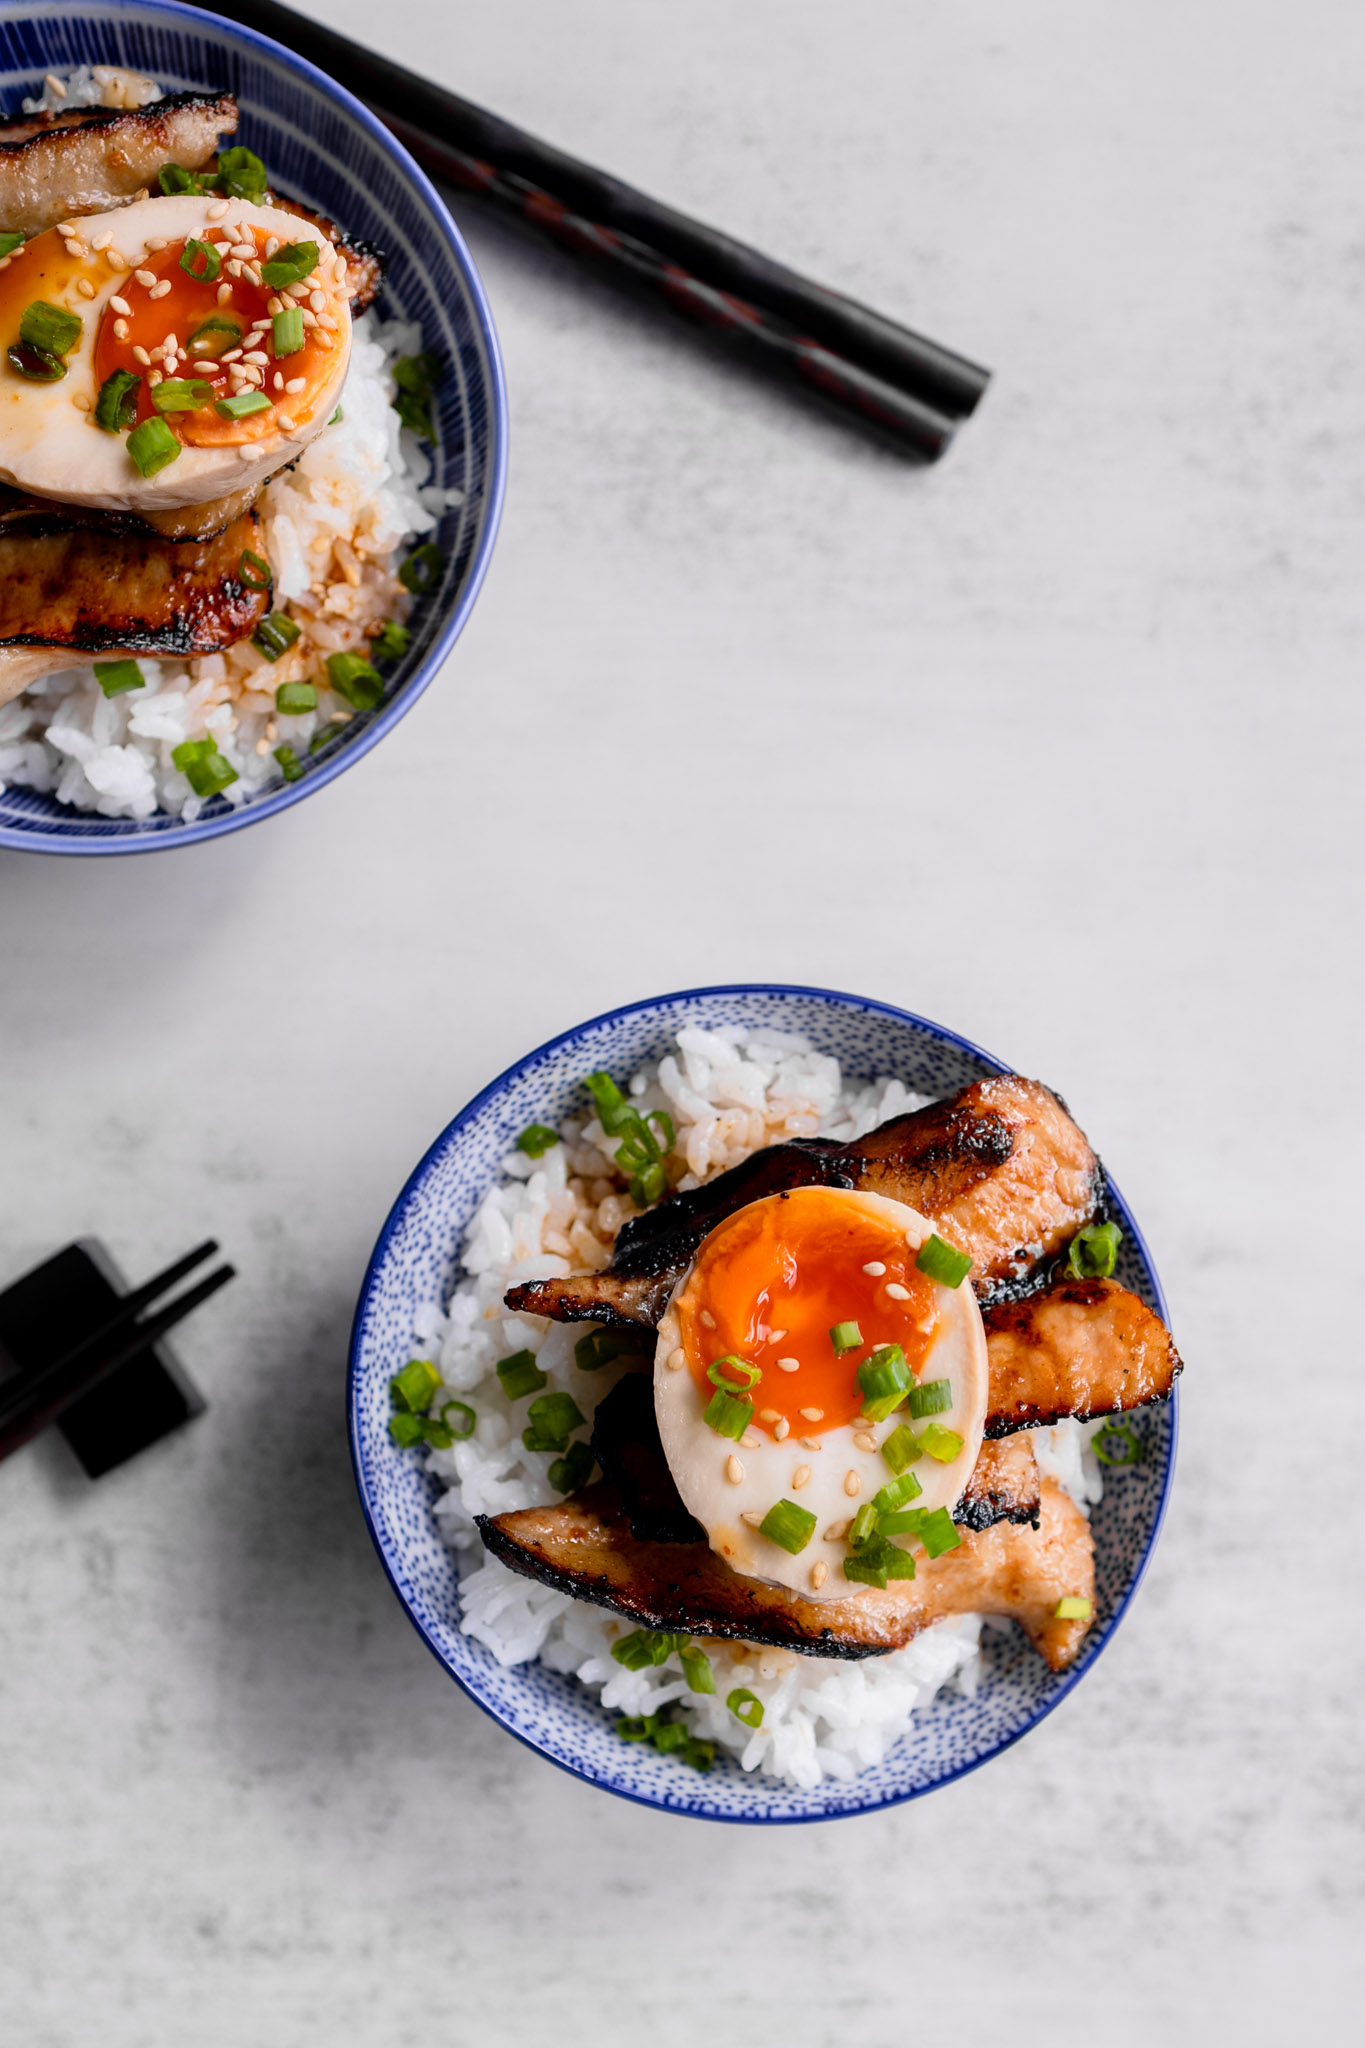
Created in the city of Obihiro, which is in the Tokachi region of Hokkaido, Tokachi Butadon(十勝豚丼), is a hearty grilled pork bowl that was initially created as a satisfying meal for hungry farmers. Much like unagi, the pork for this Butadon is traditionally made by grilling and glazing thick slices of fatty pork with a sweet and savoury sauce.
When it comes to barbecuing, this recipe is an absolute classic. You can find this dish at restaurants that specialize in meat, however, before we have Don Don Donki in Singapore it is hard to obtain the cut of meat in the normal supermarket. Thus we start to appreciate the cut of pork jowl – it is a flat, grill-friendly piece of pork that is incredibly flavourful because of the fat that runs through the meat.
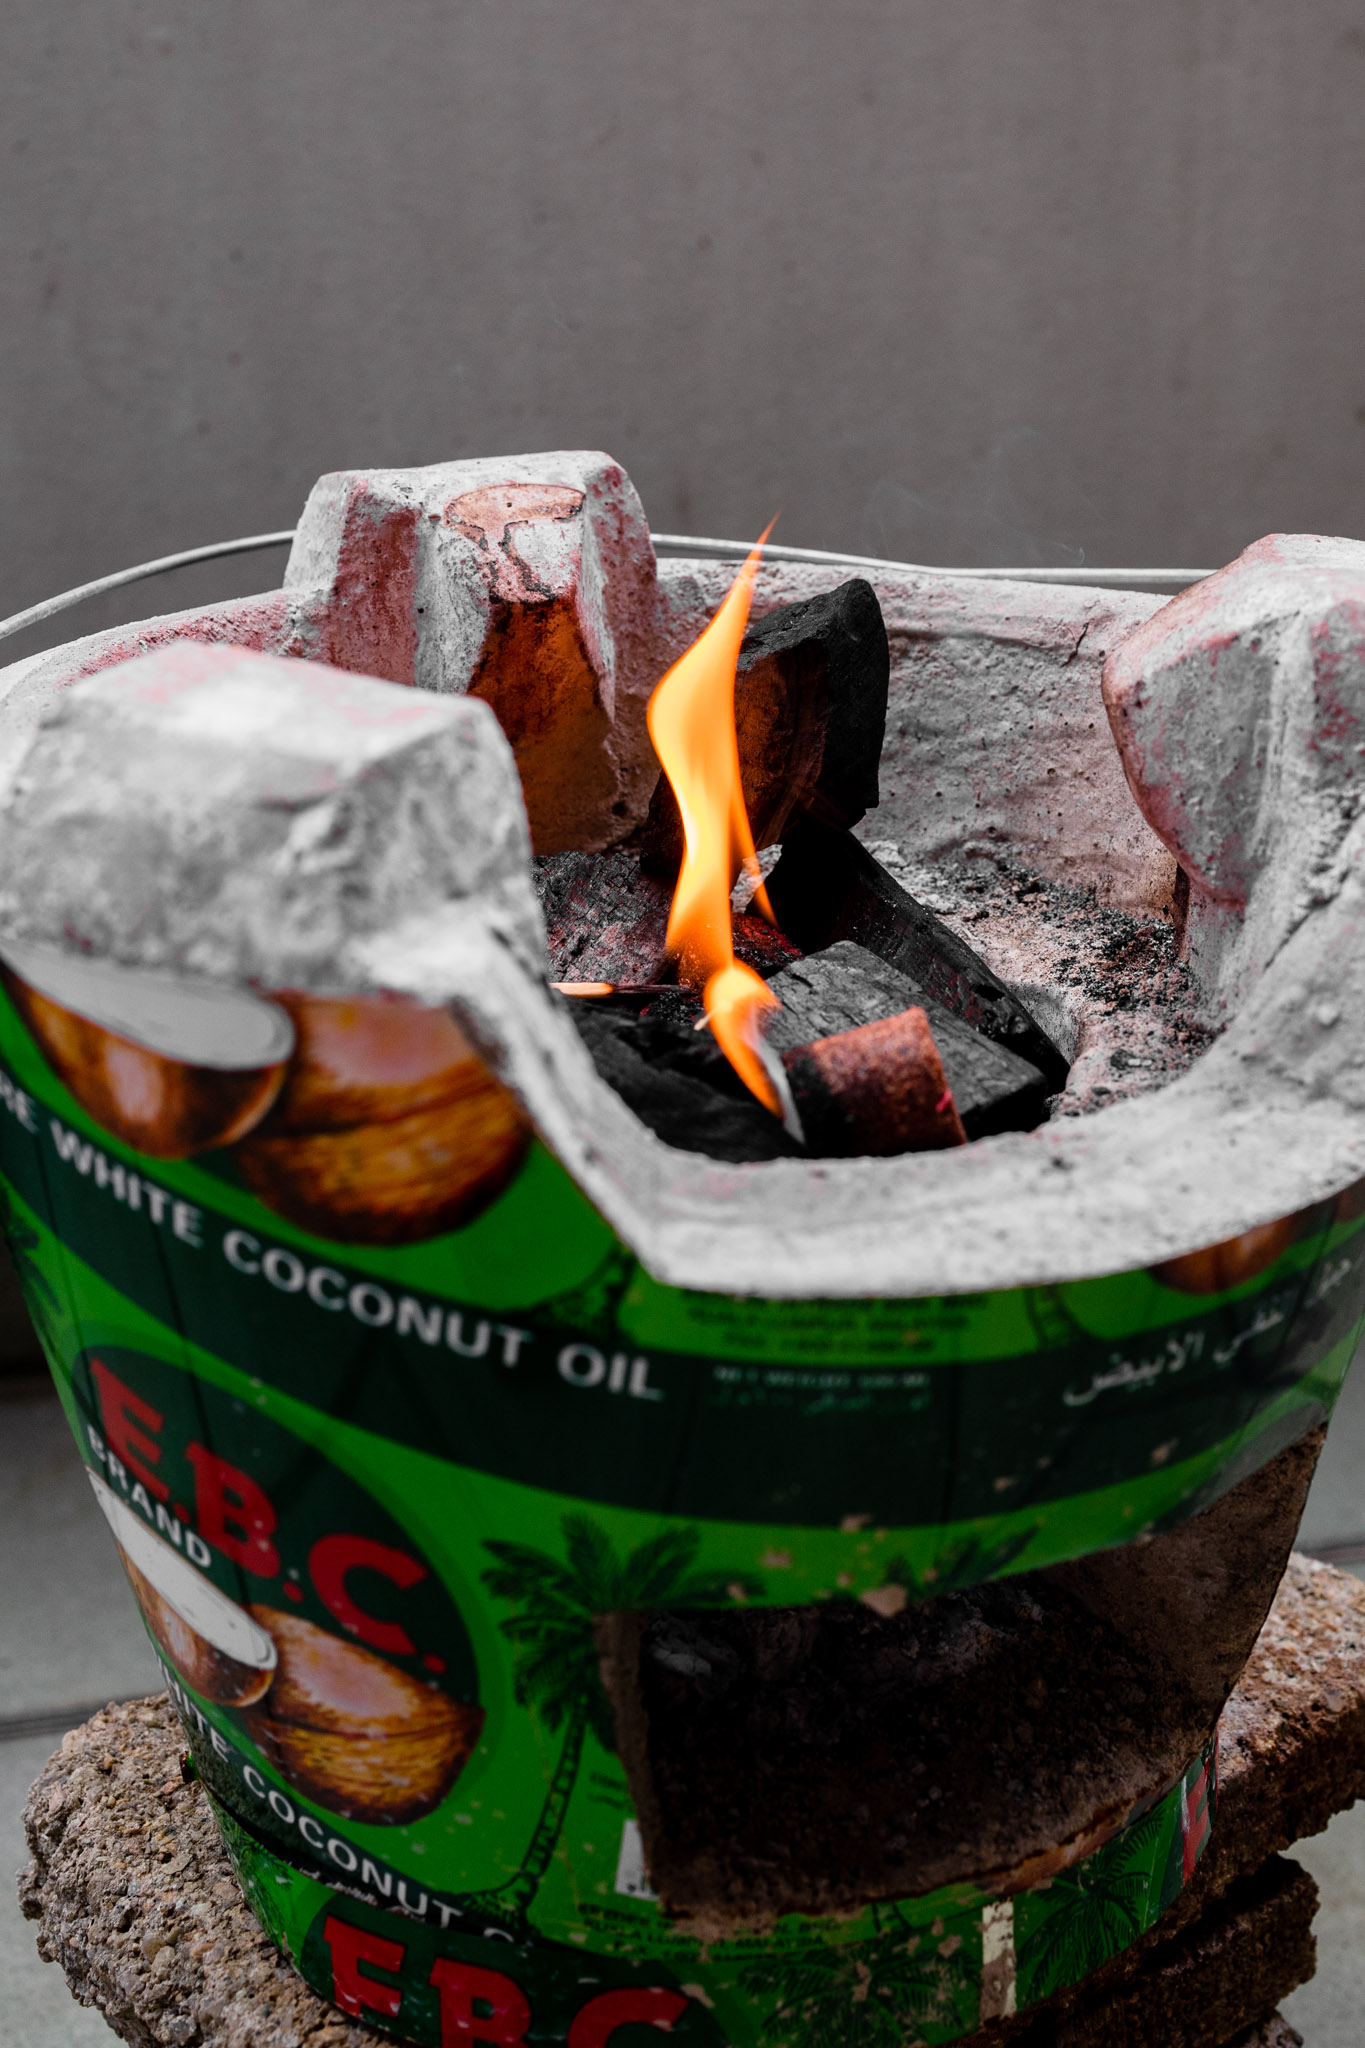
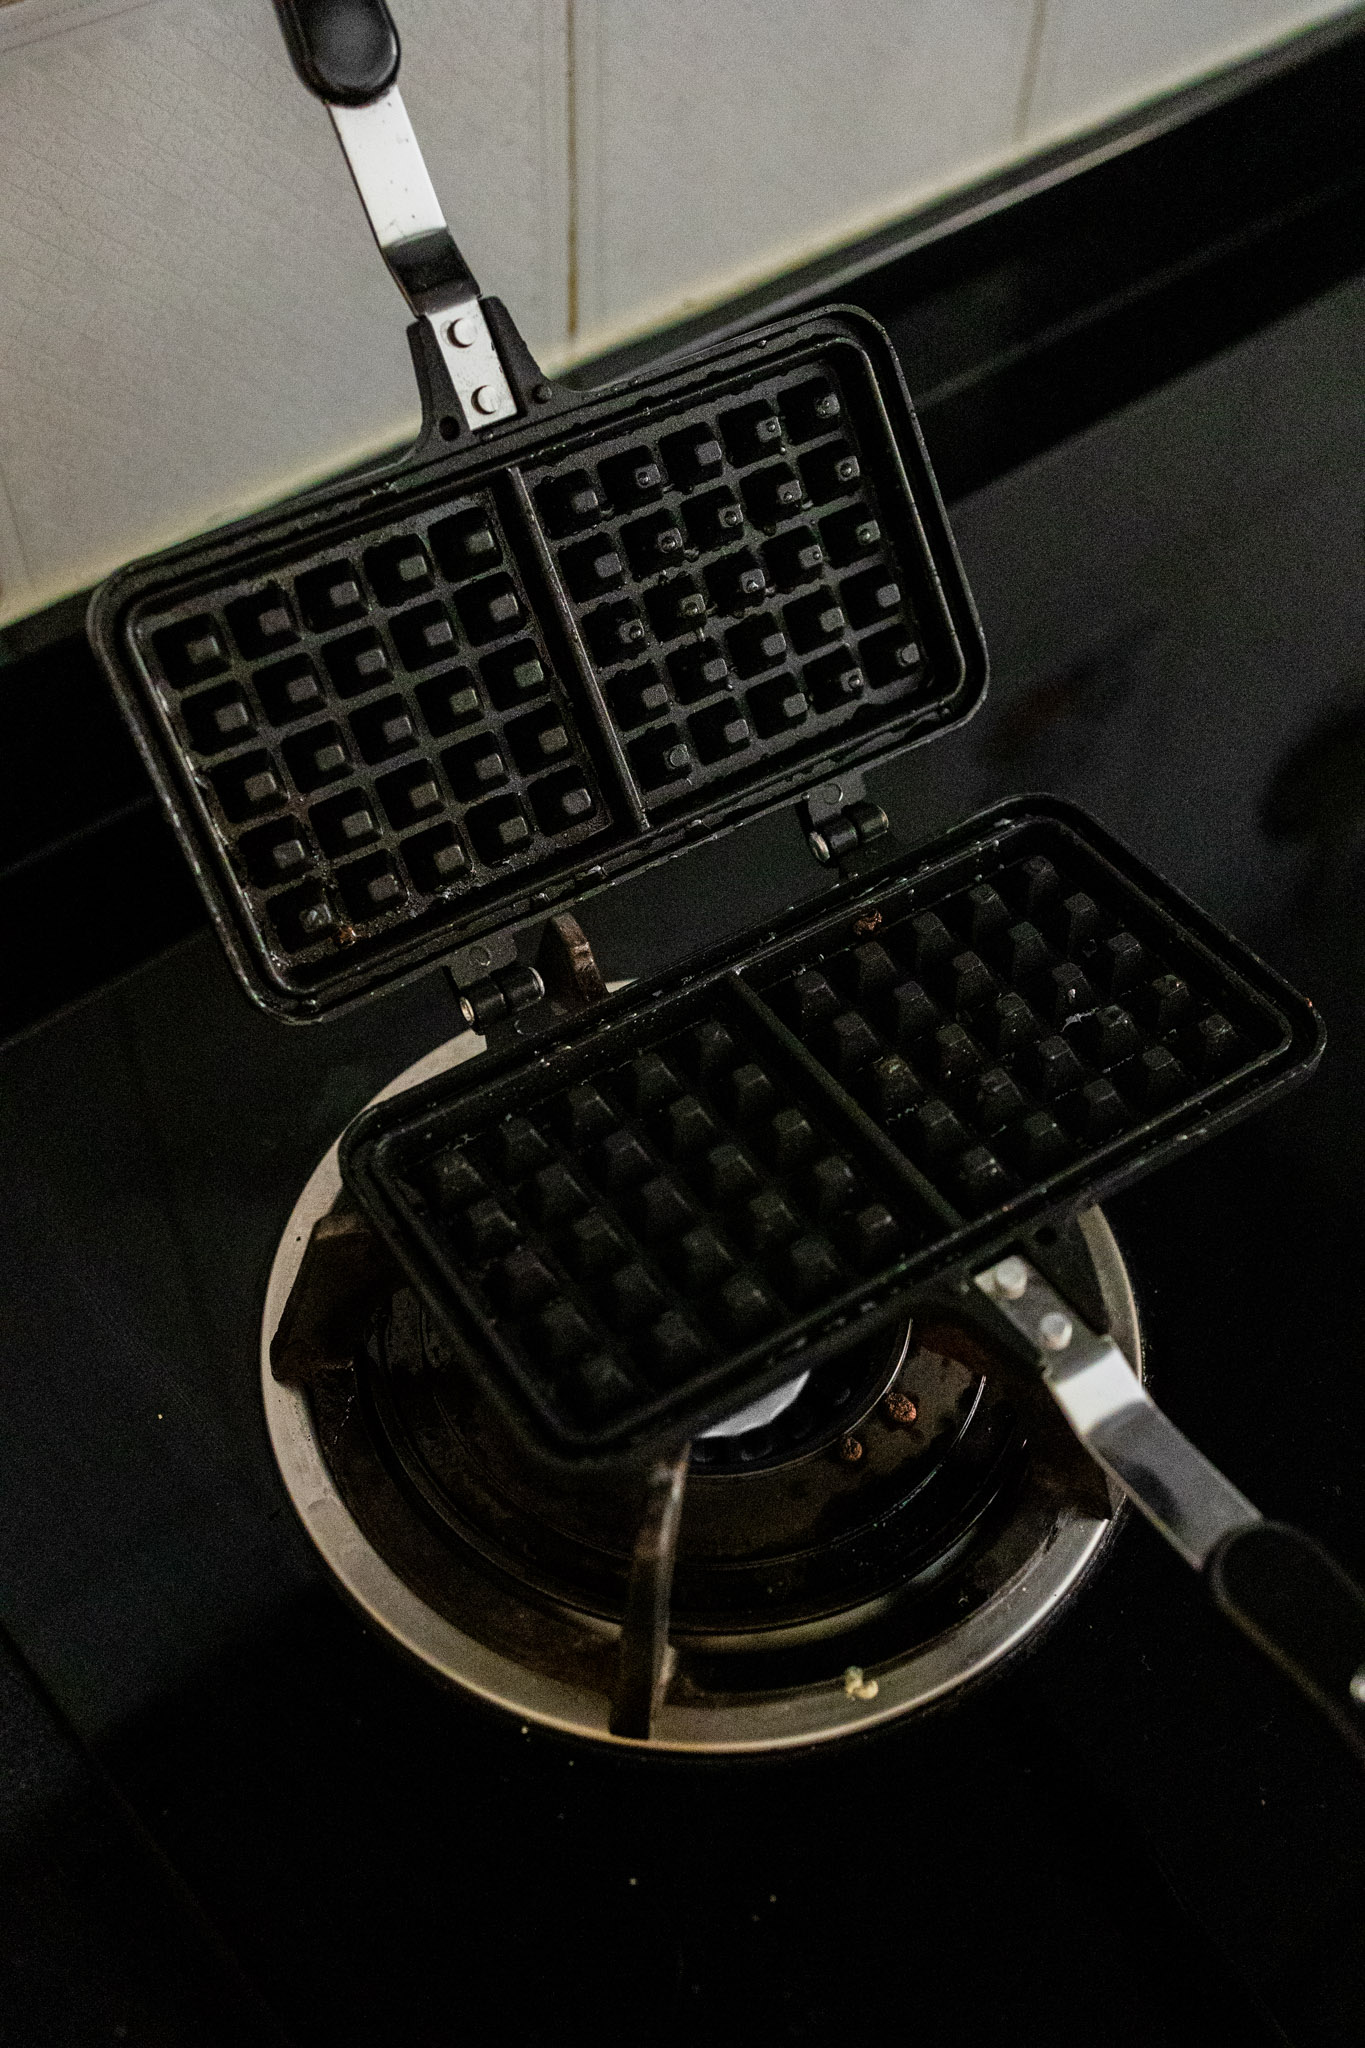
How to grilled on Chacoal Grill?
We’re going to tell you five quick and easy steps to grilling the perfect pork jowl on your charcoal grill!
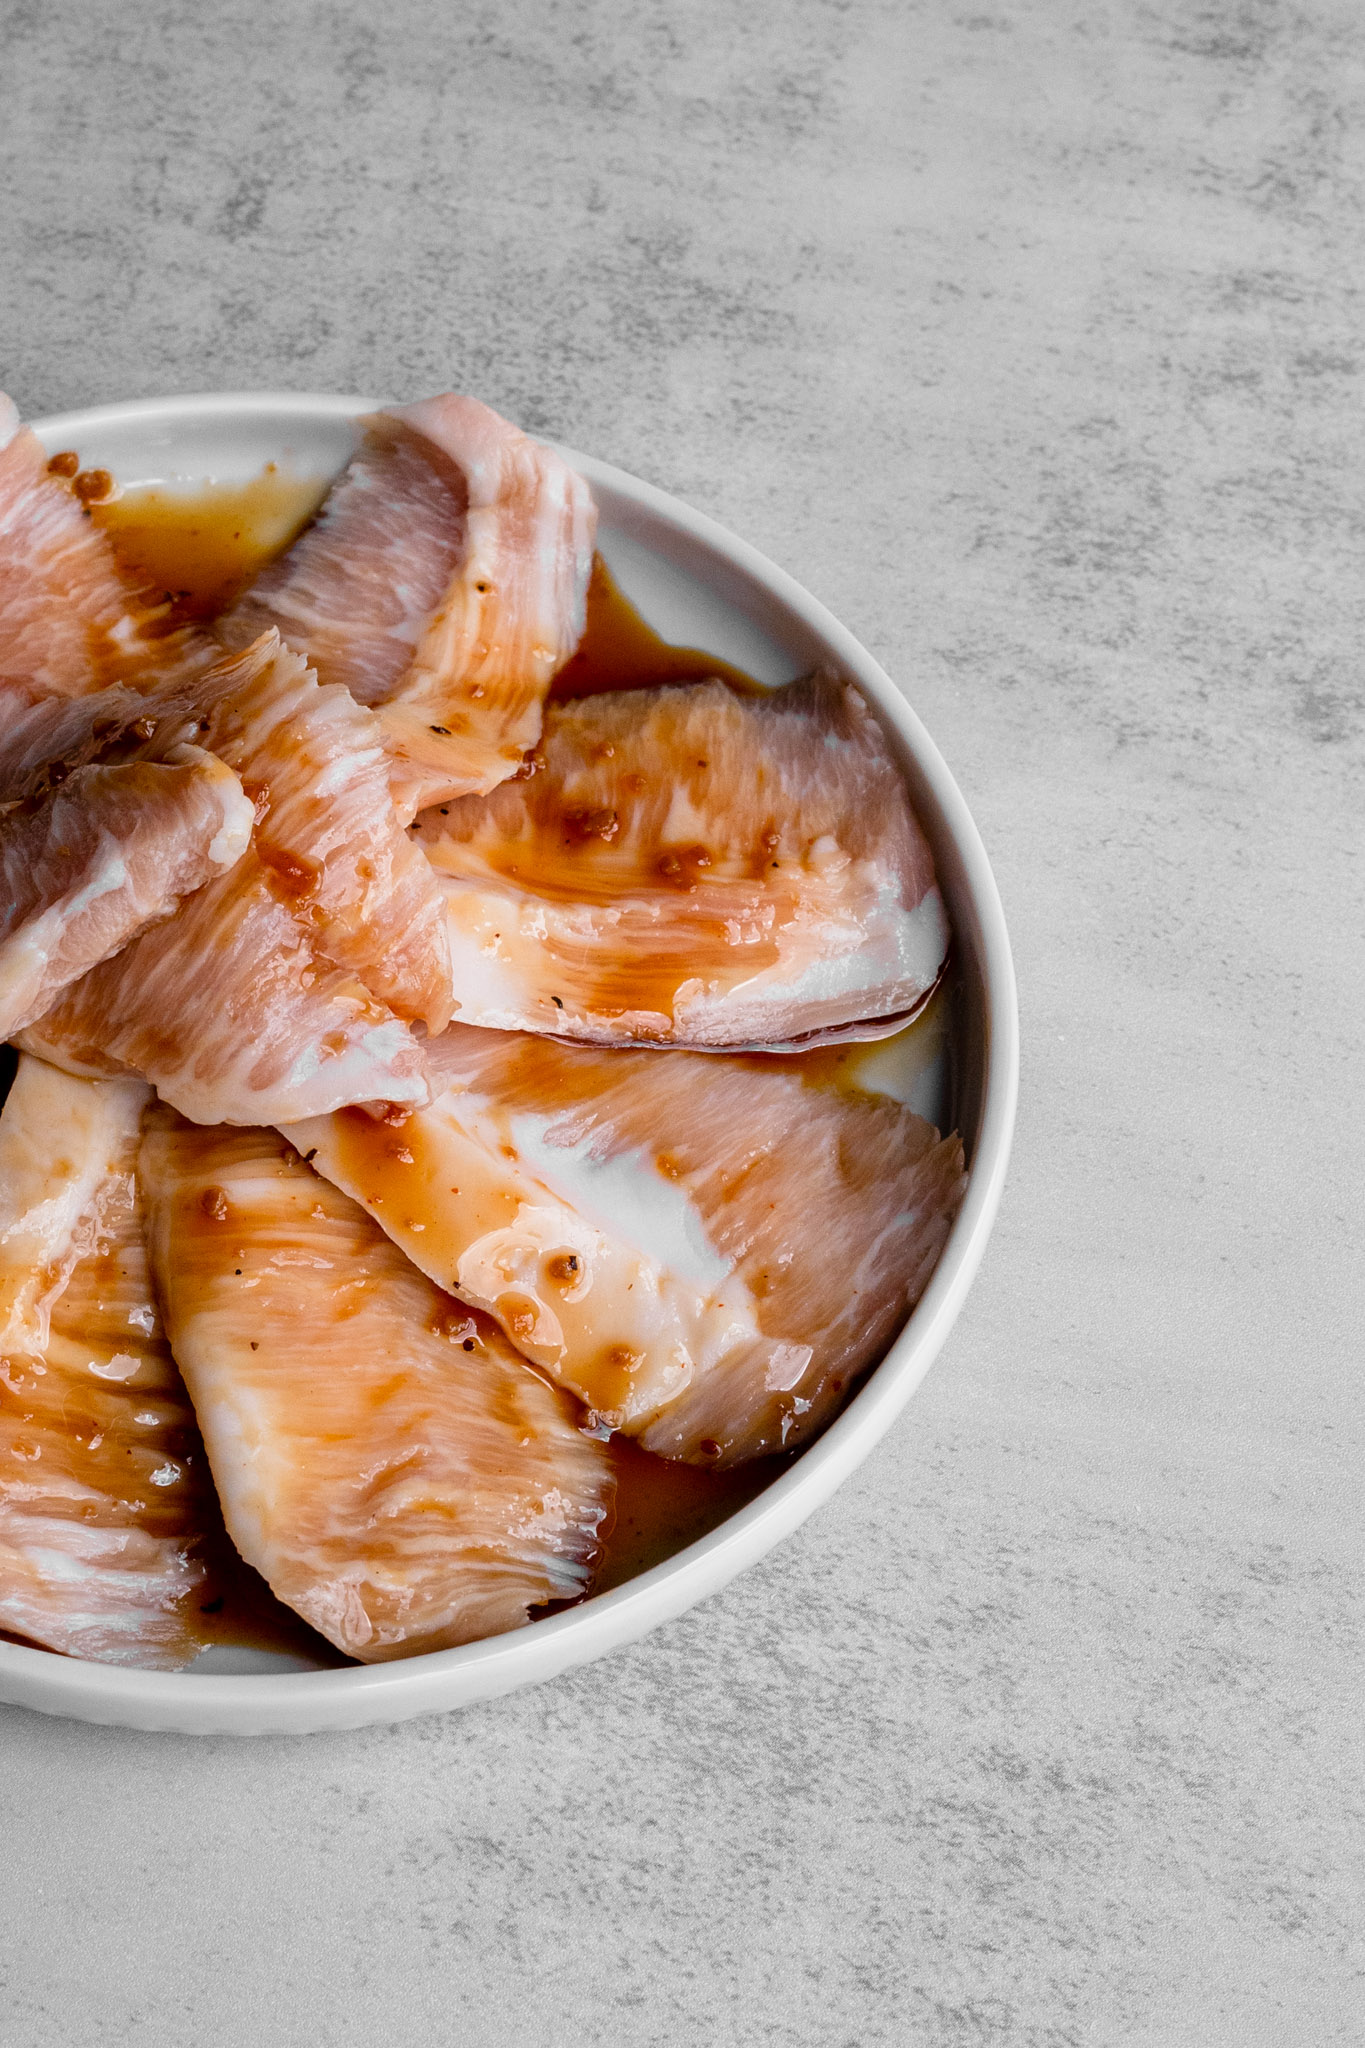
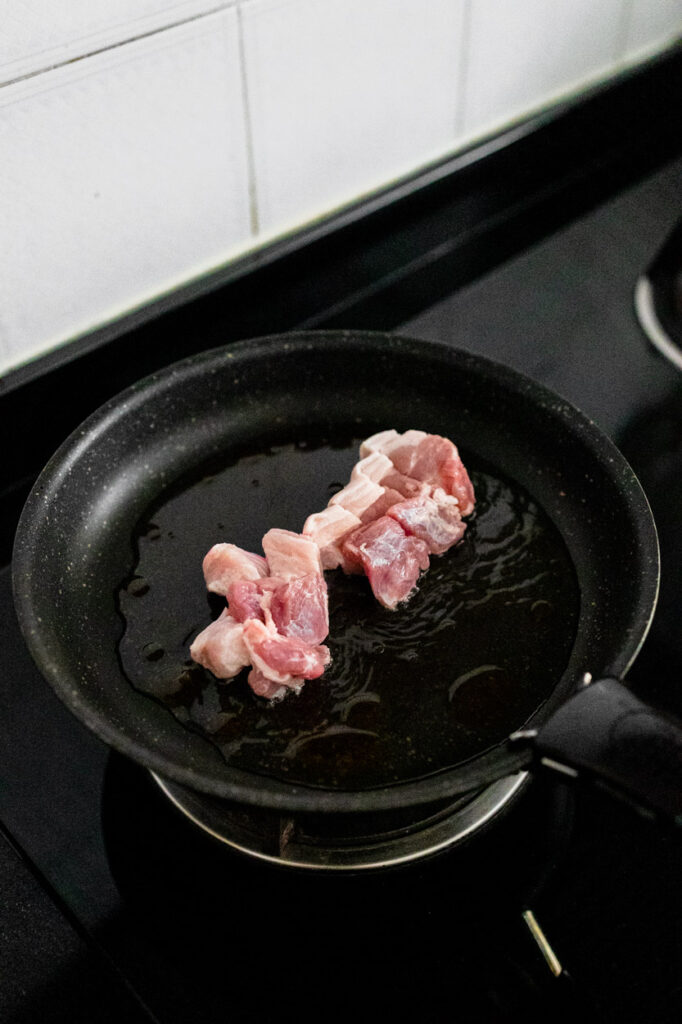
Step 1 – Prep and Season the Meat
The first thing you will want to do is take your pork jowl out of the fridge and season it on both sides with your favourite rub or the one we used below. After you have seasoned the meat let it sit for 30 minutes. Seasoning the meat and letting it sit for this time will help it cook faster and more evenly while holding the seasoning better.
Step 2 – Fire up the Grill
For pork jowl you want your charcoal grill to be as hot as possible, ideally anywhere for 200 C. We use a traditional stove with a pile of charcoal. Fire your coal up and when the coals are ready you will want to arrange them into two zones. Essentially you want all the coals on one side of the grill for direct heat and then the other side that doesn’t have any coals will be your indirect heat.
Step 3 – Grilling the Meat
Place your seasoned pork jowl on the hottest part of the grate, directly above the coals. Let it sear for two minutes, rotate a quarter turn and place it back down. Avoid the place it was just on because this is cooler now. Let meat sear for an additional two minutes. Flip the steak over and sear the other side. After the meat is properly seared move it to the warm side where there are no coals.
Ingridents for Pork Jowl Bowl
Rice – This wouldn’t be a donburi without the rice, and the rice used in Japan is short-grain. It has a higher ratio of amylopectin to amylose, which gives it a soft, sticky texture that compliments the sweet and savory grilled pork.
Pork Jowl – Due to the high temperatures involved and the two-stage cooking process, it’s essential to use a pork cut with a high fat content. Otherwise, the meat will get dried out and chewy by the time you have the right amount of caramelization on the outside. My favorite is pork jowl, but a well-marbled pork shoulder will work as well.
Kikoman Garlic Meat Sauce – We found this Kikoman garlic sauce over at don don donki and it taste amaazing with the meat. However, a combination of soy sauce, minced garlic, mirin and sugar works well too.
Ajitama Tamago – The soul of this dish, you can easily made this egg ahead and store them in the fridge.
Why will this recipe works?
By cooking the sauce to a temperature of 200 C, most of the water has burned off, and the sugars have started to caramelize. This makes the glaze thick enough to coat the pork in a thick layer in one go, so you don’t have to baste it repeatedly.
(Optional) Using a kitchen torch to finish it off caramelizes the Butadon sauce around the meat’s exterior while slightly charing the edges. This gives the pork a crisp texture around the edges while lending a smoky flavour that you can’t get using a pan alone.
While firing up the griller, cooking the pork jowl and preparing the eggs for the bowl seem like a lot, however preparing it ahead and following the step we have shown you will make everything easier. At the same time, you get to enjoy a bowl of pork jowl don with a fragrant smoky taste on the meat and it tastes heavenly.
We hope that you enjoy this recipe as we do. Share with us your version! Take a photo of your version, send us an email, tag us on Instagram, tweet us, anything. We love to see yours!
Another week of our photo journal. We hope you’ve enjoyed this series. As we slowly return to our lives, we want to explore more within the country and spend time discovering new things.
Singapore Art Museum (also known as SAM)and SAM at 8Q are some of our favourite museums in Singapore. We used to spend hours loitering in the installation during the days at school. The museum closed in 2019 in order to increase its capabilities and space while preserving the building’s heritage architecture.
Since Covid came along, our lives have changed and so have the activities with which we used to spend our time. Originally set to reopen in 2022, SAM now only expects to reopen in 2023 due to unforeseen conservation issues. As a result, we are thrilled to see a pop-up SAM Tanjong Pagar Distripark during our wait. Here are some shots for your first-time visit to SAM Tanjong Pagar Distripark.
What to expect?
At the moment, this gallery has three exhibitions running simultaneously; The Observatory Refuse, A Machine Boosting Energy into the Universe, and Gan Siong King: My Video Making Practice. They are avant-garde in style. I liked the process and missed spending time at the museum, but it took a long time for us to grasp the concept.
My personal favourite is A Machine Boosting Energy into the Universe by Korakrit Arunanondchai, located at Gallery 2. Through this series, the artist intends to address the coexistence of humans, machines, and spirits in 21st century Bangkok, where animistic energies coexist with advanced technologies. It is completely mind-blowing to see the main installation in the room. We will not be a spoiler, spend some time at SAM at Tanjong Pagar Distripark to get a grasp of the atmosphere.
Plan your trip
Before you plan your trip down, do take note that it is at an industrial park therefore there is no cafe or eateries nearby. They do have a few vending machines which are filled with varieties. But since you are in the area, just spend a 10 minutes walk you will find yourself at Tanjong Pagar and Cantonment Road area and the following are some of our favourites.
SAM at Tanjong Pagar Distripark makes use of an industrial setting to present interdisciplinary artistic practices. Personally, we found that the installations aren’t necessarily family-friendly but targeted more at those who may enjoy modern, contemporary art and its mediums.
Price: Free for Singapore residents and PRs S$5 for student and senior tickets S$10 for adult standard tickets
Address: 39 Keppel Road, #01-02 Tanjong Pagar Distripark, Singapore 089065 Opening hours: 10 am to 7 pm daily Website:SAM at Tanjong Pagar Distripark
We are delighted that SAM’s new pop up is located in SAM Tanjong Pagar Distripark, as this is a site filled with industrial vibes. If it wasn’t for the pop-up museum, the chances of us visiting would be virtually none. It provides us with plenty of opportunities for fascinating photography! These photographs provide a different vibe thanks to buildings, shipyards, mines, and manufacturing.
Previously we did a post on Veri Peri, the Pantone colour of the year, we came across more photos with different shades of purple on Pinterest and found it interesting to share with you. Looking at these gave me an impression of me being on a lavender island. While many think that purple is mysterious and bold, to us it is soft and calm.
In this shade of purple where we named it lavender, it is great to use on soft materials like silk and chiffon-like how the colour feels. If you want to try something bold – like having an all purple room. Usually, using one colour scheme and that too purple for an entire room can be risky. However, if you see this set-up, you would notice how the designers have used different purple layers and combined them to give a purple room that is not too loud. It uses deeper purple shades in the ceiling and furniture sets, while a lighter purple colour creates an accent effect at the seating area’s background.
Bird of Paradise is one of the homegrown brand that we are proud of. Birds of Paradise is so named because the shop creates gelato inspired by the botanical flavours of nature. That means fruits, flowers, pods, herbs, and spices. The owner was inspired to make ice cream since more than a decade ago, experimenting with all types of flavours, till he wanted to settle for something more natural, unique and healthy at the same time.
They started along the road of East Coast around Joo Chiat then got popular when they arrived at Changi Jewel. We got excited when we discover they open another new branch along Craig Road. It‘s not our first try on the ice cream but the interior caught our eye this time. There isn’t much crowd when we visit it only opened for a few days.
Brilliant Design
When you entered, you are welcome by a row of delicious ice cream/ gelato. They are priced at $4.70 for a single scoop, $7.70 for a double scoop, $1 extra for thyme cone. There are so many flavours to choose from, from the creamy tarty-sweet Mango, floral-flavoured White Chrysanthemum with bits of cacao nibs, and delicate Lychee Raspberry.
The place may look big but there are only a few seats in the store. Recently one tone interior has been really popular and this is what this store was adopted. Using curves and light you feel like you have entered the other world. While you are enjoying your ice cream, there is a window showing how the ice cream cone is made.
Happy that they opened a new store along Craig Road, now we can just head down by a 10 minutes walk and have a little getaway before heading back to work.
Yes, there is a Pantone colour called Adobe. it is brown with a warm undertone. Warm brown tones can be the perfect colour backdrop for any design style. This brown reminds me of the bronze. Pair this naturally rich colour with bright accompaniments or layer it with patterns for added interest in your home.
Off-white subway tiles, brushed nickel and dark wood cabinets create the perfect mesh between modern and traditional design. Vintage tractor stools give the space a creative flair, while clerestory windows let in an abundance of natural light to create an ultra-bright space. Mixing old and new can be a challenge, but when done correctly the end result can be stunning.
In a living room where neutrals are the key, select one eye-catching shade, cleverly put, and flaunt it in unusual ways. For example, cream, soft brown and white create a pleasant backdrop along with beige as the main colour. Add touches of subtle panache.
Waffles are the superheroes of weekend breakfast! There’s nothing like sleeping in on a Saturday morning, then stumbling out of bed to sit down to a plate of freshly made waffles drizzled with real maple syrup. But we hardly have them at home as we don’t have the waffles machine at home. Thus we got ourselves an old fashion cast iron waffles pan so that we can enjoy the waffles at home anytime we want.
These homemade waffles are crisp on the outside, fluffy on the inside, these waffles are delicious drizzled with syrup and have it with your choice of fruit. The perfect start to any weekend morning!
Is Waffles Mix the same as Pancake Mix?
The batter in this waffle recipe is not the same as the pancake batter. Waffle batter uses more egg (plus we beat the whites separately and fold them in) for the most fluffy waffles ever! The extra egg in a waffle batter makes a crispy exterior surrounding a moist fluffy inside with lots of air pockets. Pancake mix or a pancake recipe will be a bit denser and won’t have the same texture on the outside.
How to make the Waffles?
This light, fluffy homemade waffle recipe is easy and takes just minutes of prep. The rave reviews will make it worth the extra step of whipping the egg whites!
Separate the eggs and beat the egg whites until stiff. (Optional but recommended). This extra step makes this recipe extra fluffy compared to other waffle recipes.
Mix dry and wet ingredients (per recipe below). Fold in whipped egg whites.
Ladle batter into a hot waffle iron and cook until lightly browned and crispy, about 5 minutes on each sides.
Replace the Waffles with Croffles
Croffles are a cross between a croissant and a waffle. This delicious breakfast dish was invented by an Irish pastry chef named Louise Lennox, and it has become widely popular across the globe, especially in Korea, where it is one of the best-loved sweet street foods.
You’ll love how easy it is to make Croffles. Preheat your waffle iron. Place your ready-made croissant dough onto the pan, one crescent at a time into the waffle iron and cook until golden brown. Place the Croffles on a plate and garnish them with plenty of maple syrup and your choice of fruits.
Our favourite fruits combination
To welcome the spring we like to have fruits that are colourful on our waffles. We just pick whatever we have in the market, and here is the combination that we got.
Lo and behold, Pantone has unveiled its 2022 Color of The Year, Very Peri! As its name suggests, Very Peri, or PANTONE 17-3938, is a warm and confident greeting of dynamic periwinkle blue with violet-red undertones.
Celebrating how our lives have changed pandemic-wise and how it pushed our creativity to break boundaries. Pantone’s colour experts dug deep into their colour palettes to select one that perfectly encapsulates the “carefree confidence” and “daring curiosity” the world witnessed from the past two years.
Too much of one colour would be overwhelming, and for colour as bold as Very Peri, the execution must be calculated carefully. One of the best ways to use Very Peri would be as an accent colour – on pillows, quilt covers, vases. Adding the dynamic fusion of red-violet and blue hue into a kitchen space can encourage creativity and experimentation – something always welcomed in the art of cooking! Using wallpaper to revamp kitchen counters and surfaces can be a low commitment to incorporating different textures, materials, and Very Peri.
It has become our favourite colour of the year, how about you?
If there’s a sweet potato fan club out there, we’d like to join. The tuber is versatile, healthy and as close as we’ll get to eating candy for dinner. This recipe for roasted sweet potatoes with sriracha and lime—from Amanda Frederickson’s cookbook Simple Beautiful Food—could work as a side dish, a base for meal prep or a light dinner (served with a yoghurt sauce and roasted chickpeas, perhaps).
“The exact roasting time for the sweet potatoes will vary depending on their thickness,” Frederickson writes. And if the sriracha doesn’t seem hot enough, you can add more at the end. “But, be warned,” she says. “The sriracha heat builds over time.”
Magic of Sweet Potato
Sweet potatoes are a staple food in many parts of the world. They are a good source of fibre, potassium, When did you first decide to let sweet potato slide into your diet, forcing some old buddies out? I know people who did it for the hype of how healthy sweet potatoes are (usually compared to potatoes). It’s higher in fibre, lower in Glycemic Index(half of the potato’s value), and because it was once overlooked, its mauve-orange appearance feels fresh and chic.
How to Shop for Sweet Potato
There is much confusion about the difference between sweet potatoes and yams, but the truth is actually pretty clear-cut. They are not even related. A true yam is a starchy tropical vegetable that is rarely found here, and when they are, they are likely to have been imported from the Caribbean. The two types of sweet potato most commonly found in the market are a yellow-flesh potato with thin, light brown skin and an orange-flesh variety with deep pink-orange skin. Orange-flesh potatoes tend to be denser, sweeter and moister than the yellow-flesh variety, which is drier, milder in flavour and a bit more fibrous.
Sweet potatoes are available year-round but are of the best quality in fall and early winter. Choose sweet potatoes that have smooth skin and are firm and free of soft spots, cracks or bruises.
How to Tell If a Sweet Potato Is Bad
Once you’ve bought your sweet potatoes, be sure it’s still in good condition before eating. If sweet potato is soft or has developed wrinkles, it’s beginning to spoil. Sweet potato may also be bad if the skin’s colour has changed or it’s emitting a rotten odour. In any of these situations, it’s best to toss the sweet potato.
How to cook them right?
Roasting and baking are almost synonyms since they both refer to cooking in the oven, and the only difference lies in the temperature of baking. The idea of roasting is all about creating the crust—browning the surface to make it crispy. It adds texture and layers of flavour, and it’s normally reserved for savoury dishes. But it doesn’t mean you can’t coat it or dress it with syrup or sweet sauces. With roasting, you can make both main dishes, like salad, or snacks, such as dried sweet potatoes. Save baking for hearty desserts and other “unbrowned” dishes.
Preheat the oven to 425°F and line a rimmed baking sheet with parchment paper or aluminum foil.
In a large bowl, whisk together the coconut oil, lime juice (save the zest for garnish), salt and sriracha.
Toss the sweet potatoes in the mixture. Roast in a single layer on two sheet pans until fork-tender, 35 to 45 minutes, tossing occasionally and rotating the pans halfway through.
Transfer the roasted sweet potatoes to a serving platter. Top with the lime zest and a handful of coarsely chopped fresh cilantro. Serve immediately.
We hope that you enjoy this recipe as we do. Share with us your version! Take a photo of your version, send us an email, tag us on Instagram, tweet us, anything. We love to see yours!
In a large bowl, whisk together the coconut oil, lime juice (save the zest for garnish), salt and sriracha.
Toss the sweet potatoes in the mixture. Roast in a single layer on two sheet pans until fork-tender, 35 to 45 minutes, tossing occasionally and rotating the pans halfway through.
Transfer the roasted sweet potatoes to a serving platter. Top with the lime zest and a handful of coarsely chopped fresh cilantro. Serve immediately.
Recently Angela has fallen in love with filtered coffee thus we have been searching for a cup of the good coffee roastery in Singapore. This time we spot a minimalist roastery that serves amazing hand drip coffee located at Lavender Street. Located at the end of Lavender Street it is easy to be spotted with a long queue waiting for you. While we are always sceptical about “Instagram-able” places but the coffee choice really suits our plattles.
We were recommended the Colombia La Falda ($6.50), a single-origin with notes of plum, redcurrant and grapefruit. It was indeed a well-balanced, refreshing cup with that obvious fruitiness that makes a good perk-us-up. For those who aren’t a hand drip lover, the Colombia El Mirador ($4.50) made into latte was a delicious cup with lush mouthfeel, with notes of berry-sweetness. It’s an easy cup of coffee for one that doesn’t like heavy coffee.
While it is a great place to take a break and enjoy your cup of coffee, it does give a time limit for your stay. They sell coffee beans for you to take home to enjoy, roasted weekly for the freshness of the consumer. There are lots of amazing shops and cafes along the street – Chye Seng Huat is one of them.
Apartment Coffee with certain packs in the crowds. However, I would recommend coming early in the morning or off-peak if you want to feel that tranquillity.
Apartment Coffee Address: 161 Lavender Street #01-12 Opening Hours: 10 am to 6 pm daily
If you want a cup of good filtered coffee for the day, give Apartment Coffee a try. As non-filtered coffee drinker like me enjoy them too, I am sure you will like them.
When one asked me what is my favourite flower, I would say chamomile. However one little secret between me and you, I have never seen fresh chamomile before. Many said that chamomile is not a flower but a herb instead, while I agreed to it too. Drinking chamomile tea really calms me down every time I have it. I guess you could say this is why I like it even I have yet seen one before.
Chamomile is difficult to be found in a humid country like Singapore as it only grows during the cooling weather. If you do find one it will be really pricy. Now looking at the beautiful photos of it can already make my day. Thus one of my goals is to visit a place full of fresh chamomile.
These Stuffed Portobello Mushrooms are stuffed with veggies and cheese, making for a great appetizer that’s perfect for all occasions. A great and delicious way for stuffing big mushrooms, simple to make and always a crowd favourite! We know that not all are a fan of mushrooms, but personally, it is our favourite as it is versatile in cooking.
These giant portobello mushrooms are stuffed with some incredibly tasty ingredients like cheese, tomatoes confits, and fresh vegetables, and are then grilled to absolute perfection. This recipe works well as an appetizer or even as an impressive side dish.
How to Prepare Stuffed Portobello Mushroom?
Prep the oven: Preheat oven to 400°F.
Prep the mushrooms: Carefully remove stems from mushrooms, reserve and chop the stems for the stuffing. Place the mushrooms stem side down onto a baking pan. Bake for 10 to 15 minutes until the water leaks out of them. Remove from the oven and using paper towels soak up excess water. Set aside.
Make the filling: In a skillet, heat the olive oil over medium heat. Add the chopped shallots and saute for a couple minutes until the onion is translucent. Add the spinach and tomatoes confits to the skillet and cook for a couple more minutes, until the spinach wilts. Stir in the mozerella cheese, salt, pepper and mushrooms stems. Cook for an additional 2 minutes.
Stuff the mushrooms: Stuff the mushrooms with the mixture equally. Top with mozzarella cheese. If using smaller mushrooms you should have enough mixture for about 8 mushrooms.
Bake: Bake for 10 minutes or until the cheese melts.
All about Portabello Mushroom
Choosing the mushroom. In the store, look for portobello mushrooms that have a clean exterior and aren’t bruised on the caps. Also, because you’re stuffing them, look for mushrooms with small stems that will be easier to remove. Mushrooms should be dry to slightly tacky, not slimy. For a stronger earthy taste, choose mushrooms with thick veils that are dark in colour.
Can I use other mushrooms? Any large mushrooms work for this recipe, you basically want to make sure that they have enough room after you remove the stem, to hold your stuffing.
How to prepare it? Don’t soak the mushrooms in water, use a mushroom brush to clean them. And don’t skip the step of removing excess water from the mushrooms.
We hope that you enjoy this recipe as we do. Share with us your version! Take a photo of your version, send us an email, tag us on Instagram, tweet us, anything. We love to see yours!
Prep the mushrooms: Carefully remove stems from mushrooms, reserve and chop the stems for the stuffing. Place the mushrooms stem side down onto a baking pan. Bake for 10 to 15 minutes until the water leaks out of them. Remove from the oven and using paper towels soak up excess water. Set aside.
Make the filling: In a skillet, heat the olive oil over medium heat. Add the chopped shallots and saute for a couple of minutes until the onion is translucent. Add the spinach and tomatoes confits to the skillet and cook for a couple more minutes, until the spinach wilts. Stir in the mozzarella cheese, salt, pepper and mushrooms stem. Cook for an additional 2 minutes.
Stuff the mushrooms: Stuff the mushrooms with the mixture equally. Top with mozzarella cheese. If using smaller mushrooms you should have enough mixture for about 8 mushrooms.
Bake: Bake for 10 minutes or until the cheese melts.
We are overwhelmed to be able to make it in time for this display last month. We love art installation and one that allows us to take nice pictures is a thumbs up for us. As this installation only lasted a week, we make up some time for it in between our busy schedules. Worrying it may have a big crowd we head there as early as we could.
Make its debut first in Paris in October 2021, the installation was commissioned by Porsche through their new art initiative, The Art of Dreams. The brains behind the unique installation are French artists and architects Cyril Lancelin. As the pandemic hasn’t treated anyone quite right, the artist aims to use the installation as an inspiration for people to remember and continue pursuing their dreams.
Yes, sadly the installation is now over however for those who are located at Milano, stay tuned for this as that will be their next location. Can’t wait to see more fun installations to be in Singapore.
Pendant lights are the perfect option for those who wish to create a softer atmosphere with a contemporary aesthetic. Like spotlights, they draw focus to a particular area of a room, but with a softer feel akin to a pool of light encompassing the area of focus. This effect translates nicely into rooms such as study areas, workshops, or dining rooms.
Elegant and versatile, pendant lights are available in different sizes to fit the proportions of your room. For further flexibility, they are able to be hung at the height of your choosing. With various styles on offer in Singapore, you can choose the perfect pendant light to complement your interior décor. You can opt for pendant lights with minimalist, contemporary aesthetics, or light that glitters like a jewelled centrepiece.
Certain dishes are eaten during the Lunar New Year for their symbolic meaning. Lucky food is served during the 16-day festival season, especially on Lunar New Year dinner on New Year’s Eve, which is believed to bring good luck for the coming year. Therefore, last year we came out with 10 Auspicious Must-Eat Dishes during the Lunar New Year, as every food represents something, and symbolism is associated with every traditional dish eaten for the Lunar Year. However, this year we came out with a list of the top 10 dishes that we like to eat during the Lunar New Year instead.
How can we miss having the hot pot together during the Lunar New Year? While we have lots of auspicious dishes, hotpot (aka steamboat) is the most popular gatherings ways of eating at all times. We believed that it is also the easier way to serve a huge group of people and families.
Hot pot is a Chinese cooking process. A big pot is set in the centre of the table containing boiling hot broth with a heating element underneath. Various raw ingredients are served around the pot, such as thinly sliced meat, seafood, vegetables, tofu, dumplings, and noodles. The guests cook the ingredients in the broth and eat them with a dipping sauce.
This is a popular vegetable dish we enjoy during our family meals, and you would often see it on the menu during your CNY reunion dinner or at a wedding celebration. The flavourful aroma that wafted out from the kitchen while the mushrooms were being braised reminded me of the happy memories of the past Lunar New Year. Now that we cook for our family dinner, we continue to uphold this family tradition by making this dish without fail.
While it’s fancy to have your mushroom with broccoli and scallop, someday we like to have something simple, we add in black moss aka 发菜 to the braised mushroom. Not to mention black moss Fat Choy (髮菜), i.e. Chinese black moss, share similar sounds to “get rich” (發財). Therefore it’s a popular item to include on the Lunar New Year menu.
Nian gao 年糕 symbolizes progress, advancement, and growth. Nián (年) means “year,” and “gāo” (糕) is a homonym for “gāo” (高), which means, “tall,” “high,” or “expensive.” Every family inevitably buys or makes this treat for their Lunar New Year celebration, in the hopes of having a better year ahead. However, we never had it on its own before, as it taste so much better when you pan-fired it with sweet potato and taro. As the Nian Gao soften after it is hot, the sticky and chewy Niao Gao tastes so good!
Have you felt guilty about having too much delicious indulgence during the festive season? Honestly, many of us must have resumed a healthier diet by now but there are times we can’t avoid having amazing food. While Osmanthus Tea, a sweet-smelling flower, osmanthus is warming and nourishes the lungs hence it is tasteless without sugar. But we do not like to add sugar in our drinks so we have replaced it with Goji Berries, Dried Longans and Chinese Red Dates (also called jujubes). These 3 herbs go very well together, naturally, they are as sweet as the honey so it is great for any time of the day to warm your stomach.
Pen Cai (盆菜) is a traditional Cantonese meal that dates as far back as the Song Dynasty. The dish is made up of many layers of different ingredients in a stewed chicken gravy. It is usually served in a large bowl or metal basins for communal sharing. This is because its Chinese name (also spelt as Poon Choi), has been variously translated as “big bowl feast” or “basin cuisine”.
We like having this dish during the mid of Lunar New Year, as we can add in all our “left-over” from the dishes and hotpot. Not to mention we can clear our fridge at the same time it tastes delicious.
Do not underestimate, this little plate of mini golden mantou (bun) served with condensed milk in the middle. It is not the healthier choice but this little golden devil with condensed milk are very addictive. The soft fried buns exude a milky fragrance, which is very sweet and delicious. We like to have it with our hot pot and dishes that have thick sauces allowing us to have them as a replacement for rice.
Whenever we look at a fridge from a Korean and it is always full of pre-made side dishes where you can enjoy them whenever you like. Unlike them we Chinese has fewer cold side dishes as we like enjoying them fresh and hot. However, during the period where we are preparing for Lunar New Year, we like to prepare some food ahead for our busy schedule. It is a good dish to have along with rest of the other dishes.
It is one of the dishes we like to have when ordering at a ‘Zi Char’ store. Due to the complicated steps, we rarely cook them during a normal day. Thus if we want something fancy during Lunar New Year, this is our go-to dish. Moreover, prawn is a common ingredient you will see on Lunar New Year’s table, the bigger the better. This is because prawn in Cantonese (har) is similar to the sound of laughter ‘har har’. Therefore, we believe that eating prawns will bring happiness to the family for the whole year.
Sticky Rice Cake with Red Bean Paste or pan-fried mochi is a classic Cantonese snack or street food in Hong Kong. Also, it’s one of our favourite childhood snacks. If you like mochi, you should try out this simple and delicious sweet red bean glutinous sticky rice cake recipe too!
While it doesn’t have a special meaning to have it during the Lunar New Year, it is a great snack for everyone to enjoy after the meal. Sticky rice cake is crispy on the outside with a gooey texture inside. You will smell the toasted sesame seeds from afar. The first bite of the slightly spongy and pleasantly fragrant rice cake has such a delightful mouthfeel. The sweet and moist red bean paste will melt in your mouth so quickly that won’t be able to resist devouring the whole cake!
During the Chinese New Year, even we are having a feast we still try to be healthier and avoid eating too much meat. We’re no health nuts by any stretch of the imagination, we’d eat anything and everything if we didn’t have to worry about the threat of muffin tops. The vibrant red colour is festive, and the flavour of pork belly when it’s seasoned and caramelized with sugar, soy sauce, ginger and Shaoxing wine is amazing!
Despite the current situation of Covid-19, let’s celebrate this Lunar New Year, by creating new memories and preserving traditions in safe manners by all means. Let’s bring love, joy and laughter to people who treasure it the most. Have a wonderful festive season! Happy Lunar New Year!
This is a popular vegetable dish we enjoy during our family meals, and you would often see it on the menu during your CNY reunion dinner or at a wedding celebration. There are many variations to this recipe but for us, we love preparing it using shiitake mushrooms and seared scallops to enhance the sweetness and delicious umami flavour. Of course, not forgetting the symbolic meaning behind the round shape of the scallops and mushrooms represents oneness, prosperity and the blossoming of new beginnings – an integral concept of reunion during Chinese New Year.
If you don’t enjoy eating broccoli, you can also replace it with bok choy or kai lan – which are longer vegetables representing long life, while leafy greens like cabbage or sang choy represent growing fortune.
How to braised using a claypot?
Place the dried Chinese mushrooms into a medium bowl, and pour 2-3 cups of hot water over them. Place a plate over the bowl so the mushrooms are completely submerged. Because the mushrooms are small, they should be reconstituted quickly. We like to soak them in the fridge overnight or for a few days, however, you can also soak them 1 hour ahead before you use them.
After your mushrooms are done soaking, transfer to a plate and gently squeeze out the excess water. Cut off the stem of the soaked mushroom. Set the mushrooms and the soaking water aside.
Now, heat your clay pot over medium-high heat. Spread 1½ tablespoons vegetable oil around the perimeter. Add the finely minced garlic and mushrooms, and stir fry for 10 seconds. Now add in 1 tbsp of dark soy sauce, Shao xing wine and oyster sauce. Then, carefully pour the mushroom soaking water into the wok, making sure that you don’t pour any sediment from the bowl into the clay pot. Braise it for 20 – 30 minutes, then add in your scallop. Cook till it turns white before the next step.
Next, mix the cornstarch slurry and slowly pour it into the sauce while stirring constantly. After letting the mushrooms cook for an additional minute, taste the sauce. If needed, re-season with more soy sauce, sugar, or oyster sauce to your own preference. Add more hot water if the sauce is too thick or more cornstarch slurry if the sauce is too thin. The sauce should be thick enough to coat a spoon.
Preparation of Broccoli
Trim off the florets: Slice straight through the broccoli stem as close to the crown as you can get. The crown should break into several large florets. Cut through the “trunk” of each floret to make bite-sized pieces. Place these in a small bowl and run them under water to wash away any grit.
Trim and slice the stem: The main stem of the broccoli is entirely edible. Trim off any leaves or blemishes. You can remove the tougher top layer of skin with a peeler if you would like, but it’s not necessary. Slice off the bottom inch of the stem and discard (it’s usually too dry to be very tasty). Slice the remaining stem into disks. Stems take longer than florets to cook, so place all these slices in a separate bowl from the florets. Rinse under water to wash away any grit.
Blanch it: Prepare a bowl of ice water and have it next to the stove. Bring a large pot of water to a rapid boil. Add a heaping tablespoon of salt. Add the broccoli florets and cook until crisp-tender, 1 to 1 1/2 minutes. Remove with a slotted spoon and plunge immediately in the ice water. Let the water come back to a boil, then cook the stems until they are also crisp-tender, 1 1/2 to 2 minutes. If you would like softer vegetables, cook for an additional 30 seconds.
Arrange the broccoli into a circle around a large serving plate, with a space in the middle for the mushrooms. Transfer the mushrooms and sauce to the centre of your cooked broccoli.
This is a flexible dish where you could remove the scallop for the vegetarian version. Or you can replace the broccoli with bak coy if you are not a broccoli lover.
2½ ounces small dried Chinese Mushrooms (70 grams)
1 medium sized broccoli
2½ tablespoons vegetable oil (divided)
1 teaspoon salt
2 cloves garlic (finely minced)
1 tbsp of dark soy sauce
1 tbsp of Shaoxing wine
1 tbsp oyster sauce (use the vegetarian oyster sauce to keep the dish vegan)
1 tbsp cornstarch (mixed with 1
Methods
Place the dried Chinese mushrooms into a medium bowl, and pour 2-3 cups of hot water over them. Place a plate over the bowl so the mushrooms are completely submerged. Because the mushrooms are small, they should be reconstitute quickly.
After your mushrooms are done soaking, transfer to a plate and gently squeeze out the excess water. Set the mushrooms and the soaking water aside.
Prepare a bowl of ice water and have it next to the stove. Bring a large pot of water to a rapid boil. Add a heaping tablespoon of salt. Add the broccoli florets and cook until crisp-tender, 1 to 1 1/2 minutes. Remove with a slotted spoon and plunge immediately in the ice water. Let the water come back to a boil, then cook the stems until they are also crisp-tender, 1 1/2 to 2 minutes. If you would like softer vegetables, cook for an additional 30 seconds.
Now, heat your clay pot over medium-high heat. Spread 1½ tablespoons vegetable oil around the perimeter. Add the finely minced garlic and mushrooms, and stir fry for 10 seconds. Now add in 1 tbsp of dark soy sauce, Shao xing wine and oyster sauce. Then, carefully pour the mushroom soaking water into the wok, making sure that you don’t pour any sediment from the bowl into the clay pot. Braise it for 20 – 30 minutes, then add in your scallop. Cook till it turns white before the next step.
Next, mix the cornstarch slurry and slowly pour it into the sauce while stirring constantly. After letting the mushrooms cook for an additional minute, taste the sauce. If needed, re-season with more soy sauce, sugar, or oyster sauce to your own preference. Add more hot water if the sauce is too thick or more cornstarch slurry if the sauce is too thin. The sauce should be thick enough to coat a spoon.
Arrange the broccoli into a circle around a large serving plate, with a space in the middle for the mushrooms. Transfer the mushrooms and sauce to the centre of your cooked broccoli.
Last week we did a mood board for the Chinese New Year where houses are all decorated in bright burning red. However, many readers mentioned that in recent years there like to keep it minimalist instead. Thus here are our top 2 ways you could keep it simple yet give festival vibes to your house.
Adding a Plant Having a simple auspicious plant such as a money plant and lucky bamboo is a beautiful addition to your home or office all year round. Not only does it have the meaning of bringing good money to you at the same time it gave your home a little green and fresh touch.
Simple Table Setting How to set a table used to be common knowledge, but in today’s fast and busy world, knowing how to set a table properly has become somewhat of a party trick, thus making one will surprise your guest. If you are like us having a white bowl and plate, and doesn’t want to purchase a brand new set of tableware for this occasion, you can add in some red tissue and accessories to brighten up the table.
During the Chinese New Year, even we are having a feast we still try to be healthier and avoid eating too much meat. We’re no health nuts by any stretch of the imagination…we’d eat anything and everything if we didn’t have to worry about the threat of muffin tops.
There are countless times when the two of us walk into a bakery or gourmet shop for the sole purpose of just going in to look. But Shanghai-Style Braised Pork Belly (hong shao rou) is an exception!
So for most of our home-cooked meals these days, we try to stay pretty healthy–lots of veggies. But today, thanks to viewers like you, we’re having pork for dinner (and a vegetable, of course). We’re just giving the hungry public what they want, after all.
The vibrant red color is festive, and the flavor of pork belly when it’s seasoned and caramelized with sugar, soy sauce, ginger and Shaoxing wine is amazing!
Replacement for the ingredients
Pork Belly I have been able to find slabs of skin-on pork belly in markets with East Asian ingredients and specialty butchers.
Shaoxing Wine Shaoxing wine (绍兴酒) is a fermented rice wine originally from Shaoxing in the Zhejiang province in eastern China. I have been able to find it at larger grocery stores with a sizeable wine selection, such as Wegmans, and in markets specializing in Chinese ingredients. Dry sherry can be used as a substitution if you absolutely cannot find it.
Dark Soy Sauce is also known as sweet soy sauce, black soy sauce, or thick soy sauce.
Rock sugar (冰糖, Bing Tang) is a light crystallized sugar with a little less sweetness than granulated sugar. It can be found in markets with Chinese ingredients. If you are unable to find it, substitute with light brown sugar or granulated sugar.
Step to follow for the delicious meat
Briefly cook the pork in water before caramelizing to help remove impurities and reserve the cooking water. Remove the pork from the pot and rinse well with cold water. Make sure to pat dry before adding to the oil/sugar mixture to reduce the amount of splatter.
After searing the pork and combining the ingredients, I transferred the mixture to a large clay pot to simmer. If you don’t have a clay pot available, use a wok or large saucepan with a lid.
Add a splash or two more of the reserved water if the mixture gets too dry while simmering. If the sauce is still too watery after simmering, remove the lid and slightly increase the heat to reduce the liquid until thickened and bubbling (stir often to keep the bottom from burning).
We hope that you enjoy this recipe as we do. Share with us your version! Take a photo of your version, send us an email, tag us on Instagram, tweet us, anything. We love to see yours!
1 tablespoon rock sugar (rock sugar is preferred or you can use granulated sugar)
3 tablespoons Shaoxing wine
1 tablespoon soy sauce
½ tablespoon dark soy sauce
2 cups water
Methods
Start by cutting your pork belly into 3/4-inch thick pieces.
Over low heat, add the oil and sugar to your wok. Melt the sugar slightly and add the pork. Raise the heat to medium and cook until the pork is lightly browned.
Turn the heat back down to low and add shaoxing cooking wine, regular soy sauce, dark soy sauce, and water.
NOTE: It’s very important to the color and flavor of this dish that you have both kinds of soy sauce! Just head to your local Asian market, buy a bottle of each, and it will last you a year!
Cover and simmer over medium heat for about 45 minutes to 1 hour until pork is fork tender. Every 5-10 minutes, stir to prevent burning and add more water if it gets too dry.
CHIJMES is a historic building complex in Singapore, which began life as a Catholic convent known as the Convent of the Holy Infant Jesus. The complex is located at Victoria Street in the Downtown Core, within the Central Area, Singapore’s central business district. The Caldwell House, currently a wedding venue, and the Gothic-style chapel, renamed as CHIJMES Hall, currently, a function hall and also a wedding venue, have both been gazetted as national monuments.
Korea-Inspired Cafe
I’ve always had a pretty good impression of the F&B offerings at CHIJMES so I was especially excited to learn that a new cafe has opened in their midst. Fitting right in with the whimsically tranquil complex is DOUGH, a Korean-inspired cafe-slash-bakery. In stark contrast to the casual setting outside, the interior gave off a more elegant feel with marble tabletops and warm lighting. There were even three more tables fitted into an alcove with dimmer lights.
Unlike a regular cafe, the bakery section of DOUGH lets customers pick and choose their own baked goods. Kind of like regular bakeries, but fancier. Here for lunch and after something more filling? DOUGH also whips up pretty good mains such as Spicy Kimchi & Tomato pasta ($22), Chicken Thigh ($26), Wagyu Burger ($26) and Salmon ($28).
Dough Address: 30 Victoria Street, #01-30, Singapore 187996 Opening Hours: 10 am to 6 pm, Tuesday to Sunday
There are tons of interesting food located in Chijmes and we are happy to share with you our experience there. Let us know by commenting on the post below and tell us what are some of the things you would like us to try. Have a great day ahead!
Red is the favourite colour of Chinese New Year, as it holds a special meaning and it is auspicious when you use it during the festive period. However, not many like the colour red in their everyday lifestyles and it is too bold. However, it is always great to add in some red to celebrate the festival. Here are the top 3 “accessories” we like to use for our house to give the festival a quick change.
Paper umbrella It is not your usual umbrella, these paper umbrellas are widely used in the olden days. While we never use them now, it is a good prop during the festival. Fine one that is red in colour, you can decorate in ink to the design that you like.
Lantern The lantern has always been one of the must-have decorations during this festival, and it is can be commonly found and obtained in many shops located in Singapore. It comes in many colours and shapes and is one item that can be easily stored after the occasion as it is foldable.
Couplet Couplet usually comes in a pairs, where “lucky words” are written on them. You can write your wishes of the year with ink in black or gold on the pieces of red paper. While you can get it anywhere during the Chinese New Year period, it is also a great activity you can do with your kid.
Is red a must-have colour for you during the Chinese New Year?
There is no way you want to miss having a prawn dish on your table during Chinese New Year. Prawns are pronounced “Ha” in Cantonese, which means to 笑哈哈, laughing all year long. How could you miss the happiness of a brand new year? Therefore you wouldn’t want to miss out on this additive Chinese New Year dish – Crispy Cereal Prawns Recipe, 香脆麦片虾.
Highly addictive, pour some on plain-tasting white rice to add some taste, especially the kids who love the cereal coating that goes on the prawns! The contrasting but complementary flavours of sweetness from the cereal and spiciness of the chilli padi! Both add to the fresh taste of the prawn.
How to prep your Prawns
We start by preparing the prawn, there are two options for this, the unshell and shell prawn. We prefer the shelled prawn as after deep-frying it gave the dishes a crispy texture.
Remove the legs and head of the prawn. Start by cutting off the legs and half of the head of the prawn using a scissors. It doesn’t changes the taste of the dish but makes the presentation of the dish cleaner.
Remove the guts. Most of the prawn have guts along the back and you would want to remove it. Our method is using a toothpick, poke through the 3rd section of the prawn horizontally and pull the guts out. It maybe hard at first, but it’s easy to master after a few try. The other method where many like to use is to slit the back of the prawns with scissors to remove the guts. Then use a knife to cut a deeper slit to butterfly the prawns.
Marinate it. Many of the recipie doesn’t have this step, after trying many version we do like to marinate our prawn, as it add an extra flavour to the prawn. In a bowl of prawn, add in ginger, spring onion and shaoxing wine. Marinate it for at least 15 minutes, or overnight for intense flavour.
Coat and Deep-fry
Now that you have your prawn prepared it is time to deep-fried them. We decide to deep-fried the prawn lightly as we don’t want a heavy coating like tempura. We omit the egg coating that many recipes used, and we straight away coat them with corn starch (you can replace them with plain flour). We suggest you use a shallow flat pan for the corn starch, making the coating process easier and quicker. Heat up some cooking oil for frying the prawns. Fry in the hot oil until the coating becomes slightly golden and the prawns are red and cooked through. Drain and set aside.
In a separate wok or frying pan, melt the butter. Add the chopped garlic, chilli and curry leaves, fry till fragrant. Pour in the prepared cereal seasoning mixture. Stir fry for 2 to 3 minutes until the cereals start to get toasted and become golden brown. Add the cooked prawns and stir gently, making sure each piece is coated with the cereal mix.
Cooking Tips
Do not over-cooked the prawns. Otherwise, they will be tough and dry.
The oil must be hot before adding in the prawns to seal up the juices.
Remember to lower the heat first before adding butter to the wok, as butter gets burnt easily, so will the curry leaves and cereal. The cereal gets burnt with seconds, so need to watch closely when frying the cereal.
How to tell the prawns is cooked? You can tell the level of doneness from the shape of the curl :- C’ shape is not quite cooked, ‘O’ shape – overcooked, ‘U’ shape – just right!
We hope that you enjoy this recipe as we do. Share with us your version! Take a photo of your version, send us an email, tag us on Instagram, tweet us, anything. We love to see yours!
2 tablespoons all-purpose flour or self-raising flour
Spring Onion
Cooking oil for deep frying
45 grams butter
6 bird’s eye red chilli, chopped
5 sprigs of curry leaves, leaves detached and cleaned
200g of cereal
Methods
Start by cutting off the legs and half of the head of the prawn using scissors. Using a toothpick, poke through the 3rd section of the prawn horizontally and pull the guts out. In a bowl of prawns, add in the ginger, spring onion and Shaoxing wine. Marinate it for at least 15 minutes, or overnight for intense flavour.
Shake off the excess Shaoxing wine, then coat it evenly with corn flour.
Heat up some cooking oil for frying the prawns. Fry in the hot oil until the coating becomes slightly golden and the prawns are red and cooked through. Drain and set aside.
In a separate wok or frying pan, melt the butter. Add the chopped garlic, chilli and curry leaves, fry till fragrant. Pour in the prepared cereal seasoning mixture. Stir fry for 2 to 3 minutes until the cereals start to get toasted and become golden brown. Add the cooked prawns and stir gently, making sure each piece is coated with the cereal mix.
Previously, we have a day at the East Coast Road where we visit places that required a car to travel easily. When driving we pass by a colourful place – Joo Chiat. As mentioned in our last post Joo Chait is where you can spot the Peranakan scenario.
“Peranakan” generally refers to a person of mixed Chinese and Malay/Indonesian heritage. Currently, there is a small community of 2000 Peranakan located in Singapore, however, back in the years there are many more Peranakan stayed in Singapore. Most of this community stayed in shophouses located at Joo Chiat/Katong. While many moves out of these places but the unique culture are been preserved for our generation.
Have a breakfast at Hainanese-style coffeeshop
Chin Mee Chin – Looking at the exterior of this “coffeeshop” you won’t know that it has a history of 100 years. After much research, it was known that it had just completed its renovation in Sept 2021 and now it is back, refreshed and revamped, guided by a rich heritage and tradition. Head over as early as you could, we reach there by 10 am and there’s already a long queue waiting for us. To make the trip worth we ordered every each item on the menu.
On the breakfast menu are Kaya Toast ($2.20), Eggs ($1.60), or get the set with a drink ($4.90). The Kaya Toast with the thick slab of butter remained my favourite item of the lot, with sweet aromatic kaya hand-made in traditional style on a charcoal-roasted bun. In fact, the bun was soft and more delectable than how I remember it to be. It is not the everyday kaya toast you have at Toast Box.
Chin Mee Chin Address: 204 East Coast Road, Singapore 428903 Opening Hours: 8 am – 4 pm (Tues – Sun), Closed Mon
Discover Mural Arts
Singapore has an increasing of interesting mural arts all around Singapore same to Joo Chiat. It has also been an uptick in mural creation in this area. While you can find most of the mural arts around Joo Chiat but most of the works in this area are found along or off the main Joo Chiat Road. It’s a pretty charming area that was once quite a low key, but the increasing awareness of the district’s Peranakan heritage and the tourism board’s push for more ‘local experience’ has it gentrifying quite quickly, though it’s still managed to retain most of its charm.
We love how each mural arts tell us the story about the place. While you are in Chinatown, you can see arts expressing the Chinese heritage. In Joo Chiat, you can spot many bold colours here which is the colour used in most of the Peranakan Shophouses, isn’t it interesting?
Time for a break at Tigerlily
There are tonnes of interesting little shops and cafes around Joo Chiat, you could spot one every few units away. Thus it’s simple to find food and things to buy. Then we came across this desserts cafe – Tigerlily Patisserie. It straight away gave us a feeling of a cafe in Melbourne.
Tigerlily was created to offer baked goods with unconventional flavours, using fine European techniques injected with an Asian spirit. More than just a patisserie, diners can look forward to Breakfast and Brunch items such as Monsieur Kim ($15), a grilled cheese Croque Monsieur with Brie, Comte, Emmental, chorizo and Kimchi, Salmon Tzatziki ($14) with house-cured salmon gravlax and Build You Own Big Brekkie ($18).
Before leaving Joo Chiat we of course need to visit the iconic Peranakan houses that are on every postcard. Here you’ll find pastel-decked, low-slung Peranakan-style shophouses dating back to the 1920s, with patterned tiles pressed on the walls along five-foot-ways. The real show stoppers are the rainbow-coloured terrace houses found just a block away at Koon Seng Road. Since being gazetted for conservation in 1991, these Instagram sensations remain a major drawcard for tourists.
There are so many other places to be covered in Joo Chiat and so many different types of ways to experience the place. Leave us a comment in this post below if you want to know more about this area.
One of the first categories we did for spring cleaning will be the food. It may seem like an easy task, but it is not. After many years of researching and organizing, we still couldn’t find a good way to keep our food in terms of our habits. There is still a time where we get messed up and forget the food we have. Weeks after cleaning it will turn into a mess again. Thus this time we decided to challenge ourselves and do the clean-up again. To make sure we work better, we came out with a list before we get started.
Take everything out. Food or nonfood, take everything out and put it on your kitchen table and counters. Then wipe those shelves clean! Add shelf paper to make it look nice. This project could take several days.
Toss it out. Throw away expired, damaged, or foods you no longer eat. If you can’t find an expiration date, toss it. Check StillTasty.com for questions about shelf-life.
Group similar food items. Organize your food into groups such as: small, canned foods, pasta/rice/potatoes, baking ingredients, breakfast items, spices, beverages, etc.
Take an inventory. Print out my 2-page Inventory worksheet on my website printables page. Write down what you have and items you need.
Move unused item. Put holiday items or less used appliances in a closet, the garage, or basement to make room for food in your kitchen. Donate duplicate appliances.
Hong Kong Egg Tart is one of our favourite pastries of all time! During our childhood, we kept on craving it every week. We kept on pestering our mom to get some for us, especially those from Tai Chong Kok which is just a street away from where we stay. It got sold out in 30 minutes once they are out of the oven.
The circular tarts of pastry, filled with a smooth, lightly sweetened egg custard, just melt into our mouth. It is best to enjoy them when they are out of the oven, the crunchy tart shell is all that we need. However, as time goes by we couldn’t bear to get them when the price got increased from 90 cents to $1.20 per piece. Now many of the places sell them up to $2.20 per piece making it an expensive delight.
While we do still purchase them from the store but the best part is, you can make them at home! You can enjoy it as much as you want!
Type of Egg Tart
There are many kinds of Egg Tarts; Hong Kong Style is the classic egg tart with a buttery shell, Portuguese Egg Tarts one with puff pastry and caramelized top, and there are even Cheesy Egg Tarts with cream cheese in it. This time we are going to share with you the most classic one that we saw in the dim sum restaurant – the Hong Kong Egg Tart.
Making the base
Many of the recipes use the rub-in method for making the base of the pastry, it does give you the melt-into-mouth texture. However, when the weather is getting warmer we don’t recommend that, as it will only lead to your cold butter melting fast in your finger which is what we don’t want to happen. Thus we decide to use a mixer instead when it comes to this step.
In your mixer, add in the cold butter and powder sugar, incorporate it well until you don’t see the powder sugar in a low skip. Add in the egg and mix it well for 2 minutes at a higher speed before adding in the flour. Continue mixing it until you see the dough is formed. Divide the dough equally and press them into your tart mould. Pierce a few holes in the bottom with a fork to prevent the bottom of the pastry from rising.
Making the Custart
Making the custard of the egg tart is easier than you could think. Dissolve the sugar into 1 cup of hot water, and allow the mixture to cool to room temperature. Whisk milk, eggs, and vanilla together, and then thoroughly whisk in the sugar water. Strain the custard through a fine-meshed strainer into a large measuring cup or pitcher (something with a pour spout) to get rid of those bubbles, and to produce a smooth egg tart.
Now you have both your elements, fill the custard filling into the tart base to 80%. Once the tart bases are filled with egg filling, bake immediately in a preheated oven at 200 degrees C/390 degrees F for 15 minutes, followed by 180 degrees C / 356 degrees F for another 10 minutes. Leave the oven door ajar for five minutes then remove the egg tarts to let them cool down slowly.
Our Favourite Egg Tart Place to Visit
We may not try all the egg tart in Singapore but here are our favourite egg tart’s places that we always visit when we are lazy to bake one. The consider factor of our egg tart is that the tart shell needs to be flaky, and with a runny smooth custard. Of course, the price also plays a big part here.
Mentioned perviously this 83-year-old Tai Chong Kok started out selling traditional lotus mooncakes, before they decided to venture into egg tarts is our favouite for all time. Easy to hold and box thanks to its diamond shape, the egg tarts ($1.50) have a biscuit-like texture with a buttery base, which complements its slightly runny custard.
Knowing it is one of the best in Hong Kong the first time we tried to get an egg tart ($2) from Tai Cheong Bakery we know why. A strong buttery scent exudes from its crust, with a hint of saltiness that balance its sweet and firm pudding centre. What makes this gold is its wonderfully fresh taste.
During our visit to Joo Chiat we decided to pop over to Chin Mee Chin Confectionery. While the signature is the traditional breakfast set($4) that consists of a hot cuppa, half-boiled eggs, and their famous kaya toast. We can’t dismiss their old-school egg tart ($1) when we see one.
Tong Heng is our most familiar remedy to treat a bad bout of blues; cracking into its flaky and crusty shell brings me waves of comfort. Their diamond-shaped egg tart ($2) has a velvety-soft pudding that’s contrasted by the hard but thin pastry. The wobbly custard is also sweeter than most egg tarts.
We can’t wait to try all the egg tarts for you and make a proper review on where to visit for the egg tart, thus in the meantime try our recipe, it does taste like one of these stores made ones.
In your mixer, add in the cold butter and powder sugar, incorporate it well until you don’t see the powder sugar in a low skip. Add in the egg and mix it well for 2 minutes at a higher speed before adding in the flour. Continue mixing it until you see the dough is formed. Divide the dough equally and press them into your tart mould. Pierce a few holes in the bottom with a fork to prevent the bottom of the pastry from rising.
Making the custard of the egg tart is easier than you could think. Dissolve the sugar into 1 cup of hot water, and allow the mixture to cool to room temperature. Whisk milk, eggs, and vanilla together, and then thoroughly whisk in the sugar water. Strain the custard through a fine-meshed strainer into a large measuring cup or pitcher (something with a pour spout) to get rid of those bubbles, and to produce a smooth egg tart.
Now you have both your elements, fill the custard filling into the tart base to 80%. Once the tart bases are filled with egg filling, bake immediately in a preheated oven at 200 degrees C/390 degrees F for 15 minutes, followed by 180 degrees C / 356 degrees F for another 10 minutes. Leave the oven door ajar for five minutes then remove the egg tarts to let them cool down slowly.
East Coast Road is one of the longest roads in Singapore, located from Marina Parade to East Coast Park. In between this road, you can find a lot of interesting places like our iconic Joo Chait where you can spot the Peranakan scenario, Cafe along Siglap and one of our favourite parks of all time – East Coast Park.
They are a hundred ways of visiting these places, such as a bus ride down the Joo Chait, or even a bike trip down to East Coast Park. We are lucky to have a car to travel this time thus we decided to get on a different road where the public transport is hard to get by. Here is a glimpse of how to spend an afternoon at East Coast Road.
Moroccan-Inspired Dining Experience
We start the afternoon by having at La Fez Cafe & Bakeryfor a Moroccan-inspired dining experience. We are attracted by the well-renovated Instagram-able restaurant. It has already become one of our criteria to visit a place 1) Instagram-able 2) good food. Inspired by the colours and flavours of Morocco, this restaurant does what they tell.
We are surprised with the full range of menu from meat to vegetables, however as it is a halal restaurant don’t expect them from serving pork. We ordered the Rotisserie Chicken Moroccan Style ($32.90), La Souk Green Harissa Lamb Shank ($34.90) and also a Sahara Roasted Cauliflower ($24.90) and it tastes so authentic, the portion is big which is great for sharing.
Along the road, you could also find an authentic greek restaurant Blu Kouzina. We have a try at their Dempsey Hill branch and it tastes amazing, which is a great experience.
La Fez Cafe & Bakery Address: 907 East Coast Rd Operating Hours: 11.30 am – 9 pm
Tea Break before the Sun
After a full meal, we decided to have a little tea break. During our trip down Joo Chiat, on our bus ride, we will always pass by this Little Rogue Coffee – Melbourne-Inspired cafe with delicious brunch, bicycle parking space and a pets area outside.
The name “Little Rogue” is inspired by the owners’ children’s cheeky character and playful personality. After research, we discover that before covid this is quite a family and kids-focused place, with the incorporation of a “for the little ones” menu, a small play area (currently closed for now). It has also a community library to encourage customers to donate or exchange books, which is a community place for everyone.
They have a big range of cakes and drinks, so can make a visit even you don’t want a full meal. They have bicycle parking spaces for people to park within the cafe premises thus you could have a ride there without any worries.
Little Rogue Coffee Address: 336 & 338 Tanjong Katong Road Operating Hours: 8.30 am to 6 pm (Closed on Tuesday)
Breathing the Sea
Before we have Garden by the Bay or even staycation, East Coast Park is a place I like to hang out with my friends. During the school holiday, we will book a chalet (when it is still a trend) and have a good overnight trip. Other than bbq, riding bikes, or even playing along the shore, walking down and resting along one of these stones is on the checklist. Coming back here again do bring backs all the memories. There are many “stones” like this along East Coast Park and the one we went to is located at the Aloha Sea Sports Centre, however, you can visit many other “stones” to see a different view.
East Coast Park “Stone” Address: 1212 ECP, E2 Area E Car Park
There are millions of ways of experiencing the day at East Coast Road, and we may travel back to here someday again in a different way. Let us know some places you think we should visit and we haven’t had one!
Believe it or not, it’s time to start thinking about spring cleaning your home. Spring cleaning is important for everyone, particularly if you’re an allergy sufferer. And it’s even more important in the times of COVID-19. You owe it to yourself and your family to enjoy a clean that’s more than dirt-deep.
However, when you see your equipment have you thought of giving up? Yes we do, this scrolling down the cleaning equipment aesthetic in Pinterest make us want to revamp our cleaning corner.
Whenever we look at a fridge from a Korean and it is always full of pre-made side dishes where you can enjoy them whenever you like. Unlike them we Chinese has fewer cold side dishes as we like enjoying them fresh and hot. However, during the period where we are preparing for Lunar New Year, we like to prepare some food ahead for our busy schedule. We came along with this recipe from The Wok of Life finding it interesting and thus we decided to make our own version, and the outcome is extraordinary.
What Kind of Bamboo Shoot you will need?
Bamboo shoots are young sprouts of the plant of the same name. They are a popular cooking ingredient in many Asian countries due to their tastiness as well as rich health benefits. The crispy, slightly sweet flesh of the sprouts is also great for use in a variety of soups, salads, or stews. Moreover, vegetable side dishes with young shoots of this plant are not uncommon.
We rarely can find fresh bamboo shoots, however, if you do find one it can be stored in the refrigerator for up to 2 weeks. You can pre-cook them yourself in boiling water until tender. Do not eat them raw. They actually contain natural toxins (cooking neutralizes them).
For this recipe, you will need a pack of boiled bamboo shoots that can be found in both the wet and the supermarket.
Seasoning is the Key
While the main lead of this dish is bamboo shoot, but the key to this dish is the seasoning. You will need minced garlic, Sichuan chilli flakes, vegetable oil, sugar, oyster sauce, rice vinegar, light soy sauce, salt and cilantro. Start by mixing the garlic and chilli flakes in a heatproof bowl.
In a pot, heat up the vegetable oil, the time required will depend on your oil and your stove, but a general rule of thumb is when you can see it just start to show smoke or if it bubbles when a wooden chopstick is placed inside, it’s ready. Then pour the hot oil into the mixture of spices. End by mixing all the rest of the ingredients.
We like to seat it in the fridge for at least 30 minutes for the bamboo shoot to absorb the seasoning before enjoying them.
How to Store Them?
We have never stored them in the fridge for too long as it is so delicious that we finished them right away we made it. However, you could keep them for up to 2 weeks in a tight container.
While Lunar New Year is coming, you can prepare this 2 weeks ahead and make it as one of your side dishes to the meals you are having during this gathering, You will surely impress your family and friends. Not to mention all you need is 15 minutes of your time.
1/4 cup cilantro (leaves and stems, roughly chopped)
Methods
Tear the bamboo shoots into small strips with your hands.
Add the garlic and Sichuan chili flakes to a small bowl. Heat the oil and pour over the garlic and flakes—they should sizzle and immediately smell fragrant.
Stir in the sugar, oyster sauce, rice vinegar, light soy sauce, and Sichuan peppercorn oil if using. Toss with the shredded bamboo. Season with salt to taste, and garnish with cilantro.
During our school trip, Kampong Glam was one of the places they will bring us for a tour to explore and understand the history there. Kampong Glam is historically one of Singapore’s oldest urban quarters, Kampong Gelam is a neighbourhood where age-old traditions and trendy lifestyles come together in a heady blend. The word ‘kampong’ means “compound in Malay, while “gelam” refers to the long-leaved paperbark tree, commonly found in the area and used for boat-making, medicine and even as a seasoning for food.
We first head to the street along with Sultan Mosque – you can’t miss the massive golden domes and huge prayer hall, the focal point for Singapore’s Muslims. Walking down the streets you could already smell the air differently than usual, maybe is the scent they use there, it gave a feeling of being overseas.
With its massive golden dome, bright salmon-red exterior and grand central prayer room (which can hold up to 5,000 worshippers at one time), this is probably the most impressive mosque in Singapore, as well as the largest.
Singapore’s Hosier Lane
Do not walk the main roads, head down to the small alleys to discover the colourful walls. It is like the Hosier Lane located in Melbourne, where the locals tell stories using the art on the wall. However many of the places are the backyard of businesses, thus be considerate when you are passing by there or taking a photo.
Arabica Coffee for the Humid Weather
Do you remember the story where we travel to Kyoto wanting to try this Arabica Coffee and due to my bad time management I missed the operating hours? We are now lucky to have them in Singapore and enjoy them when and ever we like. Although it cost much more than Japan, however, it is a great place to rest when the weather is too humid.
We are sure you will learn to like this place as we do, not only you can experience another culture of Singapore at the same time it is a quiet and peaceful place to spend your day at.
We always wonder why are candles widely used by many, especially during Christmas, is it because it is pretty? No, after much research we found out that there is a great meaning behind it. The candles also have their own special significance. The four candles represent the four weeks of Advent, and one candle is lit each Sunday. Three of the candles are purple because the colour violet is a liturgical colour that signifies a time of prayer, penance, and sacrifice. Isn’t this heartwarming?
Well, it’s actually okay not to follow the “rules” as just head in for the aesthetic, that’s what many do. While many have used candles in a container in recent years but in past, these long candles are really popular. However, the drips of the wax will cause harm to the tableware, which is what many doesn’t like about it. At least that is what happens to us.
The year 2021 has been carried away by the wind quickly like a breeze. It started with hope, in the mid of the year we are been welcomed by lots of challengers and end the year with a little break. Like 2020, the year 2021 was also eclipsed by COVID-19. Still, there are some things we have achieved and enjoyed, here’s a little recap on our 2021.
It was kind of a year of firsts for us: Joe has successfully grown her little sustainable garden from seed to food that we consumed every day. Her first is never a success, it only after all the try and error she now own a little garden with lady’s fingers, basil leaves, mint leaves and her tomato plant are on the way in fruiting too. Using a few recycled bottles never stop her from her journey to a sustainable life.
It’s a rare moment when Joe decided to give a little surprise as she is someone who doesn’t like one. In the month of April, which is also the birthday’s month for Angela, she was surprised with a Staycation at Capitol Kempinski Hotel by Joe. We’re glad that it all happened before her misfortunate incident happened on her actual birthday’s date. Capitol Kempinski Hotel had become our favourite hotel for both stay and food in Singapore for all time, it’s indeed a good memory we have for this year.
As we are still stuck in Singapore, we decided to give Singapore a good look, by heading around places we both have and have not been to a small walk. Apparently, there are many places in Singapore we have yet to explore. We make a visit to Chinatown, Tiong Bahru, Bras Basah and also a walk by the Singapore River.
We had the most magical summer of our life, which boarding our very first cruise since we are all grown up. While many have planned their trip overseas, but this is the only getaway we have been so far. We’d booked the 4D3N cruise, which actually only gives you 2 full days on board. All we wanted to do was relax, drink and eat and we found the best place to do that as an adult couple was the Solarium – located at the front of the ship, it’s an adults-only area with an indoor pool, hot tubs, bistro and a bar. We spent the majority of our time onboard at this area, reading, drinking and people watching, which is a good way of relaxing.
Other than trying to enjoy our lives, we continue creating different recipes and creative projects for our blog. While the weather has been getting unpredictable, we get rain and sun not in their season making our photoshoot of the recipes a challenging one, however, it does not stop us.
Our favourite dish for the year is seared scallops with apple salad and pumpkin puree that we made for the Christmas season. It’s a great combination with the perfect lightness plus hearty feels all around! This is a meal that is seriously impressive in both taste and appearance and has the added bonus of being surprisingly simple. It is the most elegant dish we have ever made.
We can never miss our chance to create a memory with our mother. During her birthday we make a trip down to the newly opened botanic garden gallop section for a picnic. We are very please that she really love the arrangement that we have made. Although the weather is not doing as well, as it rained halfway through our picnic, but we are still glad to experiment with those little moments with our mom. We can’t wait to make a visit to this place again as it is really beautiful. Hopefully, our next visit will be a sunny one!
What can we say, 2021 was something. We felt the most lonely and most loved in the same 365 days. We’ve had the most fun we’ve had in our lives, and yet we’ve never felt so stuck in a place. There were days that we couldn’t believe that it was actually our life in a good way and in a bad way. And then there were some days that were among the mids, days that were the same with the rest which had no significance whatsoever. Days that happen in any given year, whether you want them or not.
So for 2022, we just wish for a sequel of the better parts of 2021: Days filled with the warmth of the sunshine and nights filled with a lot of laughter, good company, and good drinks.
What could be more comforting during the holidays than a traditional Christmas dinner shared with family and close friends? A couple of Christmas back we Ultimate Checklist for Christmas, this year we will be focusing on the collection of food. As many said, “Food is the world”. There are millions of recipes for Christmas but below are what we’ve collected here for you in our holiday round-up of the best traditional Christmas recipes for appetizers, main courses, side dishes, and desserts. Just pick and choose among these menu options, and enjoy a classic holiday dinner this year.
Appetizers
Entertaining can be stressful at the best of times, especially at Christmas when you have a million and one things to think about on top of cooking. Keep calm and set reminders to help you achieve and host the perfect Christmas dinner.
Thus we always like to start with something simple or dishes that can be made ahead like the Antipasto Platter with Baked Brie where it is great for sharing and getting the conversation started. You can prepare the ingredients a day ahead and assemble them on the day. While on the table we like to have some homemade bread like Plain Challah to start the dinner, match them with some olive oil and flavoured salt.
Mains
Here come the stars of the table, if you have more than 5 guests we suggest you pick 2 of the dishes in this list to keep your guests filling and give them more options. Our favourite is always the meat Chimichurri Beef Flank Steak, Mediterranean Stuffed Pork Tenderloin and Salted Crusted Lamb with Mint Jelly are our go-to when we don’t want to overthink our meal. We like mixing the beef and lamb, making them into a meat platter. If you do not have anything in the oven, you will want to have the lamb on the table, although it takes 2 hours to cook it turns out so tender and juicy, where it will turn the non-lamb eater into loving it.
We will never pick seafood like Seared Scallops with quinoa, apple salad and pumpkin puree during our busy day as they are easy to go wrong when you are multi-tasking. However, this dish is so elegant to be served to impress your guests. Like the lamb we have the fish option for you, you don’t need to concentrate on the dish, but after an hour or two, you will have the juicy and fresh main dish right onto the table. Crushing the salted crust is also a way to impress your family and guest.
Side Dishes
If we are going to list down all our favourite side dishes for Christmas, it will be so long that you will be getting tired looking at them. Here are our top few that can make easily and matches with all mains you have on the table. Potatoes is a must to have, Mashed Potato and Mashed Sweet Potato are a must on the table. Our mashed potatoes are buttery and creamy, where all ages like them. However, if you are not a fan of one baked your potatoes instead – Hearty Winter Potato Ratatouille.
I don’t about you but the vegetables are a must on our side and cauliflower is are the best ingredient to be used, one reason being it is in the season, second, it is flexible vegetables that can be used in many ways such as Cauliflower Quniao Rice and Roasted Cauliflower with Gruyere Cheese. If you don’t have anything in the oven Roasted Sprouts with Pomegranate and Grilled Roots with Fig Butter could never be wrong, where they are dishes not required a long time of preparation, all you need is the oven to do its job.
There is no such saying of too many side dishes, thus choose as much as you like to make, as long as you plan your time well.
Desserts
After all the preparation for mains and side dishes we are left we no time for the dessert, so our list of desserts is always on that can be made ahead of time. During Christmas Eve, you can spend some time with your family to make some Gingerbread House, Black Forest Sweet Cheese Tart and Lemon Peach Pie as your Christmas dessert. It is fun to make at the same time the best time to make some conversation with your family.
For an easier recipe we have Honey Thyme Bundt Cake and Coconut Matcha Pines for you, both tastes Christmas-ish yet simple and fast to make.
Drinks
Yes, you have missed out if you thought you end at the dessert. While many go along with their meal with drinks like wine and soda. For us only by making some homemade drinks complete our meal. Cajun Peach Lemonade, Earl Grey Lemonade and Spiced Hot Toddy are our picks for you, they all have a common point, fruity and spicy just like Christmas.
Write down on a piece of paper your picks, if one required the oven to make, for the other dishes choose something that can be cooked on the stove instead. If you have a main that is wet, choose a drier side dish to go along with them. When you have all the dishes well planned, you can start to decorate your table and have as much fun as your can.
Here we wishes everything goes well with you and have a Happy and Merry Christmas!
Paper stars have to be some of the simplest, prettiest, and most versatile Christmas decorations around. They’re inexpensive to buy, quick to put up, and you can fold them up and store them away to reuse again and again. I’ve been incorporating them into my festive decor for years and I’ve displayed them in all sorts of different ways, so I thought I’d share a few easy yet eye-catching ideas that you can recreate in your own home.
Clusters of paper stars are ideal for jazzing up a blank swathe of the wall. This look works best if you use stars of varying sizes and position them at slightly different heights – just use blue tack to stick them in place or, if that doesn’t work, suspend them from above with sewing thread and a bit of masking tape.
Paper stars also work brilliantly in windows, especially as they can be seen from the outside. Again use trusty sewing thread, either tied around a curtain pole or stuck to the frame with masking tape.
Beef flank steak is never a part of the beef that we will be considering for our dish at any time, our top choices are usually ribeye, striploin, or the t-bone. As to cook a steak, fats in it play an important role, thus comparing flank with other parts it is lean and close to 0% of fat in it. However, it changes our mind about this meat after trying them.
It is lean but much more flavourful compared to other premium parts of the beef. Matching it with the chimichurri sauce, elevate the flavour of the steak to another level – making it a perfect and economic dish for your Christmas.
Choosing the right steak
While it is uncommon to see flank steak in your local supermarket as it is a rare part where people usually eat. We are only able to obtain it with our special trip down to our favourite butches. If you couldn’t find flank steak, replacing it with skirt steak does the magic too.
Preparation of flank steak
Learning this method from a simple recipe works very well here. Her favourite method of preparing flank steak is to put little knife pokes in the meat, breaking up some of the long muscle fibres. It will help to reduce the toughness of the steak.
We use our favourite cast iron for the steak, as usual, heat the pan with olive oil well before doing your magic. Pan-fry both sides of the steak for 6 minutes each for a medium-rare steak. Like Gordon Ramsay shouted, “do not flip the steak, wait patiently and let the pan do its job.” After cooking, let the rest on the board for 10 minutes before slicing it up. One big mistake made in all steak cooking is to slice it up immediately, doing so will lead to the loss of moisture from the steak and you don’t want that.
Chimichurri Sauce – elevating the flavour of meat
Chimichurri Sauce has been coming across to us many times and finally, we are able to try it. Chimichurri Sauce is an Argentinean sauce or condiment, similar to pesto, that is popular throughout South America. This basic version uses fresh parsley, oregano, garlic, oil and vinegar and a little bit of chilli pepper, (which is what we are going to do here) though the variations on this theme are endless. We adapted from our favourite website Bon Appétit, which is so delicious and simple to make.
Ingredients needed:
shallot
garlic clove
red wine vinegar
cilantro
flat-leaf parsley
fresh oregano
extra-virgin olive oil
Using our trusty Kitchen Aid mixer we mix all the dry ingredients into small pieces before adding in the olive oil and red wine vinegar. You can make this sauce a week ahead and keep it well in the fridge for marination of meat and seafood, or you can use it as a sauce as we do it here.
Using flank steak makes this recipe affordable and easy. It’s a good cut of meat but not too expensive, like a nice ribeye or strip. However, it’s still super tender and doesn’t require a lot of work to make delicious! Enjoying the perfect blend of Chimichurri Sauce by Bon Appéit, they are indeed a perfect match.
We hope that you enjoy this recipe as we do. Share with us your version! Take a photo of your version, send us an email, tag us on Instagram, tweet us, anything. We love to see yours!
3–4 garlic cloves, thinly sliced or finely chopped
½ cup red wine vinegar
1 tsp kosher salt, plus more
½ cup finely chopped cilantro
¼ cup finely chopped flat-leaf parsley
2 tbsp finely chopped oregano
¾ cup extra-virgin olive oil
Methods
Remove the steak from the refrigerator a half-hour before cooking. Cutaway any tough connective tissue on the surface of the steak. Using the tip of a sharp knife, poke small cuts into the meat, almost all the way through. The cuts should be at an angle, in the direction of the grain of the meat as the knife tip is going in. The cuts should be about an inch apart from each other. Turn the steak over and repeat the cuts on the other side.
Heat a large cast-iron frying pan on high heat. Place steak in a hot pan. Let sear for 5 to 6minutes until well browned for both sides each. Remove the steak from the pan to a cutting board and let rest for 10 minutes. Cut the meat in very thin slices, at an angle, across the grain of the meat.
Combine shallot, chile, garlic, vinegar, and 1 tsp. salt in a medium bowl. Let sit for 10 minutes. Stir in cilantro, parsley, and oregano. Using a fork, whisk in oil. Transfer ½ cup chimichurri to a small bowl; season with salt and reserve as sauce.
Serve the steak with the Chimichurri Sauce over it.
There are a few ingredients that always pair effortlessly. When you put them together, the outcome will always be delicious. You just know it! Whenever I bake a cake, it never has frosting or layers. So, we always try to pick some winning flavour combinations. Osmanthus Pound Cake,Chorizo Birthday Cake, and this time for Christmas’s Honey Thyme Bundt Cake. The subtle minty flavour of fresh thyme and perfume honey makes the cake smell absolutely divine.
It’s also the cake we make when we need to prep something sweet in advance – it’s dense and moist, meaning it keeps well, plus I find the flavours continue to develop over time. Store it in an airtight container for up to 10 days. Still, we like to reheat it before enjoying them.
Using Thyme during Christmas
Whether you prefer to arrange a turkey rubbed with thyme and parsley or mashed potatoes mixed with chives, there are some herbs that give your meal the familiar aromas of a decent Thanksgiving and Xmas dinner. Sage, rosemary, bay leaves, chives, and thyme is on our top list.
Thyme – these woody-stemmed herbs lend plenty of flavour to comforting fall dishes. Thyme incorporates a pronounced flavour with earthy and floral notes that lend a subtle pepperiness to both turkey and stuffing. The herb’s aromas and oils reach their maximum potential when given enough time to cook, so it’s perfect for the lengthy process of roasting a turkey.
In this case “We think it provides such a pleasant earthy flavour, but at the identical time it’s a variety of lemony and light-weight enough to decorate up the honey at the tip.”
All you need is to mix them well in the mixing bowl and bake them with your favourite bundt mould. Enjoy them when they are piping hot as you will love the crispy outside and moist inner layer.
Preheat the oven to 176C / 350F and oil a 5-inch bundt cake pan.
Whisk flour, baking soda, sugar, and thyme leaves in a bowl.
In another bowl, whisk clarified butter with 2 eggs until it’s smooth. Then, add honey to it and give it another whisk. Pour this wet mixture into the dry ingredients bowl and whisk. Next, add milk and whisk it again.
Pour the cake batter into the oiled bundt cake pan and bake it for about 50 minutes or until the cake is cooked through. Insert a knife or a toothpick and if it comes out clean, it’s ready.
Allow the pan to cool down and then flip it on a cake stand or a plate.
For the syrup, add honey, water, and thyme leaves in a saucepan. Give it a stir and allow it to cook for a couple of minutes.
This week after Christmas I really wanted to focus on winter decor here on the blog to help any of you struggling with taking your Christmas decor & not knowing what to do with your house, or those who are about to take your Christmas decor down & are sad because you don’t want a bare house.
Here are some inspiration for you that I have been loving & some of my favorite winter decor that inspires me. I shared some of my favorite winter decors last year at this time so you can call today’s post part two. I hope you enjoy this lovely rustic winter decor inspiration & that it makes you a little less sad to take down your Christmas decor in your own homes. Of course, there is so much more winter decor inspiration out there, here are just a few of my favorite winter decor elements to get you started.
We never plan very far ahead when it comes to holiday meals, so it’s kind of funny that we’re here writing about preparing for Christmas. There is this particular dish that we like to make for dinner for the festive season. When the months turn cooler, we start craving heartier foods, but with this dish, you get a feel of the end of summer and the beginning of fall all in one which is – Seared scallops with quinoa, apple salad and pumpkin puree. It’s a great combination with the perfect lightness plus hearty feels all around! This is a meal that is seriously impressive in both taste and appearance and has the added bonus of being surprisingly simple.
This dish has a total of 3 sections to be made; searing of scallops, pumpkin puree and apple salad in order to make this dish a whole. However, we promise that every section of this dish is simple and quick to make.
Easy Pumpkin Puree from Scratch
The recipe requires only two ingredients and that’s counting salt, which is technically optional! You are looking at 45 to 60 minutes of roasting time, but that’s really not too bad especially since it makes your home smell amazing. You can make pumpkin puree in advance, too. It will keep for a week in the refrigerator and for months in the freezer. (Some find that the texture changes over time when frozen, but we haven’t had any issues with that yet. I’ll keep you updated, though.)
How to make Pumpkin Puree?
You want to use small baking pumpkins when making pumpkin puree. When you’re home give the pumpkin a good rinse then get to cutting it in half.
Many of the recipie scoop out the pumpkin seeds, but like to keep them on. Then lightly season with salt.
Place the halves cut-side-down onto a baking sheet and roast until the flesh is soft and coming away from the skin.
Once the pumpkin is roasted, throw the softened flesh into a food processor and blend until smooth. Easy! (Add tablespoon of milk in if the texture of the puree is not smooth)
Apple Quinoa Salad
Angela is never a fan of eating an apple, however, this Apple Quinoa Salad changes her mind about apples. This is a very simple crunchy salad that adds a crispy texture to the pumpkin puree and scallops. All you need is 4 ingredients where it is a staple in our kitchen; quinoa, apples, parsley and lemon juice. You will need to incorporate the chop and cooked ingredients in a mixing bowl and mix it well, waiting for it to be served.
In a previous post at Roasted Eggplant Miso Salad, we have mentioned that cooking quinoa has been a challenging task for us. Click on the post to read more about how we overcome the challenge and cook the perfect quinoa.
Lead of the dish – Seared Scallops
Watching Masterchef there are always some contestants failed cooking their scallops, it makes us wonder if it is that hard? You don’t need many ingredients, all you need is scallops, salt and pepper and butter. Yes, it is hard we overcooked and undercooked some of them before we perfect it here for you.
Start by choosing your scallops
Let choosing your meat you will want your scallop dry instead of wet. Those scallops that look wet and glossy have a layer of phosphate solution, this scallop gives off flavour, and they’re usually not as fresh. We got ours in our local supermarket Cold Storage, places like Mediya Supermarket have fresh seafood too.
The first thing you want to do when you’re searing anything is to pat the outside dry with a paper towel, we do this to our steak. Next, sprinkle the scallops with sea salt and black pepper.
Searing Scllops
Next grab a skillet, preferably cast-iron. Cast iron pans are my favourite for searing because they retain heat so well and preheat nicely. Heat up the skillet until it’s really hot, and add some high smoke point oil. Drop-in your scallops, and make sure to give them enough space in the pan so they’re not steaming each other. This is when we season the other side with salt and pepper. Sear the scallops for about 2 minutes on the first side, then add a small pat of butter to the pan while the other side finishes cooking, to flavour the scallops.
Once the scallops are done cooking, serve immediately, and make sure to transfer them to another dish for serving. The cast iron retains heat and will continue cooking the scallops unless you take them out.
Combining all the elements together
Now that you have all your elements, it is time to plate them up. We use a scallops shaped plate for this dish, isn’t it cool? First layer your pumpkin puree, you can smear a thin layer onto the plate, however, the puree is so delicious that we like them thick on ours. Then layer it with the salad and top it with our main lead the scallops, drizzle it with the leftover butter from the searing of scallops. Tada, now you have this perfect Christmas main dish for your holiday party.
Preheat the oven to 190C. Line a baking pan with aluminium foil.
Trim both ends of the butternut pumpkin and cut it in half lengthwise. Using a spoon, scrape out the seeds. Drizzle olive oil over the cut side of both halves and sprinkle a teaspoon of salt over them. Place the halves cut-side down on the baking tray and cook in the oven for 25-30 minutes, until a sharp knife easily pierces the flesh.
While the butternut pumpkin is cooking, prepare the quinoa. Place the quinoa and 3 cups water in a pot and bring to a boil. Once it reaches a boil, reduce heat to medium-low. Simmer until all the water has been absorbed, approximately 15 minutes. Remove from heat, open the lid, and let cool.
Transfer the flesh of the butternut pumpkin to a blender (or you can put it in a bowl and use a stick blender), along with 1/2 teaspoon garam masala, 1 tablespoon butter, and 1 teaspoon salt. Blend until smooth.
Transfer the quinoa into a bowl, along with chopped apple and parsley.
In a separate bowl, whisk together lemon juice, olive oil, salt and pepper. Pour over quinoa salad and toss to combine.
Pat dry the scallops with a paper towel. Season with salt and pepper.
In a large skillet, heat the olive oil and butter on high heat. Once it begins to smoke, add the scallops and cook for approximately 3 minutes, or until they have browned on one side. Using tongs, flip the scallops and cook for an additional 1 to 2 minutes, depending on the size of the scallops.
To plate, start by spooning 3 tablespoons of butternut squash puree onto the plate (or shallow bowl). Top with a couple of spoonfuls of quinoa salad, followed by the seared scallops. Spoon some of the remaining melted butter from the pan on top of the scallops.
In the mid of the holiday, we love making different homemade lemonade to spice up the holiday mood. Especially because we always do it in small batches and it just feels like such a treat. Our all-time favorite is this mandarin orange lemonade (it’s SO good!). However, we love having the citrus in the summer, thus we decide to do one for the winter holiday and we have this Cajun Peach Lemonade.
For this Cajun Peach Lemonade recipe, you can make the peach syrup ahead and store them in the fridge. When you are ready to enjoy them, simply rim the glass with some cajun spice and it’s inevitably going to sprinkle down into your drink, giving it the perfect amount of spiciness.
Ingridents and Subsitution
There are four ingredients in this drink, five if you’re including the water:
Fresh Peach – You will need them to make the peach syrup and freeze them up to make peach ice.
Peach Syrup – You can use any sweetener you have on hand, many uses maple syrup because they believe it’s slightly better for you than white or brown sugar. However, we decided to make a peach syrup and store them in the fridge instead for usage. To make peach syrup you will need fresh peach and white sugar.
Lemon juice – We strongly recommned you use freshly squeezed lemon juice and not the bottled stuff. Fresh always has a better flavor.
Herbs – We uses cajun and oregano in the drink as it spice it up which is perfect for the cool weather in the december.
Water – We like to keep them simple in the busy days. However to make it more fancy you can use tea bags like green tea that you like. Use decaffenaited green tea if necessary.
Making of Peach Syrup
Our peach simple syrup is one of the best ways to add tons of peach flavor to any drink or dish. Peach Syrup is a great way to add peach flavor to your favorite drinks, cocktails, and desserts. It’s also wonderful for drizzling over pancakes and French toast, too! All you need is two simple ingredients, peach, and white sugar.
Place the peaches and sugar in a pan.
Bring to a simmer or low boil.
Smash/Blend the peaches, and cook for 10 to 15 minutes while stirring occasionally.
Remove from heat, and pour through a mesh sieve (optional) into a heat-safe container.
Chill the peach simple syrup until ready to use.
How can you serve and store them?
Stirred Single serving –Fill a plate with a tablespoon or so of cajun seasoning and rim a glass with a lemon wedge. Dip the rim into the seasoning and coat it. Add 3-4 tablespoon of the syrup to a tall glass, fill the glass up with ice and some peach slices, and top with about 1 cup of lemon water. Top it withoregano.
Shaken Iced Tea– Make it just like they do at Starbucks and shake it like you would a cocktail. Add 1 cup of green tea, 3 tablespoon peach syrup, and a few ice cubes to a Mason jar. Close with a lid, shake, and pour through a cocktail strainer into a tall glass filled with more ice cubes.
Pitcher Iced Tea – This is the easiest way to serve it. Combine the lemon water, peach syrup and theoregano in a large pitcher, add ice, and stir well.
Storing – Both the syrup and the green tea will keep in an airtight jar in the fridge for 3 days.
If the Cajun isn’t your thang, you can omit it but we highly recommend you use them. It’s served cold and it’s so good. And we’ll just say it for all of us here. Yes of course you can add vodka to your cajun peach lemonade!
Peaches add sweet, mellow roundness to traditional lemonade for a refreshing summertime beverage. Stir in white rum or bourbon for the grown-ups!
Ingredients
6 cups water
3 cups chopped peaches
1 cup sugar
1 1/2 cups fresh lemon juice
2 peaches sliced for garnish
2 lemons sliced for garnish
1 bag frozen peaches for serving (to use as ice!)
cajun seasoning for the rim (here’s a homemade version!)
fresh oregano for serving
Methods
Place all the ingredients in a medium saucepan over medium heat. Stir to combine, and adjust heat to bring to a simmer or low, rolling boil.
Continue to cook at a simmer, while stirring often, until the sugar dissolves. Smash the peaches to break them apart, and cook for a total of 10 to 15 minutes.
Remove from heat, and pour through a mesh sieve (optional) into a heat-safe container. Refrigerate to chill or use immediately. Store leftovers in the refrigerator for up to a week.
In a large pitcher, combine the peach juice with the lemon juice. Refrigerate for at least 1 hour. You can taste it at this point and add more lemon juice if desired! Stir the lemon wedges and peach slices into the pitcher.
Fill a plate with a tablespoon or so of cajun seasoning and rim a glass with a lemon wedge. Dip the rim into the seasoning and coat it. Fill the glass with ice.
Pour the lemonade over the ice and garnish with peach slices, lemonade slices, and fresh oregano. Serve!
In recent months, the checkmate pattern has been on the trend for a while. People are really been into classic bold patterns that are applied to unexpected materials, and teaming them with beautiful monochromatic palettes. This checkered pattern green and white shag rug is something that we are really into for a new look in our room.
From rugs to plates, placemats to cushions, there’s no end of ways to incorporate the big and bold design into your living space. Green and black have been popular colours for this pattern. However, I like how that uses pastel blue and pink in it where it gave a different style to this pattern.
How long do you think this trend will last?
xoxo, Joe Credit | All shots used on the mood board via our Pinterest boards.
Avocado, Tuna, Snowpea and Egg Salad — ‘Creamy’, ‘inspired’ and ‘delicious’ are just three ways we’d describe our Tuna & Avocado Salad with Sugar Snap Peas and a French Dressing. We’ve mixed basil-infused tuna with a French dressing and popped it on top of a sugar snap pea, baby salad and avocado base for a unique lunch that will hit your tastebuds time and time again.
Cooking Hard Boiled Egg
If you need easy-to-peel eggs and you have fresh eggs, you might want to try steaming the eggs for 15 minutes. Pour an inch of water into a pot and insert a steamer basket. Bring to a boil. Place the eggs in the steamer basket, cover and steam for 15 minutes (more or less, check!). (Or if you don’t have a steamer basket, steam the eggs in a half inch of water.) The steam penetrates the shell a bit making the eggs easier to peel.
If you’ve boiled a batch of eggs that you are now finding difficult to peel, try cracking the shells all around without peeling them and soaking the eggs in water for a while. The water often seems to seep in enough under the shell to make the egg easier to peel.
If you live at high altitude, let the eggs sit in the hot water longer or lower the heat and maintain a low simmer for 10 to 12 minutes.
Did you know? Older eggs are easier to peel than fresh eggs. If you are planning to make hard boiled eggs for Easter and want to make sure that the eggs are easy to peel, buy your eggs at least a week ahead of time (two weeks even better, they’ll keep).
80 g can tuna steak in spring water, drained (60g drained weight)
a few chives, snipped
Methods
Heat a small frying pan and toast the pumpkin seeds until they start to pop. Tip into a bowl and set aside. In a separate bowl, combine the oil, 1 tsp of the lemon juice, the lemon zest, a pinch of salt and a good grind of black pepper.
Stone, peel and slice the avocado, then toss in the remaining lemon juice. Thinly slice the sugar snaps at an angle into long strips, then transfer to a bowl. Add the pea shoots and avocado, and gently toss them together.
Flake over the tuna and drizzle with the dressing. Scatter the pumpkin seeds and chives on top.
The Civic District located along the Singapore River is where Singapore’s historical, architectural and cultural heritage started. The Civic District lies at the very heart of Singapore and is well-known for its key government buildings, museums, protected parks and memorial spaces.
It is one of our favourite places to visit, especially during all the art festivals and events this is where it’s been held at. Due to Covid-19, this place is quieter than usual, as fewer art exhibitions are being held. However, new cafes and exhibitions is taking over this quiet place recently. It is not the first time we visit here, but every visit is a memorable one.
Everything meal starts with a cup of good coffee.
Researching for places to visit during our free time has permanently altered my TikTok ‘For You Page’ to display a constant stream of recommendations and new openings. You won’t be hearing any complaints from us though, especially after we added the video of The Great Mischief to our favourites without a moment’s hesitation.
Looking like a scene out of a Wes Anderson film, the restaurant boasts a pastel-hued interior, gold accents, scallop chairs and terrazzo tables, a leap from the previous decor that had neon lights and turquoise tiles. The refreshed vibe has a good balance of heritage and modernity, mirroring the art gallery.
The restaurant has a Catalan-inspired brunch menu including Chaffles ($20), classic waffles with savoury fried chicken and Pear in a Blanket ($12), Poached Pears wrap in crepe. As it is a halal restaurant it offers a non-alcoholic menu. If you are heading down, try to snag a seat at one of their window nook booth seats. It offers a scenic view of the skyscrapers, perfect for a chill day with friends.
The Great Mischief Address: National Gallery Singapore, 1 St Andrew’s Road, #01-17 Operating Hours: Monday to Sunday | 10 am to 10 pm
Instagram-able Bridge at Fullerton Hotel
As it was not the first time we visit National Gallery, thus we decide to give this time a pass and head out for some fresh air. Heading further into the Civic Centre we passed both the Arts House; an arts and heritage centre and then the National Gallery, both in close proximity to each other. The former used to be the old parliament building and the latter, City Hall and more recently the Supreme Court of Singapore.
Not to mention, Singapore really has a lot of places that are nice to take photos with. Walking toward Fullerton Hotel, you will spot this bridge along the road. It feels like a bridge in London. At some angle, you could also capture down the famous Fullerton Hotel.
For those who like arts and architecture, you need to take a visit here. Many of the buildings are built in the 50s where gives a modern London feel. You may think that you have entered another country!
Even autumn/fall is coming to an end, and we are entering to the winter. It never stop me from loving all the autumn/fall vibes till the end. Checker is never a season thing, changing it colour and texture it can be cater to a specific season. Same in using them in the fall!
You can usually see them with green, yellow, mustard, brown and also some pastel colours. Matching them with woody tone accessories gives it a more autumn vibes. As there are many type of checker, you also need to choose a right one. One with more white spacing giving it a relax mood which is what autumn is.
The weather has been getting colder due to the rain. Same to those living in countries with seasons, it is getting colder and colder. Time has been passing so quickly that we couldn’t catch it at all. How about you?
Seeing we are moving into November, we have Joe’s birthday around the corner and alsothanksgiving. We’ll say most of us are fairly prepped when it comes to the big day (do you?). When you ask us to plan on our meal, between mains, sides and desserts, sides will be the most difficult decision to be made, as there are just so many choices to choose from.
However, if we are to choose Brussel sprouts is one of the vegetables that we will be using! We like using Brussel Sprouts with Bacons, but this time we decided to go with somethings different –Roasted Sprouts with Pomegranate. Here we’ve paired roasted Brussel sprouts with a salty and tangy miso-mustard vinaigrette glaze. This makes a great side dish for Thanksgiving or any fall meal.
How to prefect Brussel Sprouts?
Brussels sprouts are still one of our favourite fall vegetables, though these days we prefer them roasted instead of boiled. We like them charred and crispy on the outside, lightly caramelized and meaty on the inside, and ready to serve faster than you can say “hustle!” these roasted Brussels sprouts have become our go-to quick and easy side dish. When cooked properly, Brussels sprouts taste fantastic, even addictive. While Brussels sprouts can be bitter raw, cooking them at a high temperature ensures they have a rich, caramelized flavour, and a tender, satisfying texture.
First, you need to make sure you divide your Brussel sprouts into the equally same size. As you don’t want some undercooked vegetables but yet some overcooked ones. Then, all you need to make roasted Brussels sprouts is a pan, some olive oil, salt, and 25 minutes over medium-high heat.
Why is our Brussel Sprouts’s purple in colour?
Purple brussels sprouts are very similar to the green brussels sprouts you’re used to, but they’re purple! They’re so pretty and not always in season, we make sure to pick them up if we spot them. They’re not completely purple, however, in fact, they have purple and green leaves. The purple colour is quite obvious and vibrant though and makes for a gorgeous presentation in a dish.
How do purple brussels sprouts differ from green ones?
Although they’re very similar, there are a few small differences between a purple brussel sprout and the green ones you’re likely used to. If you haven’t tried a brussels sprout before, they have a taste that’s similar to cabbage.
Besides the obvious difference in colour, there’s also a slight difference in flavour. Purple is slightly sweeter and not quite as pungent as the green brussels sprouts. They’re still earthy like the green variety but are a little milder in flavour.
Miso-mustardVinaigrette Glaze
Miso is a great ingredient to keep on hand, as it adds umami, or a savoury flavour, to recipes. Besides soup, miso can be used in many applications, including marinades, dressings, and stir-frys. This miso mustard dressing recipe is ready in 10 minutes. It combines sweet white miso with a few simple pantry ingredients for a unique and delicious dressing that is a welcome addition to any weekly meal prep.
Combine all the elements together
You’ll only need a few tablespoons of the miso-mustard vinaigrette glaze for this recipe. The leftover will keep refrigerated for up to a month and you can use it for glazing other vegetable dishes, spoon over roasted meats, or even mixed into a cocktail.
We recommend tossing the sprouts with the glaze after the Brussels sprouts are fully cooked because. The sprouts look better that way, and you can really taste the flavour of the glaze.
Sprinkle some fresh pomegranate arils and walnut over the finished Brussels sprouts and you have a beautiful side dish for your holiday table!
This Roasted Sprouts with Pomegranate is one of my absolute favourites! It has such amazing flavours and is so easy to make. With Thanksgiving almost here, this makes a wonderful addition to the table.
In a jar, combine all the ingredients for the dressing and mix it well.
Preheat the oven.
Trim the ends of the Brussels sprouts and slice them in half. Chop very large sprouts into quarters. Toss with olive oil and a good pinch of salt. Divide the sprouts between 2 baking sheets and roast for 20 to 25 minutes, stirring halfway through.
Let the Brussels sprouts cool for a few minutes before tossing them with 2 to 3 tablespoons of the miso mustard glaze, walnut and the pomegranate arils. Taste and add more glaze if you like. Serve immediately.
Ever since Covid-19 started all my mom went was home, hawkers and sometimes a walk at the shopping centre. It seems like a long time she was out to the sun and breathing some fresh air. Thus on her birthday, we decide to bring her out and have a little picnic session between us ladies. Usually, we will prepare our own food, however, this time round Angela spotted this restaurant near the venue, where it provides picnic boxes.
Bee’s Knees
It starts raining en route to our picnic at the Botanic Gardens. It is the classic scenario in need of a Plan B, but most picnickers have no backup protocols and simply run to the nearest gazebo. Thankfully, the sun is shining feebly after we pick up our picnic basket (box) at the Bee’s Knees at Petite at 9 Gallop Road.
Bee’s Knees is a great food alternative for those who don’t have time to prep their meals for the picnic and planning to head to Botanic Gardens for a picnic. It came nicely in a big box with all the food and inside. The food was surprisingly great and good portion where we all enjoyed.
Dressing up in Themes
Our mom is the one who suggested dressing up in theme (look who is the excited one), and we decided on white and green. Doesn’t we all match well with one another? Other than enjoying the food from Bee’s Knees we also got some little cakes from Leckerbaer as they have newly opened a new branch at Keong Siang Street which is minutes away from us. We tried to light up the candles but the wind blow them off before our mom could. Anyway since we are all dressed up, it is time to take some photos.
While it is kind of humid after the rain, our mom did complain about the stuffiness once we reached. However, glad that it all goes well once we settle down and the wind blows on us. We don’t have much time to explore the place, as the sky is going to pour heavily soon. We can’t wait to explore this part of the Botanic Garden soon.
A few days ago we have a visit to Joo Chiat. Walking down the streets you can find many elements of the Peranakan-style building. It makes us wonder what will it be like if we uses this element at home?
Go big or go home, is a phrase that can best describe Peranakan style homes. Conventionally, they are loud and ornate, with a predisposition towards sturdy solid wood furniture. But in today’s KonMarie world, where less is more, homeowners here are taking a more pared-back, subdued approach to this traditionally decorated style. But the good news is, the spaces are no less distinctive and full of personality.
One of the elements that are easily used is tiles, it can easily make a big difference to your home. There are many unique and colour for you to choose from. Doors were designed using jade green porcelain tiles, embossed glass panels and inset framed tiles is a treat. Dark wood cabinets are also an important element in Peranakan-style homes.
This colourful Fall Harvest Salad combines so many great textures and autumn flavours. Loaded with roasted sweet potato, fresh crisp beetroot, quinoa, and toasted walnut, this fall salad is tossed with lettuce and a delicious homemade tahini lemon dressing. It’s healthy, wholesome, nourishing, and filling. Plus, it’s a gorgeous and colourful salad to put on your holiday table this year. Enjoy this for dinner and save the leftovers for lunch the next day!
Roasted Sweet Potato
Let’s start with the main ingredient of this dish – Sweet potatoes are incredibly versatile as a side dish for whatever protein you’re serving, or as an add-on to salads (in this case) so you stay satisfied for longer. They’re amazing boiled, baked, sautéed, and fried. One of the easiest and most useful ways to cook sweet potatoes is to roast them. For perfectly roasted sweet potatoes every time, abide by these 4 simple rules.
1. Roast at a super high temperature. Low and slow roasting brings out the natural sugars in fruits and veggies. Since sweet potatoes bring plenty of sweetness already, we opt for a higher temperature for roasting. This way, they get a nice golden char on the outside, while maintaining a custardy smooth core.
2. Cube ’em up. Unless the goal is to bake your potatoes whole, cutting them into 2.5cm cubes means a faster cook time and more surface area per bite for delicious caramelisation. Aim for equally sized potato pieces so that each piece cooks at the same rate.
3. Ditch the skin — or don’t. This is totally up to you. Personally, we don’t like the flavour and texture of sweet potato skin, but there’s no harm in not removing it!
4. Flavour them. Here’s where you choose your own adventure. Dried spices like cumin, chilli powder, turmeric, or curry powder all pair nicely with the sweetness of sweet potatoes. Freshly chopped hearty herbs like rosemary, thyme, or oregano work well, too if you want more flavour. For us, salt, pepper, and olive oil are the basic.
Preparation for Hearty Fall Salad
It’s a simple salad where you can make in 30 minutes. You can start your morning by boiling and roasting the quinoa and sweet potato before your morning routine. All you need is to combine all the components and enjoy them.
Sweet Potato: dice and roast the sweet potato for 25-30 minutes at 220 degrees until slightly browned and tender.
Quinoa: in our experience, the sweet spot for light, fluffy quinoa is right in the middle. We use 1 3/4 cups water for every cup of quinoa. Any more water and the quinoa gets mushy. No less, and it’s too dry.
Mixed Greens: the best thing about this salad is that it works well with a variety of different greens. You can use a mix of baby kale, spring mix, and spinach or you can go with butter lettuce, crisp romaine, arugula or a mix of all three.
Beetroot: The radish adds even more crunch and texture to this hearty salad. If you have never added beetroot to your salad, you are really missing out. They add such a great flavor. We recommend slicing them thinly if you doesn’t like the taste of beetroot, we dice it like the sweet potato.
Roasted Walnut: do we even need to say anything else? perfectly crunchy, roast it with the sweet potato in it’s last 5 minutes.
Creamy Tahini Lemon dressing
This is key to the salad. A mix of tahini, lemon, and minced garlic. It’s so creamy, tangy, and even a little spicy. It pairs wonderfully with the flavours in the salad and is so quick to mix up too!
When the walnut is all roasted, toss the salad with the vinaigrette – serve it up, and enjoy!
Make-ahead and Storage Tips
Leftovers – this salad makes the perfect lunch the next day. Store leftovers in the fridge in an airtight container for up to 3 days. Make-ahead and meal prepping – If you want to prepare this salad in advance we recommend storing the massaged lettuce, roasted sweet potato, and quinoa together in a sealed container in the fridge. Add the toppings, beetroot, and the remaining dressing just before serving.
Not only is this so pretty on a dinner table, but it’s totally delicious too. Sweet, tangy, and spicy with so many autumn flavours, plus an awesome crunch too. Great for every occasion from family dinners to Thanksgiving!
1 small butternut squash peeled, seeded, and diced
½ tablespoon olive oil
salt and freshly ground pepper
⅔ cup (120 grams) raw quinoa
1 cup (240 ml) water
2 cups (130 grams) chopped kale leaves
2 small apples cored and sliced or diced
Topping
¼ cup (30 grams) pecans roughly chopped
Tahini Lemon Dressing
3 tbsp of tahini sauce
4 tbsp of lemon juice
1 tsp of minced garlic
salt and pepper to taste
Methods
Roast the Sweet Potato: Preheat the oven to 400°F (200°C). On a non-stick pan, toss together the sweet potato, olive oil, and a pinch each of salt and pepper. Transfer to the oven and roast for 20 -25 minutes, flipping halfway through cooking, until the squash is tender. Remove from the oven and let it cool completely.
Cook the quinoa: Rinse the quinoa and drain. In a small saucepan, combine the quinoa with water and bring to a boil uncovered. When it starts to boil, reduce the heat to medium-low, cover, and simmer for 20 minutes or until the water is absorbed and the quinoa is light and fluffy.
Make Dressing: Whisk all the ingredients together in a bowl (or shake together in a mason jar) until combined. Taste and adjust the salt and pepper.
Place the lettuce in a large bowl and pour half of the dressing over the top. Use your hands to gently massage the dressing into the lettuce for about 30 seconds, until it starts to soften. Add the quinoa, roasted sweet potato, and beetroot into the bowl with the lettuce and toss to combine. Divide the salad between 3 plates, then top with the chopped walnut. Drizzle the remaining dressing over the top, and serve.
This is a long overdue post that we want to share with you readers but took us a while to do so. The last memory we have from our visit to cruise since young was an image from our old photo. We never got interested in visiting one as to our concept we are spending money to eat and sleep in a boat. (We later slap our face after experiencing going on one.)
When it was first announced that Royal Caribbean was launching “cruises to nowhere” from Singapore, we thought the idea sounded insane. Well, months later with no future travel insight, we found ourselves pulling up to Marina Bay Cruise Centre to board the cruise to nowhere for 3 nights, our first ever cruise! Moreover, our parents and we really need a getaway from this small city.
Before the Trip
A month before… The food and beverage packages are a little unclear but basically, your meals are complimentary onboard. There are plenty of restaurants, but not all of them are included in your cruise price. Royal Caribbean will send you emails after your cruise booking, tempting you to add on extras. We didn’t opt for any of the packages however we will do get some wifi for the next time. Don’t worry if you didn’t get any and change your mind. You can book the speciality restaurants onboard, for a set price per meal (and you can order as much as you want).
A few days before… Before boarding the cruise you must also have a PCR test to be negative, which is included in your cruise price. An email will be sent to you requesting for PCR test booking. I felt totally okay but not the case for Angela, it was uncomfortable. So overall, it feels relatively safe to board a cruise with a thousand other people!
Hours before… To be more careful an ART test will be done on the day for extra safety. You will be required to book slots for these check-up using their app – Royal Caribbean. It will be your go-to once you’re on board, but it also has your boarding details. The check-in process was really smooth and took about 30 minutes after we have our ART result.
When you are now on Board
Mentioning before the importance of the Royal Caribbean app. After much scanning of our pass on the app, being set up with our ‘tracelet’ (which you must keep on at all times, except in the pool/your room) and going through immigration, we found ourselves on level 4 of the gigantic Quantum of the Seas, being directed to our room on level 11. Our set sail passes were slotted into our room number on the door, with our names printed on the front of them. These will be your lifeline when you’re on board, so do not lose them, you need them everywhere.
Once you’re in your room, it’s advised to book everything you’d like to do onboard through the ‘my calendar’ option on your app. We had selected ‘my time dining’ so we needed to make sure we reserved our dinner slots in the main dining area, as well as the shows etc that we wanted to see. Everything books up really quickly, so make sure you book it all on the first day. There are so many activities to do, some free, some you’ll pay extra. There are shows, martini classes, pub quizzes, bumper cars, rock climbing, indoor skydiving, surfing, the North Star, music performances, the casino, shops, and so much more.
Activities to do on a Cruise
Bumper Cars Using the Royal App, you’ll be able to book your desired slots for bumper cars. The slots come in 15 minutes blocks so you’ll be able to enjoy as many times as you wish during these blocks that you book. Entry is only allowed with bookings via Royal App which means that queuing is not allowed.
For the rest of the Seaplex activities such as gaming consoles and Fussball tables, you’ll have to book them physically at Seaplex itself.
Swimming There are several swimming venues throughout the ship. There’s an indoor pool, an outdoor pool and our favourite venue, the Solarium. There, you’ll be able to enjoy hot tubs, cool indoor pools with amazing views out to sea! A little small tip for you is to visit the hot tubs after 10 pm, there is almost no one there. You can enjoy the tub and have a good rest later.
Headliner Shows There were 4 headliner shows during our cruise to nowhere with Quantum of the Seas. This includes Gold Art Duo, The Beatlemaniacs, Starwater and Sequins and Feather. We head to almost all of them, however, if you only want to choose on the Starwater is the best choice, the cast, song, costume and show is perfect.
Rock Climbing & Flow Rider FlowRider is located at Seaplex, deck 15 at the aft of the ship. You’ll have to register and sign an indemnity form before waiting in line for your turn. As they’re not open throughout the day, remember to check out the Royal App for the opening hours of FlowRider. We didn’t get to try this as we “are not adventurous” enough.
Similar to FlowRider, just head on over to the Seaplex at Deck 15 (Flowrider and Rock Climbing is right next to each other) and wait in line for your turn to scale the walls! We are lucky that we didn’t need to wait for very long, head there in the morning instead of the afternoon, there will be fewer people.
There are so many other things you could do such as heading to the gym, there are also a lot of “hands-on” activities such as towel folding, napkin folding and the making of pop-up cards that you could join. Many of these you need to head down early for a seat as you couldn’t book a slot using the app. There are also a few paid activities for those who want more such as Ripcord by iFly and North Star which is an observatory onboard the Quantum of the Seas that brings you up to a height and rotates to the port and starboard side of the ship.
Food on Board
There are so many food options on the cruise, for us, the Complimentary Dining Venue is more than enough. Below are the options provides for you; Windjammer, Main Dining Room, Cafe Two70, Cafe Promenade and Sorrento’s Pizza and Seaplex Dog House. Generally, most of the food is alright, however, the Main Dining Room, Cafe Two70 and Sorrento’s Pizza is probably our favourite among all places. Head over to therantingpanda for more detailed reads on the food onboard. However, we would love to share our experience of dining in the room.
Previously based on the P2HA rules and regulations, those who are unvaccinated couldn’t dine-in in the restaurant, in-room service is provided from the unvaccinated instead. Due to medical conditions, our father couldn’t get his vaccination and thus room service. Before the night end, you need to submit your order through the QR code provided. It will serve the same thing the main dining room provided. One thing that is inconvenient is that you can’t ask for more food if you need more. We take turns accompanying our father to dine-in the room, while one good thing is that you don’t need to travel to the restaurant.
Tips you don’t want to miss
Money All charges and prices onboard are displayed in USD. This means that when you’re purchasing anything on the ship, be it luxury bags or even a cup of latte, they will be coded as a foreign transaction on your credit card. You can link this card to your sailing during check-in.
Electronics All charging ports on the ship are US standard ports. There are also no USB ports available in the stateroom. Remember to bring your travel adapters or you’ll be left with empty devices the whole trip.
Communication As we didn’t opt for the wifi, you must be wondering how did we communicate with each other? We purchase a lightweight walkie talkie on Taobao and surprisingly it works well.
Last sailing day / Disembarkation The ship will reach back in Singapore at 6 am on the last day of your trip. A simple breakfast will be served to your room (during P2 HA) before 7 am. If you have no luggage, then you can disembark anytime after 8 am. However, if you do, you’ll be assigned a baggage tag and specific timing. The entire disembarkation and immigration process was quick and took only 20 minutes.
We’d booked the 4D3N cruise, which actually only gives you 2 full days on board. All we wanted to do was relax, drink and eat and we found the best place to do that as an adult couple was the Solarium – located at the front of the ship, it’s an adults-only area with an indoor pool, hot tubs, bistro and a bar. We spent the majority of our time on board in this area, reading, drinking and people watching.
Before we knew it, the last night was upon us and we had an early call time of 8 am to depart. Again, the procedure is super organised and simple to understand. You are assigned a time to leave, stick your tag to your bag, deposit your tracelet in a bin on the way out and simply walk off the ship. After a quick scan through immigration, we were in a Grab and heading home. Coming home so early we were pretty tired, so went straight back to bed once we’d arrived, feeling very much like we’d had a great holiday and break.
It is a much fun experience but busy at the same time as we need to take care of our parents. However, we really love to daydream all day looking at the sea. Want to head back and experience more of these.
When summer starts to come to an end, it doesn’t mean we have to abandon our alfresco pursuits. Autumn is a fabulous time to be planning picnics. There is so much wonderful harvest produce to celebrate, the weather is starting to cool, and of course, there’s the splendid natural display of color to enjoy.
While there is no autumn in Singapore but rain and sun. We love looking at all the beautiful picnic inspiration on Pinterest. We can conclude that a must need is checkers and pies for the picnic during fall. While a large wicker picnic basket is romantic and charming, it is not always practical. There are times when a heavy picnic basket can be a right pain in the bum to transport, especially if your location is a little remote or requires a walk. If a traditional style basket is a right bag for the job, opt for an insulated picnic basket so you can have all your food and gear in one bag.
The quickest way to elevate (almost) any vegetable is to roast it. And eggplant is no exception! It’s nothing interesting when raw – pretty tasteless actually. But when you give it a good blast in a hot oven, it completely transforms. That moment when you bite through the gorgeous caramelised edges and the juicy flesh inside bursts in your mouth.
This is an eggplant salad that proves two things: 1) that quinoa has an undeservedly bad reputation for being bland and boring and 2) that eggplant really is one of the best vegetables in the world to roast in the oven. Combine them together and you have a winner of a salad!
This recipe calls for a heck of a few ingredients, they are all “normal” things and you won’t just make this once and be exhausted, you will make it over and over again.
Oven-Roasted Eggplant
A common problem people run into when roasting eggplant cubes is that they turn into mush before they caramelise. Been there, done that!
The key to fixing this is simple:
cut into large pieces – smaller pieces cook too quickly and turn into mush before the outside has a chance to caramelise; and
roast at a high temperature so the surface gets “sealed” and holds in the juice inside.
How to Roast Eggplant?
So with that said and done, here is how to cut and roast eggplant:
cut into thick 3cm / 1.2″ slices, then cut each slice into pieces to form cubes / rectangles
drizzle with olive oil, sprinkle with salt and pepper then toss well in a bowl using a rubber spatula
spread out on tray and bake at 240°C/ 450°F for 20 minutes, flip, then for another 10 minutes, until the eggplant is super soft and caramelised on the edges
How to cook quinoa?
Joe and I always have an issue when it comes to quinoa. It either ends up uncooked or wet, however now that we have mastered it, we can tell what you want to do. All you need is quinoa and water! If you look at different methods for how to cook quinoa, you’ll find a range of water ratios. Some recipes call for as high as a 2:1 water to grain ratio, while others go as low as 1 1/2:1. In my experience, the sweet spot for light, fluffy quinoa is right in the middle. We use 1 3/4 cups water for every cup of quinoa. Any more water and the quinoa gets mushy. No less, and it’s too dry.
Once you’ve measured both, follow these easy steps:
Combine the quinoa and water in a medium pot. Bring to a boil, cover, and reduce the heat. Simmer for 15 minutes.
Remove the pot from the heat and let it sit, covered, for 10 minutes more.
Then, remove the lid and fluff with a fork!
The soul of the salad – Miso, Mustard Olive Oil
To complete this dish, the sauce is very important and we have Miso, Mustard Olive Oil. Do an internet search for ‘miso dressing’ and you’ll probably come up with a slew of Japanese-inspired recipes with similar ingredients. That is not this miso dressing.
This olive oil uses the salty, savoury flavour and thick texture of miso to elevate the usual suspects of a traditional American vinaigrette – adding lemon juice, olive oil, Dijon mustard, garlic and thyme – into a punchy, flavorful dressing with an unexpected twist. It’s perfect for a variety of dishes, from a simple green salad to roasted veggies, to your favourite meat or fish.
How to make the sauce?
Mince the garlic and thyme.
Add everything to a jar, bowl, or glass measuring cup and shake or whisk to combine.
Enjoy on everything! You can store leftovers in an airtight container in the refrigerator for up to 5 days.
You can make the quinoa and sauces ahead, all you need to do is to roast the eggplant and combine all the elements, it could be a fast meal when you are busy or even lazy.
Combine all the ingredients in a jar and shake well.
Roasted Eggplant:
Preheat oven to 240°C / 450°F (220°C fans). Line a tray with parchment/baking paper.
Cut eggplant into large cubes – 3 cm / 1.2″. Place in a large bowl, drizzle with oil, salt and pepper.
Toss well, then immediately spread on tray and roast 20 minutes. Flip, then roast for a further 10 minutes – edges should be caramelised, soft inside, but they’re not shrivelled up and dismal.
Assemble
Add tomato and lettuce into quinoa, drizzle over most of the Dressing then toss.
Pour onto serving platter. Pile over eggplant.
Drizzle eggplant with remaining Dressing, sprinkle with feta. Serve warm or at room temp! Great with a side of flatbread or this easy crusty bread.
In the midst of our busy schedule, sometimes we like to spend some time heading out to reconnect with the world. Have a walk or enjoy a lovely meal and catch up with some sister’s talk (which strangely we cant do at home easily). We know that we are always late sharing our photo journal as sometimes the amount is enormous. While Angela will edit it during her free time outside of her work. We don’t count individually but monthly we took at least more than 500 photos for the blog (so we are outdated to share our stories).
In between September – October there will be activities for Children Day. While we are not children nor have a child with us, we still decided to head out for a walk. We found out about this Children’s Festival at Garden by the bay very last minutes during early October. There’s an exhibition of larger-than-life inflatables by Art-Zoo with very big King Kong aka Little Kong and their signature Bruno Bear. Honestly, we missed actual fun at the Art-Zoo we had been before pre-covid.
Since this year the theme is Wonder Gardens as it is held in a garden, Little Kong and Bruno Bear is joined by friends such as Cheerful Caterpillar, Lovely Ladybirds, Radiant Rhino Beetle, and the Super Speedy Snail! The inflatables are so huge that many of the children there are amazed by them like we too. We are so unlucky to be welcome by the rain, we have to keep on finding shelter throughout the whole event.
We are also lucky to meet Mid-Autumn Festival Exhibition at the period of time to spot some interesting exhibitions. One of our favourites is this structure called AirMesh Pavillion designed by SUTD we spot from far. This white structure is displayed near Bayfront Plaza sitting atop a grassy knoll.
As an engineering student, I am surprised that the frame structures are made of 3Dprinted stainless steel components – resounding proof of concept for a new construction system. Looking at the photos online, it will be lighting up in the evenings like a gem. The AirMesh Pavilion is indeed a shining example of what construction in the future could be. As it is one of the world’s first fully functional spaces, meaning in the future your house’s can be built via a 3D printer, isn’t it so cool?!
Have you been to Gardens by the Bay in Singapore? What did you think of it? Or have you been to other cool gardens around the world? Please share your experiences in the comment area below. We would love to hear from you! Thanks!
Decorating your house for the different seasons does not mean that you have to start completely over and buy new everything. It is all about added small touches. Switching out a couple of items to make your space feel new and refreshed. For fall we are craving all things cozy. Just by adding a few fall colors, you can take your space from bright and sunny summer to warm and cozy fall.
Pumpkin is one of the things that come through our mind when the falls arrived. There are all sort of colour and shape for a pumpkin. We loves looking at them as the colour combination is so vibrant and each of the colour looks well with each other. Have you ever thought of using the colour in your house? Rich shades of crimson, gold, eggplant, pumpkin, and umber are the colors of fall and should be your guide to decorating. Use a canvas of subdued fabric colors and finishes to showcase your seasonal colour story.
Our quintessential lazy fall/winter recipe: tomato confit pasta with basil that we pluck from our garden! These sweet and savoury cherry tomatoes confit which are slowly cooked in olive oil with thyme, garlic, and black pepper until soft and caramelized. Tossed with spaghetti and topped with parmesan cheese and basil, it doesn’t get simpler or more delicious than this!
Self-sustaining Herb Garden
We are delighted that our little garden is growing up well that we are able to get herbs like basil leaves. Initially, we are like many of you feel daunted by the idea of indoor farming because we think it is impossible to do so in the high-rise buildings we live in given its limited floor space and lighting. However, after months of trying, we can tell you do not need a large plot of land in a community garden or a backyard to create your own indoor herb garden.
Why self-sustaining herb garden?
Leftover Herb. One problem that many of use faced is that there are always leftover from the herb we purchase in the supermarket.
You wll always have fresh herb. Herb like basil leaves that we are using here need to be use in a few days after purchase which means you couldn’t keep them for too long. Growing one yourself means fresh herb always.
Growing environmental awareness. Where it also led more people to make the connection to growing their own food, this is a great way for your children to understand where there vegetables comes from and how did they grow up.
There is a full list of the reason you should have your own self-sustaining herb garden. However, you need to make sure to devote time and have patience – gardening doesn’t have shortcuts. We will always devote at least 2 hours every week to our self-sustaining garden making sure they are in the right condition.
Cherry Tomato Confit
We know the word confit may conjure up some feelings of worry and anxiety, but we assure you, the process couldn’t be easier. The term confit is typically associated with meat (especially duck), but can also be applied to fruits and vegetables. Confit simply means to cook something in fat at a low temperature for a longer period of time.
To make the tomato confit, simply toss cherry tomatoes, garlic and thyme (your choice of herb) in olive oil, and slow-roast for 45 minutes on high heat or 120 minutes on low heat. We use low heat to avoid them getting burnt and the more you cook the deeper the flavour it is. The resulting tomatoes will soften and blister, releasing some of their juices onto the pan. The tomatoes and juices will have a wonderfully concentrated tomato flavour.
10 mintues meal
Prepare the cherry tomato confit ahead and store them in the fridge for later use and all you need for this recipe is 10 minutes. Here, we’re tossing cooked pasta with slow-roasted tomato confit and chopped fresh basil. You could also heat the tomato confit in your pan with some garlic for extra deep flavour.
Seasoning is key with this recipe. You need to season the tomatoes before they go into the oven, and you need to season the pasta water. Once you combine the two, you need to check for seasoning again. We found that we needed to add a couple more pinches of salt to really make the flavours pop.
For best results, give this recipe a try while tomatoes are in season. First, head back to our cherry tomatoes confit recipes and make a few jars first.
Handful of basil leaves, torn, plus more for topping
1 tbsp of minced garlic
Kosher salt
Freshly ground black pepper
Methods
Bring a large pot of salted water to a boil. Cook pasta until al dente (soft on the outside, but still some bite left on the inside).
Combine and Toss. Place cooked pasta, basil and tomato confit* in a large bowl, tossing to combine. Season to taste with additional kosher salt and black pepper (add a couple of additional pinches of salt). Serve.
Heat them in the pan. In a pan heat the oil and garlic till fragrant. Then add in the tomato and pasta, stir for 2 minutes. Add in the basil leaves and season to taste with additional kosher salt and black pepper. Serve.
After having the Matcha Latte Espresso aka Dirty Matcha in this early October at the newly spotted cafe Cafe Kurasa located at Waterloo Street we are addicted to it and want to recreate one. This Matcha Latte Espresso is a beautifully layered drink of matcha green tea and espresso with milk. This double-caffeinated drink is not only vibrant in colour, but as well as in taste.
Not to sugarcoat this – It’s a little bitter, with a grassy taste, yet I think it’s absolutely delicious. We like using Matcha Hagoromo because it tastes smooth and is not too bitter. We have no affiliation with the company, but it had raving reviews and has met our expectations.
About Matcha
If you’re not familiar with matcha, it’s a Japanese green tea powder made from finely powdered dried tea leaves. It has a slightly bitter, vegetal taste and a vibrant green colour that results from the leaves’ high chlorophyll levels. It’s recently become popular because of its health benefits. Same as green tea it is the powerhouse of antioxidants however matcha contact more of it. The antioxidants it contains may lower blood pressure, reduce your risk of heart disease, and even boost your metabolism.
You might want a matcha whisk. For those who are using matcha power and you make matcha often, we recommend investing in a bamboo whisk called a chasen. Its special design breaks up clumps and creates a frothy layer of foam on top of the tea. If you don’t have one, use a regular whisk or an electric milk frother instead. Whisking or stirring with a fork or spoon will not work here.
It doesn’t last forever. Please also take note that matcha doesn’t have a particularly long shelf life. Once you open it, use it within 2 months for the best color and flavor. We recommend buying it in small quantities and storing it in the fridge to preserve freshness.
Ingridents you will Need
Ice
Milk. (or any other kind of milk if that’s not your thing) You could also choose an non-dairy milk for this drink, Almond milk it’s a bit light in both body and flavor, but does have a distinctly nutty taste. Soy milk with a pronounced soy aftertaste, it’s thicker and sweeter than almond milk. The coconut milk is also a good alternative as it is mildly nutty, but has a slightly sour aftertaste make the drink more interesting.
Matcha green tea powder/ Matcha Concentrate. We uses sugar-free matcha concentre by Flash Brew for this recipie due to the convient, refer to above for more matcha powder option.
Creating the Layers
To make this an Instagram-able drink, creating the layers is an important step here. After many trials and errors, one tip that you need to know is to use A LOT of ice!! Also, the cold helps. Start by making your espresso while you prepare the matcha. This allows time for the espresso to cool down. Because no one wants melted ice and a watery latte. The order of the ingredients also makes a big change here.
First, pour the matcha green tea, then the ice. Then, slowly pour the remainder of the milk. The slower you pour, the more distinct the layers will be! Then, pour the cooled espresso over the top!
Mixing all the components up gives you this Instagram-able drink. While there are times we are too busy to head to the cafe, it’s still simple to make on at home to stratify the craving.
This Matcha Latte Espresso is a beautifully layered drink of matcha green tea and espresso with milk. This double-caffeinated drink is not only vibrant in colour, but as well as in taste.
Ingredients
1 cup ice cubes use more if you have a larger glass
1 tsp matcha green tea powder
1 cup soy milk divided
2 shots espresso
Methods
Fill your glass to the top with your ice cubes. If you want to go for the layered latte look, as you see in the picture, it works best with a lot of ice!
If you are using matcha powder: In a bowl, whisk the matcha powder, 1/2 of the milk with a matcha whisk. This can also be done in the blender. Make sure you either whisk it or blend it until it is smooth.
Pour the matcha mixture to be the first layer.
Since this is an iced drink, we like ours to cool off as much as it can before we pour it over ice.
Floor cushions, poufs, and pillows are on our hot trend watch list. These simple decor additions can be used to easily add both comfort and style to any space. Even more, they double as seating and can even be combined to make a floor couch, so you can get the most out of every space.
These cushions will add a boho-chic vibe to your design style and add coziness to your interior. You can even put them outside for elevated patio style. We’re sure you’ll love these floor cushion styles by our talented Creators. So make sure you check them out and get inspired to bring a little Bohemian inspo into your space!
If you are vegetarian (or a flexitarian like me), and you love dumplings, then you’ll be very familiar with the feeling of missing out when all you can find are dumplings filled with meat. This’s why we’re so pleased to share with you this dumpling recipe filled with shiitake and tofu.
As an Asian, dumplings and bao are some of my favourite comfort food. We love it to steam, boiled, pan-fried, any other methods we find it interesting. They are necessary for my everyday meals. I crave them at least a few times a month. They are one of the healthiest foods – you can eat (quite occasionally with). These are beautiful carbs I will never limit myself. Now, get ready to try out this quick and easy Shiitake Tofu Dumpling!
Dried or Fresh Shiitake Mushroom?
The shiitake mushroom is a favourite of those who prefer a meaty, rich-flavoured mushroom. Originating from Asian Dried shiitake mushrooms and fresh shiitake mushrooms have very different aromas and flavours. Dried shiitake mushroom has a much stronger aroma and flavour compared to fresh shiitake mushroom. Thus the dried shiitake mushroom will always be our go-to if we have one.
How do you choose a “good quality” dried shiitake mushroom? The good quality dried shiitake mushrooms have a big, round, and thick cap. The texture should be tender with a strong fragrance. If you can touch the shiitake mushroom before you buy it, the good quality shiitake mushroom should be dry, crispy and light.
Making of the Fillings
We find that a lot of vegetarian dumplings at the stores aren’t meaty enough for us. The meat dumpling texture is much better than the filling that is just a gooey pile of mashed vegetables. That’s why we filled these dumplings with tofu and shitake mushrooms, which adds that meaty flavour and texture back in.
While making the filling is usually the easiest part of the whole dumpling process as you just have to mix all the ingredients together, but this is not the case for this dumpling. As firm tofu and vegetables have a higher content of water which is not what we wanted in our dumplings. Thus the steps below made was to reduce the water content in it at the same time adding more flavour to the filling.
How to deal of the Tofu?
Choosing the right tofu; extra-firm is what you’ll need. It has a heartier, denser texture and less water content than other types of tofu, which worked out perfectly.
Removing the water content in the tofu; wrap the tofu with paper towel, with heavy object lying on top. Let the tofu sit 20 to 30 minutes, to let the water drain from it, and you will have a much drier tofu.
Soak in the water for rehydration; rinse with the cold water first then rehydrate by soaking in cold water for around 3 hours or overnight before cooking. Softening the shiitake mushroom in water will make it easier to cut into the shapes you want and also make it easier to cook.
Chopping the mushroom in to small diced; squeeze the access water out from the soaked mushroom. Remove the stalk of the mushroom and diced it.
Making of your fillings
Cook theingredients; will cook the prepared vegetable ingredients ahead, as the tofu and mushroom contain lots of moisture, we don’t want wet fillings. Heat 1 1/2 tablespoons canola oil in a pan over medium heat. Add in the tofu and mushroom following by the garlic and ginger and cook till the mixture is slightly drier. Toss it occasionally and breaking tofu apart with a wooden spoon. Transfer the vegetables to a plate and let them cool for 10 minutes.
Combine the ingridents; transfer the cooled ingridents into a bowl, add in scillion ansd season it with soy sauce, sesame oil, and salt. Stir all the ingredients to combine. And now you are all prepared for wrapping them.
Wrapping of the dumpling
There are many ways to fold a dumpling and this time we tried a new method. However, if you want to try our method we have shared a detailed record of how you could wrap your dumpling thus we include links to avoid repetition. How to fold the dumplings?
Making a C using your index finger and thumb, allowing the dumpling to seat on top. Then you will scoop your filling placing it in the middle of the fingers. Seal the middle of the dumpling skin, now you will have two holes at the sides. Fold the access side of the dumpling towards the middle of the dumpling, repeat the other side. Remember not to overfill your dumpling as it will be hard to seal. Use water if your dumpling skin is on the drier side, it will make the process easier.
How to make your own chilli oil?
Personally, the spicy soy sauce is my favourite and that’s how we make all my dumpling sauces. But feel free to explore other options. We also highly recommend adding a few drops of homemade chilli oil to your sauce if you like to spice things up, which is what we tried this time.
Making chilli or infused oil are actually pretty simple to make at home. You just have to give a little patience with the cooling time for the oil. 2 years ago we first tried to make Chilli oil at home but what is different along our way is to add in more herbs and spices making the oil fragrance and flavourful.
Storing of your dumpling
The best way to store dumplings is to freeze them right after wrapping. You don’t need to thaw them before cooking and they will turn out just as great.
On the other hand, if you’ve cooked all the dumplings, you can store them in the fridge for 2 to 3 days or freeze them for up to a month. You also can reheat them in the air-fryer to avoid using oil and still get crispy results. You can reheat them in a lightly greased pan on the stovetop as well.
Crave for other dumpling recipes
Dumplings are a reasonably healthy option – it’s the quantity you’re eating that you need to watch because it’s light to eat too many. Steamed dumplings are the best option in terms of fat content, with pan-fried the next best.
6 ounces (170g) extra-firm tofu, pressed to remove moisture
1/4 cup (25g) finely sliced scallions
1 tablespoon soy sauce
1 tablespoon (14g) water
1 1/2 teaspoons sesame oil
1 1/2 teaspoons sugar
1/4 teaspoon finely minced fresh ginger
Methods
Filling:
In a large skillet over medium-high heat, add 1 tablespoon oil and heat until shimmering. Add the mushrooms and garlic, season generously with the remaining salt and pepper, and cook, stirring occasionally, until the mushrooms cook down and turn golden in spots, 3 to 4 minutes. Add the mushrooms to the cabbage and wipe the skillet clean.
Crumble the tofu until no pieces larger than peas remain. Return the skillet to medium-high heat, add the remaining tablespoon of oil, and heat until shimmering. Add the tofu and cook, stirring occasionally, until pieces begin to turn golden brown, 4 to 5 minutes.
In a small bowl, whisk together the scallions, soy sauce, water, sesame oil, sugar, and ginger. Add the mixture to the tofu and let cook for another 2 to 3 minutes, until the tofu absorbs the sauce.
Add the tofu to the cabbage and mushrooms and mix until well combined. Set aside while you roll out the wrappers.
Divide the dough into six pieces. Work with one piece at a time, keeping the remaining pieces covered or in a sealed container.
To shape:
Roll one piece of dough into a short cylinder about 1″ in diameter. Cut the dough into six to eight pieces (fewer for thicker skins and more for thinner ones).
Use a small rolling pin, dowel, or pastry pin to roll each slice of dough into a circle about 3 1/2″ to 4″ in diameter. Try to make the edges a little thinner than the center. Flour generously and set aside, covered. Repeat with the rest of the dough.
Place 2 to 3 teaspoons of filling in the center of a wrapper. Dampen one half of the wrapper’s edge. Fold the wrapper in half and press firmly along the edge to form a half-moon shape. You can cook the dumplings as is, or press the pointed corners together, like a pair of folded hands, to make a rosebud shape.
There are no worries about travel restrictions here at the Museum of Ice Cream (MOIC)! Take a trip to California Dreamin, a dreamy pastel pink beach resort inspired by one overseas. This is also one of the installations where you can enjoy unlimited servings of delicious ice cream treats that are served in flavours with a local twist!
Throughout the museum, there are different ice cream spots that you can get. Enjoy a Pina Colada ice cream on the beach as well as other flavours such as Pulut Hitam Potong ice cream, Lemon Bliss Balls, Apple Pie Soft Serve, Lychee Bandung and Taro Milk Tea ice cream sandwiches.
We pre-order our tickets months ahead for this as we don’t want to miss it. Unfortunately, due to the busy schedule, we mistook the dates, and almost missed them. However, we are glad that we are able to reschedule the exhibition dates. Due to the covid-19 getting serious, we are happy that the Museum of Ice Cream make new arrangements and make this trip a safe and happy one for us.
The exhibition is located at the “ulu” Dempsey Hill, thus the only way is by driving or a cab. Please reach only 5 minutes earlier before your allocated time. You won’t be able to enter even you reached early (that’s what happen to us). The only restroom is located at the start of the exhibition, please use it before you start your ice cream’s journey! It will be a trouble if you wanted one during the mid of the exhibition.
Engaging Experience
You will start your journey by making a name for yourself, the name needs to include your name and an ice cream flavour. I called myself JojoMint and Angela’s called herself CocoAngie as both of us love ChocoMint a lot and we decide to blend into our name.
You will then welcome by ice cream, creatively designed walls, a pop’s setting and also some engaging actives. One of our favourites is the Wall of alphabets. Where we will piece out the words that we want to share with the world. Which is our name! You could also find some really creative ones while you were there.
Welcomed with Singapore Inspired Spaces
If you have to head to the other Museum of Ice Cream in other countries before thinking the one in Singapore is the same, you are wrong, the Potong Land and Playspace is something most Singaporeans can relate to and only can be found here.
Paying homage to one of the island’s favourite ice creams, Potong land is a place all Singaporeans can relate to in one way or the other. Over there, you can get a cube of bubur hitam (black glutinous rice) ice cream. Usually, it is served with a stick but it serve in a cube here thus it’s very cold when served, and we would say it’s better than the ones you can get at supermarkets.
Like Potong Land, the Playspace is one Singaporean can relate to. Once you reached the playground you will be welcome by inspired by the famous dragon playground in Toa Payoh. As a Singapore themed area, what’s more Singaporean than waffle ice cream? You’d get to choose between taro milk tea and lychee bandung. We tried thelychee bandung flavour and we’d highly recommend it. It might be the best tasting ice cream out of the entire museum, so do not miss it! It is totally an upgraded childhood here!
A little reminder here, a lot of us missed the disco corner located at the corner of Potong Land. Thanks to the reminder by Princess Potong we didn’t miss it!
The iconic Sprinkle Pool
Here come the stars of this museum! Sprinkle Pool is the highlight of the Museum of Ice Cream! The largest pool of its kind in the world, it promised to give you ample fun and photo opportunities.
You’ll be asked to deposit your bags, loose items and shoes at a dedicated area before entering. Looking at the pool, you definitely do not want to be dropping anything in it. Head in and have as much fun and photos as you can!
You will be tummy filled with ice cream and a phone filled with photos when the exhibition ended. While we must be on our masks all time (other than when enjoying the ice cream), you still are having a lot of fun. We couldn’t imagine that we have spent 4 hours here, thus plan to head there early and make sure you enjoy as much as you could. There isn’t a time limit at any station but you could make a u-turn if you have left the station.
We thought that the Museum of Ice Cream caters to the young Instagram crowd only, however, surprisingly we spotted lots of families and middle-aged people too!
Click here to get your tickets at the Museum of Ice Cream Offical website now!
Pinterest has called sage the new neutral and I’m really curious to know your take on this color trend?! Sage is an interesting pick for a ‘neutral’ since it’s somewhere between a truly neutral and bold color pop. And I’m finding that it’s easy to incorporate into pretty much any home style, which is a check for the pros column. It works for modern homes, Scandinavian abodes, more traditional styles, craftsmen, etc.
One thing that I can’t get over with this sage color is that it works in almost any room and nearly any style of home. It fits right in in a modern home, looks cool in a traditional home, is great in a designer home, and even works in a simple builder-grade home. Seriously, it looks good everywhere!
Tomatoes Confits are the sweetest, meltiest, most delicious tomato recipe. Garlicky, soft, juicy, and packed with thyme flavour, tomatoes made this way can literally elevate any kind of meal. Perfect as an appetizer, on bread, bruschetta, or on top of a freshly baked rosemary focaccia bread. These confit tomatoes are even great on pasta, or with pan-fried tofu. The key to the dish is ripe cherry tomatoes but more importantly, the extra virgin olive oil. Luscious sweet tomatoes and creamy buttery garlic are slowly cooked to perfection and packed with tons of flavour.
What are Tomatoes Confits?
Confit comes from the French term “to preserve”, and tomatoes are the perfect vegetable to store in your refrigerator after the days of summer are gone. They are cooked low and slow in (quite a lot) of olive oil, which preserves their texture and shape. This process also brings out their beautiful sweetness and infuses them with some amazing garlic and thyme flavour.
The process of baking them slowly, at a low temperature, will boost their flavour. In fact, those confit tomatoes have an intense, sweet, and yet salty, garlicky flavour, and they are a perfect umami booster on top of many other dishes. While cooking in oil will produce a nice plump and juicy tomato, that’s perfect for spreading onto crusty bread. You can also toss with freshly cooked pasta for a no-fuss sauce.
Prepare your Ingridents before getting started
Tomatoes: make sure to use fresh, ripe tomatoes for the best flavor. We useda mixture of red and orange cherry tomatoes, but you can use just one colour too.
Extra virgin olive oil: you’re going to need a lot for this recipe, so don’t cringe. You can use a mild, less expensive cooking olive oil option, but try to use extra virgin olive oil at least to take advantage of the additional health benefits.
Herbs: We used thyme. However, you can experiment with others, including oregano, chili flakes, rosemary, etc.
Garlic: it infuses the oil with a wonderful additional flavor.
Salt & Pepper.
How to make Tomatoes Confit?
Step 1: Add the items to a deep baking tray or casserole dish. We placed the thyme first, then added the tomatoes and cloves.
Step 2: Add the olive oil. Add enough so that the tomatoes are all covered at least 1/3 of the way.
Step 3: Slow roast tomatoes in the oven for 2-2.5 hours at 120ºC(fan-assisted). The tomatoes should begin to burst and blister but without entirely losing their plump shape.
Step 4: Allow the tomato confit to cool enough to room temperature before transferring to jar/s. If the tomatoes aren’t completely covered then top them up with a little more olive oil and then store them in the refrigerator.
Tips for Tomatoes Confits
How to storeTomatoes Confits? Store the cherry tomato confit in airtight sterilized jars in the refrigerator, making sure the tomatoes are fully covered with olive oil. This way, the preserved tomatoes should last several weeks (2-3 at least). Though, to err on the side (because of the garlic in the mixture) of caution, we aim to use it within two weeks.
What can you do with leftover confit oil? Don’t worry – there’s no reason to throw it away! There are several ways you can use the leftover tomato confit oil:
In place of regular cooking oil, to add flavour to dishes.
Serve with fresh bread and antipasti – as a dipping oil.
Spooned over dips and sauces.
Just make sure to keep the confit tomatoes stored in the refrigerator at all times due to the risk of botulism or freeze it in ice-cube trays (as mentioned above).
How do you serve Tomatoes Confits?
Since the holidays are around the corner, you could make extra and can them for friends and family. Tomato confit makes an extra special gift. But here are some ideas on how to use it:
Bruschetta
Fritatta
Cheese platter
Hummus
Pasta (use grain free to stay Paleo)
Wrap
Bowls
Steak, fish, chicken
These beautiful jewels will be your new favourite flavour bomb from a jar. Their savoury sweetness will brighten up so many dishes. And no judgement, if you end up spooning out a portion and eating them just as they are! Keep in mind to add a little extra olive oil, and you can add it to a separate jar and use it with so many different recipes.
Add the items to a deep baking tray or casserole dish. We placed the thyme first, then added the tomatoes and cloves.
Add the olive oil. Add enough so that the tomatoes are all covered at least 1/3 of the way.
Slow roast tomatoes in the oven for 2-2.5 hours at 120ºC(fan-assisted). The tomatoes should begin to burst and blister but without entirely losing their plump shape.
Allow the tomato confit to cool enough to room temperature before transferring to jar/s. If the tomatoes aren’t completely covered then top them up with a little more olive oil and then store them in the refrigerator.
After months of hiatus, we’re excited to roam around and discover one of our always to-go-to neighbourhoods – Bras Basah. It’s a bustling downtown neighbourhood with a mix of colonial buildings and modern skyscrapers. Along with the National Museum and the iconic 19th-century Raffles Hotel, with its grand facade. Chijmes, a former convent school in a neoclassical building, draws a post-work crowd with its al fresco restaurants and bars. Nearby, hip Bugis Street is an assortment of market stalls, food kiosks and street art. All the locals know the chams of it, we decide to explore the hidden alleys in the neighbourhood.
We decide to avoid the crowds and explore Waterloo St, Queen St and Bencoolen St for a different sight.
At the mid street of Middle Street you will be able to spot this bright yellow and green building. At first we doesn’t know what’s the purpose of this building however much research we found the name of this building which is called — Objectifs. Objectifs is possibly the birthplace of several ‘moonlighting’ filmmakers and photographers in Singapore. Surprisingly to know that the place provide a chance for people to learn these skills after dark and even on weekends.
While we does not have the chance to visit the place inside yet. It is still a great chance to take some insta worthy photos using the walls and window as backdrop.
Kurasu is hidden in the Waterloo Centre, a Contemporary cafe with a unique co-working space showcasing speciality coffees & coffee-making equipment. They have an elegant minimalist space that captured our hearts. It is such a cosy afternoon to grab a coffee and hang out there for a peaceful mind of thought. They served no food but only coffee and some light cakes and toast. Angela is definitely particular with coffee as she easily has a “caffeine rush” which make her unwell. She preferred something flora, nutty and light. So I found out about Kurasu, they served speciality coffee from Kyoto.
The space is simple and minimalist, with a coffee table to witness the hand pour process, and several sofa seats for a cozy and homely feel.
Angela ordered their signature hand drip. I have ordered one of their popular cups – Matcha Latte Espresso ($7.50, same price for hot and iced) otherwise known as “Dirty Matcha” which is a combination of sweet matcha and latte – so there is a good balance of both. We also order a Red Bean Toast which is a good option to eat with the coffee.
Kurasu seem to aim to be a place where people drink, buy and talk about coffee, and which we believe that this hidden gem.
Karusu Address: 261 Waterloo Street #01-24 Opening Hours: 8.30 am – 5.30 pm
Red Brick Building
Who loves red brick like me? Heading down to Prinsep Street you will spot this church Prinsep Street Presbyterian Church. The retro red building gave me an England feels. Who will say no to a photogenic wall?!
Prinsep Street Presbyterian Church Address: 77 Prinsep Street
A recent revist
Last year was a tough year, while we thought this year will be smoother, we can anticipate a little more. Sadly, what welcome us were multiple hiccups, from Angela’s being hospitalised to a couple of lockdowns during our unoccupied schedule. Many things we look forward to doing, we have to cancel it one after another. The first half of the year has been interrupted with multiple unplanned popups but we remained positive. From August to early September, we thought that things get better and we could resume our daily life and enjoy some cruise time (we are sorting out the images will share the post soon), planning to participate in some local activities. A piece of harder news come to us without an alarm – our Dad tested covid-positive and 3 days late so for our mom. While we are back to normal for the October but we just hope that it will maintain like this without any hiccups anymore.
Worthly Mention
If you are feeling adventurous, Chijmes is one of the places we love to visit around Bras Brasah. Some of the best mention are Glasshouse and Havala. While their are so many food choices at Chijmes these two places is one that we will visit again and again.
With an adventuring heart, we’re hoping to explore more places locally but in the midst of all, we also decide to stay in more for safety reasons.
Going all white for your house is a bold and challenging decision to make. The negative reaction we gave the most often about these homes is, “These people/this home has no soul, no character, and no personality.” For some, it may feel that way, but it’s very important to acknowledge and accept that not all people define “soul and character” in the same way. Is it everyone’s cup of tea? Nope.
An all-white room does not inherently equal less personality and character. Just in the same way having a “maximalist” home with lots of color and accessories doesn’t automatically equal a fascinating personality or style. They’re just different choices and the people (and stories) behind them are what usually reveal a space’s real personality and intention.
We promised that you fell in love with this Soy and Scallion Tofu bowl instantly. If you are a vegan or decide to have a meatless Monday (just like Angela), this recipe shows you how to make tofu taste like teriyaki meat without a fuss. You can enjoy the juiciest, well-seasoned bowl without worrying about your plant-based meal taste like grass.
While we’ve enjoyed tofu all the time, recently we’d rarely made any tofu dishes at home except, exclusively, from putting them into soup or making them into dumplings. Motivated by bon appetit we did this Soy and Scallion Tofu Bowl for our lunch where Angela insist to have a meatless meal on that particular day. We replace the ground meat with tofu and seasoned with sake, mirin, and soy sauce. This is the most simple way to replica the “teriyaki sauce”.
Everyone has an opinion on tofu, and here’s ours: we love it… when it’s prepared the right way. If you’ve never worked with it before, cooking tofu can be daunting. But once you learn a little about it, it couldn’t be easier to prepare tofu well!
Why tofu?
Tofu is a soy-based food that’s made from curdling soy milk and forming it into a solid block. It’s a good source of plant-based protein that can be used in all sorts of ways. It’s a great addition to vegetarian and vegan diets, but even if you’re a meat-eater, we urge you to try it. In these tofu recipes, you can treat it as a meat substitute, but rather we treat it as something unique and delicious in its own right!
What kind of tofu should you use?
Here comes the lead of the dish, Tofu! There are four types of tofu, and choosing the right kind is important. In grocery stores, it ranges from silken to firm and extra-firm. Soft silken tofu would be my choice for blending into desserts or slicing into miso soup, but if you’re serving it as a main dish or topping it onto bowls, extra-firm is what you’ll need. It has a heartier, denser texture and less water content than other types of tofu, which worked out perfectly.
How to deal with Tofu?
Although it is extra-firm tofu there is still much water contain. To remove excess water, let the tofu sit 20 to 30 minutes to let the water drain from it. However, we prefer to treat our tofu with the below steps.
Transfer the tofu directly onto the serving plate from the package instead of putting it first on a cutting board, when using silken tofu in a cold dish. Sliced tofu will be easily smashed and is very difficult to transfer it once sliced.
Use a knife to cut the edges of the tofu to separate it from the plastic pack first. Then, you only need to quickly flip the package and the tofu will land on the plate in one piece.
Wrap the tofu with paper towel, with heavy object lying on top.
Let the tofu sit 20 to 30 minutes, to let the water drain from it, and you will have a much drier tofu.
Soy and Scallion Tofu
The crispy-crumbly texture and the juicy, savoury flavours of this simple tofu stir-fry are oh-so-lovable. Scooped over a pillowy bowl of steaming white rice, it’s a new (to us) kind of comfort food and we are all about it. Here’s how easy thisSoy and Scallion Tofu Bowl is to make:
Heat a skillet over medium-high heat.
Add the garlic and sesame seed, sauté until the garlic is browned.
Add the tofu, cook and toss the tofu occasionaly. Using the spaulat break the tofu into smaller pieces. Cook until the tofu is slighly browned.
Add in the scillion and seasoning, cook until the liquid is almost evaporated. Serve on top of the rice!
A few words about the ingredients. This dish uses very minimal seasoning so that everything stands out. You need to use fresh scallion and good soy sauce to make this dish works. Tofu is so fantastic for a meatless and carb-conscious dinner, and this was so delicious! We can see there will be a lot more tofu dishes in the future.
1 tbsp. toasted sesame seeds, plus more for serving
1 tsp. Aleppo-style pepper or ½ tsp. crushed red pepper flakes, plus more for serving
3 scallions, chopped into 1″ pieces
3 tbsp. soy sauce
2 tbsp. mirin (sweet Japanese rice wine) or 1 Tbsp. pure maple syrup
2 tbsp. unsalted butter (*optional if you are vegan)
Cooked white rice (for serving)
Methods
Heat oil and garlic in a large nonstick skillet over medium. Cook, turning once, until garlic is golden, about 3 minutes. Add 1 tbsp. sesame seeds and 1 tsp. Aleppo-style pepper and cook, stirring, until fragrant, about 30 seconds. Add tofu, increase heat to medium-high, and cook, tossing occasionally and breaking tofu apart with a wooden spoon, until it begins to crisp in spots, about 5 minutes. Stir in scallions, soy sauce, mirin, and butter and cook until liquid is almost completely evaporated about 3 minutes.
Divide rice among shallow bowls and spoon tofu mixture over; top with more sesame seeds and Aleppo-style pepper.
Passionfruit Kombucha is one of our favourites kombucha to date, hence we have a long discussion if we want to share this post as we have too little imagery to share. Therefore bare with us, and this post might be wordy.
This 2-ingredients drink is not only tasty but also good for you! If you or your companion are an athlete or trying to keep a balance that night then this drink will be a great part of your special meal. In that meal something that’s oftentimes overlooked is the drink. This Passionfruit with Kombucha drink is a showstopper all on its own with it being so flavorful and beautiful to present. It pairs quite well though with a meal or even just dessert, too.
Flavoring homemade kombucha is such a fun yet suspenseful adventure. Because you can never be sure exactly how the flavors will transform over the fermentation process, and you have to wait a few days to find out!
You can go crazy with it or keep it simple with pureed fruit. This Passionfruit Kombucha are on the simple side and is one of out favourite kombucha flavours!
There are two main fermentation phases when making homemade kombucha:
First Fermentation: This is when you transform sweet tea into tart and delicious kombucha (see our comprehensive guide to homemade kombucha here)
Second Fermentation: This is when you carbonate the kombucha by adding sugars (like passionfruit!) and bottling it.
In order to make this Passionfruit Kombucha, you will need to have completed the first fermentation already and have some kombucha that’s ready to be carbonated!
Passionfruit: You can use fresh or frozen passion fruits to make kombucha!
How long can I keep it?
The acidity of the kombucha will prevent the fruit from going bad! After you’ve carbonated your kombucha, store it in the fridge until ready to drink (it should last a few weeks).
Looking for a fresh flavor to try out on your homemade kombucha? This Passionfruit Kombucha recipe is easy to brew and makes for a perfect balance between sweet and tart! Happy drinking!
When the winter blahs set in and you’re dreaming of fresh greens from your summer garden, consider growing indoors. Not only do plants cleanse your household air (read about Greens That Clean) and improve the aesthetics of any indoor space, they can provide your family with a wealth of yummy, organic foods.
City dwellers, or those without a good gardening spot in the yard, may find growing indoors especially useful. Plants don’t need to take up much space — a windowsill is fine if that’s all you have. For others, the indoor garden may become starter plants for an outdoor garden come spring.
While we have a balcony of plants but zero across the other rooms as it attracts many insects, do you think we shall make a try and grow some indoor plant?
We love that this recipe doesn’t require many ingredients yet it still yields amazingly flavorful end results, and it is all thanks to that bright lemon and creamy butter. With this recipe you get perfectly tender, golden brown baked chicken breasts that are coated in that quick lemon pan sauce.
Lemon Garlic Butter Chicken Thighs Recipe with Green Beans – So addicting! This paleo, low carb, keto-friendly chicken thighs recipe is a snap to fix and cook. You can cook the chicken thighs and green beans in one skillet for easy prep and the flavour combination is spot on or bake the chicken in the oven like us. With only 25 minutes of total work, this nourishing chicken meal makes weeknight dinners a breeze.
Baked vsPan-seared Chicken
First, you’re going to bake your marinated chicken on an ovenproof pan.Once you get you. chicken nice, crispy and golden, you’re going to add all the flavours to themin a cast-iron skillet. Butter, garlic, lemon juice, and fresh parsley (or your herbs of preference) to seal the deal.
Lastly, after finishing the chicken off on the cast, add your asparagus spears and allow them to cook to your liking. We like my crisp-tender and put them in during the last 10 minutes of searing time. If you like them softer, add them in during the last 15 minutes.
If you don’t have a cast iron, you can always place the chicken directly into a baking dish and skip the searing part. It’s completely up to you.
How to make Lemon Butter Sauce?
We’ll start by heating the lemon juice, garlic, red pepper flakes, and seasoning in a small saucepan. Reduce the lemon juice until you’ve got roughly three tablespoons remaining, this shouldn’t take more than 1-2 minutes. Then, slowly add the butter a little bit at a time, swirling the saucepan to help the butter melt. I like to do this while the chicken is browning, it doesn’t take more than 5 minutes!
Tips for the Chicken Thigh recipie
Remove chicken thighs from the refrigerator about 15 minutes before cooking to bring them close to room temperature.
We use boneless chicken thighs because they cook quicker than bone-in. Plus, it is easier to rub the spice mixture deep into the chicken meat.
Season chicken thighs just before cooking to prevent drawing out moisture and drying out the meat. If you want to let it sit longer, omit the salt from the spice mixture, and add it 10 minutes before cooking.
For a variant of this chicken thighs recipe, you can use chicken tenders instead of chicken thighs. They’re delicious and cook faster! Just keep an eye on it so they don’t overcook and dry up.
These chicken thighs carry quite a bit of punch with that fresh, zingy lemon flavour and that smoky goodness from the paprika. And this cream sauce is absolutely heavenly. Just be sure to have a spoon ready because you’ll want to sip on it straight from the pan!
3 tablespoons butter, divided or (ghee for paleo diet)
4 garlic cloves, minced
1 teaspoon paprika
1 teaspoon onion powder
1/4 teaspoon salt and fresh cracked black pepper
Juice of 1/2 lemon + lemon slices, for garnish
1/2 cup (125ml) chicken stock
1 tablespoon hot sauce (we used Sriracha)
1/4 teaspoon crushed red chilli pepper flakes, optional
1/2 cup fresh chopped parsley
Methods
To make the lemon garlic butter chicken thighs recipe with green beans: In a small bowl, combine onion powder, paprika, salt, and pepper. Season chicken thighs generously with the spice mixture. Set aside while you prepare green beans.
Cook the green beans in a boiling pot of water for 3-5 minutes, until almost done but still crisp.
Lay the seasoned chicken thighs in one layer in the oven-proof pan with butter. Bake for 10-12 minutes then flip and bake another 10 -12 minutes, until cooked through and a cooking thermometer displays 165°F (75°C). Adjust timing depending on the thickness. Transfer chicken to a plate and set aside.
In a cast-iron pan, lower the heat and melt the remaining tablespoon of butter. Add chopped parsley, garlic, hot sauce, red crushed chilli pepper flakes, and pre-cooked green beans and cook for 4 to 5 minutes, stirring regularly, until cooked to your liking. Add lemon juice and chicken stock and reduce the sauce for a couple of minutes, until slightly thickened.
Add cooked chicken thighs back to the pan and reheat quickly. Adjust seasoning with pepper and serve the lemon garlic butter chicken thighs immediately, garnished with more crushed chilli pepper, fresh parsley, and a slice of lemon if you like. Enjoy!
We are incapable of passing one without stopping for a bite. Decided to head out for a walk on one of our off-day from work, and we decided to join the crowds to try the long waited for Eggslut for an early lunch aka brunch. We head there at 10 am to miss the crowd but guess there is someone that head there even earlier than us. Never have the chance to visit Los Angeles but we do get to enjoy one of the hottest sandwiches in town. While the queue is filling up fast, it took us a while to head in. They open at 8 am thus you may try your luck down for a shorter wait.
Everything here is about eggs, hence the name Eggslut. The signature dish here is the Fairfax Sandwich with cage-free soft scrambled eggs, chives, caramelised onions, cheddar cheese and sriracha mayonnaise in a warm brioche bun. Noteworthy mention for the brioche bun which is specially imported from South Korea.
While waiting we study on which sandwich shall we have for our first try and we ended up with Fairfax Sandwich ($12), Cheeseburger Single ($13.5) and Slut ($11) for our very first try. Especially the description of their signature dish– The Slut caught our eyes that we didn’t want to miss it: A coddled egg on top of potato puree with grey sea salt and chives.
A well-coddled egg is a beautiful thing, and when the server said, “This will take a while; we coddle them to order,” We were hooked. As anyone would be. This is a perfect way to start the day – a tender egg, held together with no more than a wish, on top of buttery pureed potatoes. The crunch of salt, the snappy bite of chives. Heaven in a spoon. And so rich it made both of us deliriously happy for the rest of the day.
The Fairfax Sandwich is definitely my favourite here too, and order this if you only have space for one. We like the soft egg texture which is buttery enough for my liking.
It’s a pity that we didn’t get to choose the seat we preferred as we are allocated one due to the crowd management, but it is an amazing experience. It feels like an early morning at LA/ Melbourne cafe, with buzzing people. It is also a disappointment that the wait for seats and food took longer than we expected. Well, it’s never bored with my sister around, it is also a great time to slow down the mind while waiting.
We definitely want to head back to try all the other burgers. Let’s hope for a shorter queue or more batches!
Eggslut Address: Scotts Square – 6 Scotts Road #01-12 Opening Hours: 8 am to 10 pm
Travelling is one of our favourite activities, where many go shopping and food during their trip, one of our favourite tasks is to look for places that have good exterior and interior. Using this inspiration we found around the world we may use it for our house. While we couldn’t travel now, we look for inspiration online and came across this home in Mumbai.
Relaxed and natural are the first words that come to mind as one steps into this apartment in South Mumbai designed by Deepshikha Jaiswal Raut, principal architect of The Drawing Studio. The next two perceptions that follow could be considered descriptions that might be in slight contradiction of each other: for the apartment is as rustic as it is refined. And then there is the biggest draw of the room—the home owner’s much-loved collection of plants that include a variety of palms, nasturtiums, dracaenas, and aglaonemas. Clustered around corners and on top of tables, bringing in myriad shades of green, they thrive so well that some of them even touch the ceiling.
In a few days time, it will be Mid-Autumn Moon Festival, which to us means mooncakes! For most of our life, when we thought of mooncake, we pictured a heavy, rich pastry filled with red bean or lotus seed paste and maybe a salted egg yolk inside. They’re good, but you can only eat a couple of bites before it gets to be too much. Then we discovered Taiwan’s version: light, flaky layers of pastry wrapped around sweetened taro root paste. Not only are they delicious, but they’re also really gorgeous!
Last year we did a try on this mooncake at theMid-Autumn Moon Festival itself, it totally failed as we did it in rush. Some of the recipes use lard, shortening in the dough and/or taro paste but we use unsalted butter. Note: This took way longer than we thought it would take to make. We made the taro paste the day before, and it still took me over 3 hours to make the mooncakes the day of.
How to make homemade taro/yam paste?
These smooth and creamy homemade taro paste using the taro roots with just the right amount of sweetness. The taro paste is suitable as a filling for mooncakes, Asian pastries, steamed buns, cakes, and other desserts.
You can get the whole root for both taro and purple sweet potato at the wet market. You can replace the purple sweet potato with all taro as it is only used to add some colour to the filling. However, you can also get the taro root that has been peeled from the store. If you get the whole root, wear gloves and peel the skin (As taro may cause itchiness on the skin) and weigh to get 350 and 200 grams respectively. Cut into thick slices and then steam 15 minutes over high heat or until you can easily mash with a fork.
Ps:We got the sweet potato powder/ flour at The Source where we are able to measure the ingredients you need. You can replace the sweet potato powder with matcha powder, blue pea water or colouring.
Mash the taro together with the sugar while they are still warm. You can also use an immersion blender or blender to make it really smooth. Transfer to a non-stick pan. Add butter/oil and cook over low heat. It may seem very oily at first. Keep stirring until the oil is all absorbed by the taro and no longer sticky to the pan, may take about 15-20 minutes.
How to store it? Transfer to a plate and let it cools down completely. You can portion it out, and wrap it in cling wrap and put it inside a freezer bag. Simply thaw overnight in the fridge and it’s ready to be used in the recipe.
Preparing the Dough
For this mooncake, you are required to make two kinds of dough, Water Dough (the white layer) and Oil Dough (the purple layer).
Water dough: Using a mixer, mix flour with caster sugar then add in the butter and mix it in mid-speed. It will feel crumbly, resembling bread crumbs. Gradually add the water and continue to mix and knead athigh speed knead the dough for 25-30 minutes oruntil you form a non-sticky dough. Cover and let it rest for 15 minutes.
Oil dough: In a large mixing bowl, mix flour and sweet potato powder.Rub the shortening into the flour mixture and form a dough. Cover and let the dough rest for 15 minutes.
Assembling the Mooncake
Divide the water dough and oil dough each into 8 equal portions. Keeping the rest covered, take one oil dough and one water dough. Flatten the water dough and place one oil dough in the middle. Wrap the water dough around the oil dough. So the oil dough is nested inside the water dough now. Repeat with the rest of the doughs. Rest it for 15 minutes.
First Roll: Use a rolling pin to roll the dough into a flat oval shape. Roll it up tightly starting from the bottom like a Swiss roll.Repeat with the rest of the doughs. Rest it for 15 minutes.
Second Roll: Turn the dough vertical and roll it out again. Now you have a long flat strip of dough. Roll it as thin as you can as it will give you more spiral in the finished products later. Roll it up tightly again starting from the bottom into a Swiss roll. Cut it into half. Work with one at a time, flip the cut side down and use a rolling pin to roll it out into a circle, about 7-inch in width.
Wrap it all up: Place the filling in the middle. Gather the sides to wrap the filling. Pinch to seal at the bottom. When you flip it over, this is how it looks like. Place them on a baking sheet lined with parchment paper.
How to store the leftover mooncake?
Let them cool down completely on a cooling rack. If you plan to eat them the next day or two, keep them in a paper bag. Push all the air out and fold over. The paper bag can help to retain the crispiness and flakiness at least for a day or two.
For longer storage, store the whole paper bag inside a freezer bag. Push all the air out and seal the bag. They can be kept for up to 3 months in the freezer. Thaw them at room temperature and then reheat briefly in the oven or an air-fryer at 200 C for 8-10 minutes or until crisp again.
We are devastated thisMid-Autumn Moon Festival, a festival we enjoy together with the family. While we are under a quarantine order, prayers all sending to our parents wishing for their speedy recovery. May everyone, have a wonderfulMid-Autumn Moon Festival!
Combine together flour, sugar, butter and gradually add water. Stir and knead until the dough comes together.
In a stand-mix, high speed knead the dough for 25-30 minutes. The dough can be stretched to a thin sheet. If no stand mix, just knead the dough until smooth or could be stretched to a thin sheet.
Wrap with plastic wrap and set aside for 30 minutes. (It is important to rest the dough for 30 mins to make it more stretchable later)
Matcha Dough
Mix together Sweet Potato powder with butter respectively. If the dough comes too dry, add about 5g more butter. The dough should come relatively oil and wet when finishing.
Cover with plastic wrap and set aside
Filling
Make filling to a ball shape of about 22-25g per piece, a total of 16 pieces.
To Assemble
Divide white dough evenly into 8 pieces. Divide matcha dough evenly into 8 pieces
Use palm to press one white dough into a round shape and wrap one matcha dough into it. Seal completely. Cover with a plastic bag to set aside for 15 minutes.
We are so excited to share this post – making your own Kombucha Scoby. Oh yeah! We have prepared this post for the longest time as we need to experience and try on it ourselves before sharing our thoughts and actual experience on it! We’ve been addicted to kombucha from the first sip. It wasn’t really the probiotics or other health promises that did it for us — although we’ll take those, too! It was the way it tasted: like tart green apple mixed with sour stone fruits, but with an underlying sweetness that keeps it all together. And fizzy! We couldn’t believe that something this delicious could actually be made from tea, of all things. Or that we could make it at home with a few very basic ingredients.
We will not lie to you that it’s easy as it required your time and patience. Initially, we didn’t expect we have but when we shared this post, it’s the 3rd batch of the Kombucha Scoby making. We try on the various recipes online but it didn’t work on our first batch but we go with our guts and give it a tweak and here is our getaway to share with you folks. This guide will be served the best result in Asian weather conditions – since Singapore are a typical tropical climate.
What is Kombucha Scoby?
“Scoby” is actually an acronym: Symbiotic Culture Of Bacteria and Yeast. Eww… like it sounds. A Scoby is the living home for the bacteria and yeast that transform sweet tea into tangy, fizzy kombucha — think of the Scoby as the coral reef of the bacteria and yeast world. It is a rubbery raft that floats on the surface of the kombucha. Aside from being a home for yeast and good bacteria, the Scoby seals off the fermenting kombucha from the air and protects it from outside, undesirable bacterias while it’s fermenting.
There’s really no arguing that it’s ugly and it looks kind of alien-looking. And yeah, even downright gross. But dang it! Scobys make some delicious kombucha! If you want to save a few bucks on your ‘booch habit, there’s just no getting around it. You’re going to need a Scoby.
You can get a slice of Scoby from a kombucha-brewing friend, or you can order a fresh one online. But there’s one more option: you can grow your own from scratch.
What tea leaves to use?
Use pure black, green, white, or oolong tea for brewing kombucha. You’ll get the cleanest flavour and the most impact from the nutrients from the leaves of the Camellia sinensis plant. You can even blend different tea leaves together to create different flavour profiles. Avoid using scented or flavoured teas; the chemical compounds used in the flavouring process could have a negative effect on the growth of your kombucha culture.
Don’t try to use herbs like peppermint or chamomile as your brewed tea base. Herbs won’t be able to provide the nutrients necessary to feed your kombucha culture. Herbs may also introduce naturals oils, which can interfere with the Scoby’s ability to absorb oxygen, or antibacterial properties, which can harm the bacteria component of the Scoby.
What’s a starter tea?
“Kombucha Starter Tea” is raw, healthy, aged kombucha that contains the living bacteria and yeast needed to brew kombucha. This liquid kombucha culture is usually taken from a previous batch of kombucha and is then used to kick start a new batch of kombucha, hence the name starter tea. We using the Original Raw Kombucha by Synergy.
We make it easy for you to follow through the visual, just follow the step.
How to grow your own Scoby?
You have to start by making sweet tea, which is a combination of water, sugar and your choice of tea. Allow the steep tea cools to room temperature before the next step. After cooling all you need to do is to combine the sweet tea and kombucha in a jar. You have to make sure to have your jar sterilise well and cool down before use.
Cover and store for 1 to 4 weeks with a few layers of tightly woven cloth, coffee filters, or paper towels secured with a rubber band.We use cheesecloth initially which is not ideal because it’s easy for small insects, like fruit flies, to wiggle through the layers.
Store the jar somewhere at average room temperature, out of direct sunlight, and where it won’t get jostled. Sunlight can prevent the kombucha from fermenting and the Scoby from forming, so wrap the jar in a cloth if you can’t keep it away from sunlight.
How does the finished Scoby look like? Your finished Scoby might look a little nubbly, rough, patchy, or otherwise “not quite like a grown-up Scoby.” It’s ok! Your Scoby will start to smooth out and take on a uniform colour over the course of a few batches of kombucha.
Take note of the food safety
Because this is home fermentation, you’ll want to take extra care to ensure all of your containers and tools are sterilized. we recommend immersing your jars and bottles in boiling water for a few minutes to eliminate undesirable pathogens from sneaking their way into your brew. Wash your hands well and keep your jar in a place where it won’t be disturbed, far away from activity and potentially germy situations.
Pay close attention to how your Scoby looks—but only after the first week. It will look quite funky at the beginning with patchy white snowflake shapes, so avoid spending time in the first few days agonizing over whether you’re breeding a Scoby or mould. But if you begin to see green, black, fuzzy and dry spots, it’s most definitely mould. When that happens, always veer on the safe side: toss the entire batch and start anew.
A growing Scoby will start off looking very stringy—that’s due to the yeast clusters. Over time, it should become a floating layer of milky, semi-opaque jelly that covers the surface of your tea mixture and conforms to the shape of your container. Use all of your senses to check in on the health of your Scoby it should smell sweet and vinegary, it should look smooth and glossy after it’s fully developed, and it should feel resilient and flexible, not brittle. The newly formed Scobys will be whiter in colour while older Scobys will be darker and browner.
4 bags black tea, or 1 tablespoon looseleaf (see Recipe Note)
1 cup unflavored, unpasteurized store-bought kombucha
Methods
Make the sweet tea. Bring the water to a boil. Remove the pan from heat and stir in the sugar until it is completely dissolved. Add the tea and allow it to steep until the tea cools to room temperature. Remove and discard the tea. (Alternatively, boil half the amount of water, dissolve the sugar and steep the tea, then add the remaining water to cool the tea more rapidly.)
Combine the sweet tea and kombucha in a jar. Pour the sweet tea into the jar. Pour the kombucha on top — if you see a blobby “baby Scoby” in the bottom of your jar of commercial kombucha, make sure this gets transferred. (But if you don’t see one, don’t worry! Your Scoby will still form.) Stir to combine.
Cover and store for 1 to 4 weeks. Cover the mouth of the jar with a few layers of tightly woven cloth, coffee filters, or paper towels secured with a rubber band. (If you develop problems with gnats or fruit flies, use a tightly woven cloth or paper towels, which will do a better job keeping the insects out of your brew.) Place the jar somewhere at average room temperature (70°F), out of direct sunlight, and where it won’t get jostled. Sunlight can prevent the kombucha from fermenting and the Scoby from forming, so wrap the jar in a cloth if you can’t keep it away from sunlight.
First, bubbles will gather on the surface. For the first few days, nothing will happen. Then you’ll start to see groups of tiny bubbles starting to collect on the surface.
Then, the bubbles will collect into a film. After a few more days, the groups of bubbles will start to connect and form a thin, transparent, jelly-like film across the surface of the tea. You’ll also see bubbles forming around the edges of the film. This is carbon dioxide from the fermenting tea and a sign that everything is healthy and happy!
The film will thicken into a solid, opaque layer. Over the next few days, the layer will continue to thicken and gradually become opaque. When the Scoby is about 1/4-inch thick, it’s ready to be used to make kombucha tea — depending on the temperature and conditions in your kitchen, this might take anywhere from 1 to 4 weeks.
The finished Scoby: Your finished Scoby might look a little nubbly, rough, patchy, or otherwise “not quite like a grown-up Scoby.” It’s ok! Your Scoby will start to smooth out and take on a uniform colour over the course of a few batches of kombucha — take a look a the before and after pictures of a baby and grown-up Mother Scoby in the gallery above.
Using the liquid used to grow the Scoby: The liquid used to grow the Scoby will likely be too strong and vinegary to drink (and if you’re not used to drinking kombucha or very vinegary beverages, it can give you a stomach ache). You can use it to start your first batch of kombucha, or you can use it as a cleaning solution on your counters.
Arches—in varying shapes and sizes—radiate a positive authority in the three-bedroom apartment. The same imperative guided the transformation of the doors, walls, and even reiterated the mirrors in the bathrooms and as art in the living room. The effect is pleasingly sculptural. They try to create an aesthetic imbibed with structural logic. Arch being structurally the most stable form, it brought a degree of calmness to the overall space (as there’s no tension in the way even the load is transferred). This feeling was further enhanced by curved edges to add softness.
The ivory dining table, which sits as a partition between the living room and kitchen, plays the apt accomplice. The chairs are offset with black tones to create depth and match with the ebony flooring and backsplash in the cook room. The overall rustic theme continues —from the muted whites delivered in the marble on the walls, to the woody interpretations of cabinets. The designer pulled a twist of modernity with a sculptural light sourced from Bangalore.
This might be a piece of great news for those who want to have fast and easy Oven-roasted Vegetables that never fail to serve on your dining table. This is the recipe that you want to remember by heart and do not want to miss. You just need 5 staple ingredients in your pantry and you can put a well-seasoned plate of oven-roasted vegetables on your table. We promised, it’s a beautiful and delicious stand-alone or goes with any of your dishes and does not compromise the taste of it.
So are you ready to get started with us? We believed that almost 99% of the human race loves to have garlic as we do. It is the most pleasant ingredient loved by everyone. Garlic grows in many parts of the world and is a popular ingredient in cooking due to its pleasant and delicious taste. It gives a slightly spicy flavor infuses in all the food you are prepping. We almost everything with garlic as it just makes things more delicious. So this ingredient would never go wrong with any other ingredients.
Not until recently that I discover garlic powder as I’m too used to garlic but why we fall in love with powder form is before it helps to marinate and infused your food even quickly and deeper.
The 5 staple ingredients
Oil (flaxseed oil, olive oil or any other selection)
Salt
Pepper
Garlic Powder
Chili Flakes (Optional)
What kind for oven-roast, any veggies?
These days whenever we cook we love to have a tray of roasted veggies as our side on the table. You can roast just about any vegetable but if you really need to ask, what kind of vegetables are best for roasting, personally we preferred to go with Crunchy and Hard Vegetable. . Just use the same simple method – chop (things such as green beans and asparagus just leave whole), drizzle with oil, season, toss and roast. Toss once or twice through baking.
Just keep in mind different vegetables take various amounts of time so we usually like to roast vegetables with the same cook time together (or give more firm root vegetables a head start then add others later on). However, there are times where we a rushing, we will mix all the vegetables in a tray and cook them at a go. A simple tip to undercooked or overcooked some vegetables to chop the easier cooked vegetables into bigger pieces and the longer times smaller pieces.
Cauliflower – 25 minutes
Celery – 25 minutes
Sweet Corn (cobs left whole with husks) – 40 minutes
Eggplant – 20 minutes
Head Lettuce – 15 minutes
Pumkins – 30 minutes
Potato – 30 minutes
Sweet Potato – 30 minutes
Carrots – 30 minutes
Onion – 15 minutes
Brussels Sprouts – 30 minutes
Broccoli (don’t forget the Brocollini) – 30 minutes
Peas and Beans (like chickpeas) – 20 minutes
Zucchini – 25 minutes
A swap for a happy planet, never been so happier with my Flexitarian Diet and I’ve lost 8kg.
Back in July, I shared my resolution on becoming a flexitarian, ever since I have been eating happier and felt my body getting stronger never better than before. It has been almost 20 weeks now, meal planning has infused into my everyday life without knowing but busy days could catch me off my grid, there is where I fall in love with oven-roast vegetables. What best about that, not a day the menu is repeated and I could enjoy freshly roasted seasonal vegetables as my main or as a side based on my preferences.
I chose to be flexitarian for many reasons and not compromised my old life, this allows me to appreciate my meal more and avoid sudden changes in my lifestyle. A vegan diet is in most cases better for the environment than a flexitarian diet when you consider all the factors that affect the mother earth. However, I still want to contribute to the environment through what I eat. Fear not about changing your way of eating, here are some tips for you to swap your meals to plant-based.
Start small – like me if you’re used to eating meat every day of the week, why not start with a meat-free Monday?
Change your mindset – rather than thinking of it as limiting your diet, start thinking about how you can incorporate lots of new foods and ingredients into your diets, such as soy protein, grains, lentils, and many others…
Make meat the side – Switch your meals around so that meat isn’t at the center. That way you won’t notice if there is less of it. Each week I will cater 20% of the meals on my meals unlike in the past. This allows me to appreciate the meat whenever I have it.
Make simple swaps for more meat-free meals – use halloumi instead of bacon, a marinated tofu, and tempeh instead of a beef burger, or beans and peppers instead of mince in chili, you’ll soon learn just how versatile vegetables and pulses can be.
Having vegan meals is so much more than just salad in your meals!
We share what we love and as much as we love vegan meals, our blog is a mixture of healthier and flavourful tastes. Gonna head to bake another tray of vegetables for our lunch. Try it with us.
In our previous post, we have shared with you a little preview tour of our garden. Many of you direct message us and want to know more about how we started it, thus here you go. We are no expert in planting thus we will only share with you our experience during our process.
Growing plants from seed is a great way to start gardening earlier in the season. With the right light and some simple equipment, it’s easy to grow from seed to harvest. Because each plant has unique seed-starting requirements, it helps to start small by growing just a few varieties. Some seeds — such as tomatoes and camomiles— are especially easy to start indoors. Other good choices for beginners are basil, mint, parsley, and our favourite coriander. If you’re a beginner, choose those first, and then move on to more fussy seeds, such as watermelon or even strawberries.
Find the right equipment
This is not the first time we tried germinating seeds, it is either we are under-watering them or we over-watering them and drown them. We came to a long pause as we are discouraged by the result before Joe came through this YouTuber’s Hamimommy on tips for growing edible plants indoors using a self-watering system where it highly encourages her to start her planting journey again. Get the right container During germinating, the seeds are very sensitive to the among of water intake, thus this self-watering system using recycled water bottles. You could also purchase self-watering pot online however it does cost an amount. You want to make sure the soil stays consistently damp but not soaking wet.
However, when the plant is getting bigger you may start needing a bigger pot or de-pot the seedling individually to an individual self-watering pot. Moreover, we also used biodegradable peat pots when we have more experience on know how much water the seeds need. One advantage is that you can pot time right into the soil when they grew up without de-potting them.
Get the right soil Choose potting soil that’s made for growing seedlings. Do not use soil from your garden or re-use potting soil from your houseplants. Start with a fresh, sterile mix that will ensure healthy, disease-free seedlings.
Start planting Check the seed packet to see how deep you should plant your seeds. Some of the small ones can be sprinkled right on the soil surface. Larger seeds will need to be buried. During the initial stage, we spread the seedling in the soil without gaps where it is a bad idea, as it will be tough when you want to de-pot them. Spread the seeds evenly with gaps between them.
Taking care of them
As the seedlings grow, use a mister or a small watering can to keep the soil moist but not soggy. Let the soil dry slightly between waterings. Remember to feed the seedlings regularly with liquid fertilizer, mixed at the rate recommended on the package. However do not over fertilizer them, it will result in the stem and roots getting soften and die which is what happens to us.
Something that we didn’t realize at first and was reminded by our mom was that seedlings need a lot of light. If you’re growing in a window, choose a south-facing exposure. Rotate the pots regularly to keep plants from leaning into the light. If seedlings don’t get enough light, they will be leggy and weak. If you’re growing under lights, adjust them so they’re just a few inches above the tops of the seedlings. Set the lights on a timer for 15 hours a day. Keep in mind that seedlings need darkness, too, so they can rest. As the seedlings grow taller, raise the lights.
The Growth of Tomato
It has been nearly two months since we started planting, and so far the tomato is the only plant that is doing well compared to ours like basil leaves, mint, and parsley. During these two months, one of the tips we have experience and want to share with you was that the bigger the plant grows the bigger pot you may needs. Believe in the power in nature too! As we are blessed to have a big balcony in our home, during our 4 days trip on a cruise, the rain and sun do the job for us and they did a better job. It grows 2 times taller in just 4 days.
There is still a long way before we can start harvesting in our garden, many may ask why plant them when it is easier to purchase them in the market? While many can get their food in the market but not many can plant their own food. Planting our own food also teaches us the toughness of how food is formed and making us want to appreciate the food we have more. Can’t wait to share with you our edible garden again.
In design circles, there are a few things that might be considered “Instagram famous” — certain plants, to be sure; Luis Barragán interiors; Ricardo Bofill exteriors; the Atelier Brancusi replica at the Centre Pompidou; anthuriums. This Mads Caprani lamp — a ’70s-era Danish creation that mixes a curved bentwood spine with a cast-iron base and a creamy fluted shade — plays on the current mania for pleated lampshades.
The Mads Caprani lamp was a thumb stopper. I’d seen plenty of mid-century wood floor lamps with linen lampshades, but none like this. The curved wooden spine, for one. The hanging pleated lampshade, shaped like little paper cocktail umbrellas. It was delicate and organic but balanced by the cast iron horseshoe base. The lamp was made in the 60s or 70s but somehow didn’t look dated. And I could see it still looking fresh decades down the line.